Showing posts with label DISTRESSED TECHNIQUE. INKING TECHNIQUE. Show all posts

Sunday, April 3, 2016

LADIES NIGHT BLOG AND CHALLENGE

Welcome to my Scrap Hut!

My name is Agnes aka flowerdisco and I am of the designers for Cut Cardstock. We offer some serious premium high-quality cardstock among other items.
 We have paired up with Great Impressions, who has some of the cutest rubber stamps and we are inviting you to join us for this fun and feminine
"Ladies Night Blog Hop".
We hope you have a good time hopping with us.

PLEASE MAKE SURE, you check Great Impressions with instructions on how to participate and link.

Parlez-vous français?
(:D) 
I don't but would love to.
Anyway, I won't bore you much with details because you still have one more hop to do but I do want to say most images are from Great Impressions and all cardstock is from Cut Cardstock.

This is "Birthday Diva". She is getting ready for her night out. :)
She is the picture perfect for the hop, don't you think?
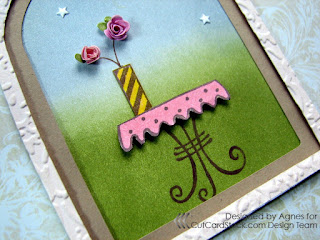
Next, it is the "Tea for Two". She will be dining here, "al fresco", later on. :)

The "Glamour Shelf" is where she likes to display some of her french perfumes. 
:)

I am sure she will have a night to remember, :).

Somehow I believe I should write a few sentences about some of the supplies I used. I found the cute cathedral shape in one of my Cricut cartridges. Classic Crest Recycled cardstock and distressed inks were used for the base and scenery. The other two layers were cut on a light brown and a soft pink color cardstocks. I embossed the soft pink cs with a Cuttlebug embossing folder.
The Great Impressions stamp images were stamped with memento ink, fuzzy cut and manipulated to fit. I colored them with alcohol markers. The mini roses and stars were die cut using metal dies. 
I truly enjoyed working with Great Impressions stamps and I truly love our cardstock.

Thank you all for stopping by. I hope you have enjoyed our projects so far.
Next stop is: 
(our Cut Cardstock team leader)

Below are the links for the hop in case you need them.


Cut Cardstock and Great Impressions supplies used:


Blogged by flowerdisco
(copyrighted)

Monday, December 7, 2015

HUGS AND KISSES...because valentine's is almost there

yeap! before we know it we will be celebrating love day.
and here we are ready to entice you, lol

HUGS AND KISSES
4-1/2" x 3-1/2"
this is the style i like the most. 
i love to distress and ink. i love the grungy look. i love intense colors. bright colors. 
rich hues. i feel at home.

card is all handmade. 
cut by hand, stamp by hand, distressed by hand, colored by hand.
no cricut, no dies here.

here is the handwriting font that i love from joy clair. can't get enough of it.

the hugs word, the tiny envelope and the tiny stamp above hugs, the heart to the left they all are from the "hugs and smiles" super pretty stamp set.

i used oldie papers from the lost and found collection that was so popular a few years back. this collection is from my mind's eye. i have a few stacks of it. lol.
i haven't bought new paper in a while. i have tons of it in my stash. when i see something new that i have to have i do buy it, but in the meantime i am forcing myself to use what i have at home. i am pretty sure you are familiar with the hoarding. hehe.

the inside
super cute valentine's day card OR any occasion card.
you choose, lol.


here is the beautiful stamp set. some designers have made gorgeous projects with this one. they used the flowers the most so i did not want to use the flowers too. 
Hugs and Smiles Clear Stamps Hugs and Smiles Digital Dies
they have been linked for your convenience.

thanks so much for stopping by.

REMEMBER: Joy Clair is having a Design Team Call


blogged
by
flowerdisco
from
flowerdiscosscraphut
(copyrighted)

Wednesday, October 21, 2015

INTRODUCTION TO JOY CLAIR CLEAR STAMPS

 i am delighted and honored to have been chosen to join their design team and to work with their beautiful stamps.
their stamps are made here in the usa (georgia).
they are made of a high quality photopolymer, nice and thick, non yellowing, strong deep edges, they adhere so nice to the clear blocks and they take ink very well. 
their designs are unique and so very pretty and the fonts and sentiments are gorgeous.

joy clair has many plans for all of you to enjoy: challenges, videos, discounts and more. sign up to their newsletter and you won't miss any of it.

below is my first project to show off some of their great designs.
hope you enjoy it!

-A Halloween Frame-
by flowerdisco
hehe, let's start with a nice sneak peek.

i used my die cutter machine for the card base, layers and banner and worked
with 3 different stamp sets on this project:


i started stamping each "halloween" letter on a 1" piece of punched paper using different colors of pigment inks and then outlined each letter with a black permanent ink fine tip marker.

as you can see i distressed most of my cardstock too and later on you will see i "dry embossed" the black base.

as i mentioned before the polka dots banner was cut using my die cutter.
 i wrapped a fuzzy and thin green jute around it for an added detail.

the pumpkin and the boo word were stamped with a dye ink. i stamped the pumpkin first, did some fussy cutting around it and then stamped the boo word. i adhered it to the banner with some foam tape for dimension.

the skulls border to the right was stamped before i adhered the halloween letters keeping in mind their placement.


 the border has 4 joined skulls but i just had room for three of them.

 see the dry embossing on the black layer? it is a chevron shape but hard to see, sorry. i used a core-dination cardstock and after sanding it a nice orange color came through.

here is the finished halloween frame.
(i used a steel die to make a chipboard easel for the back to prop it up).

so what do you think of the stamps? really nice, huh?

you can click on the joy clair logo and it will take you the store where you can take a look at the rest of them.

and remember that only good vibes are welcome, the rest are deleted, lol.

see you next time and as always
-thanks for taking the time to visit-


blogged by
flowerdisco
from flowerdiscosscraphut

(all content and worked has been copyrighted)

Tuesday, April 22, 2014

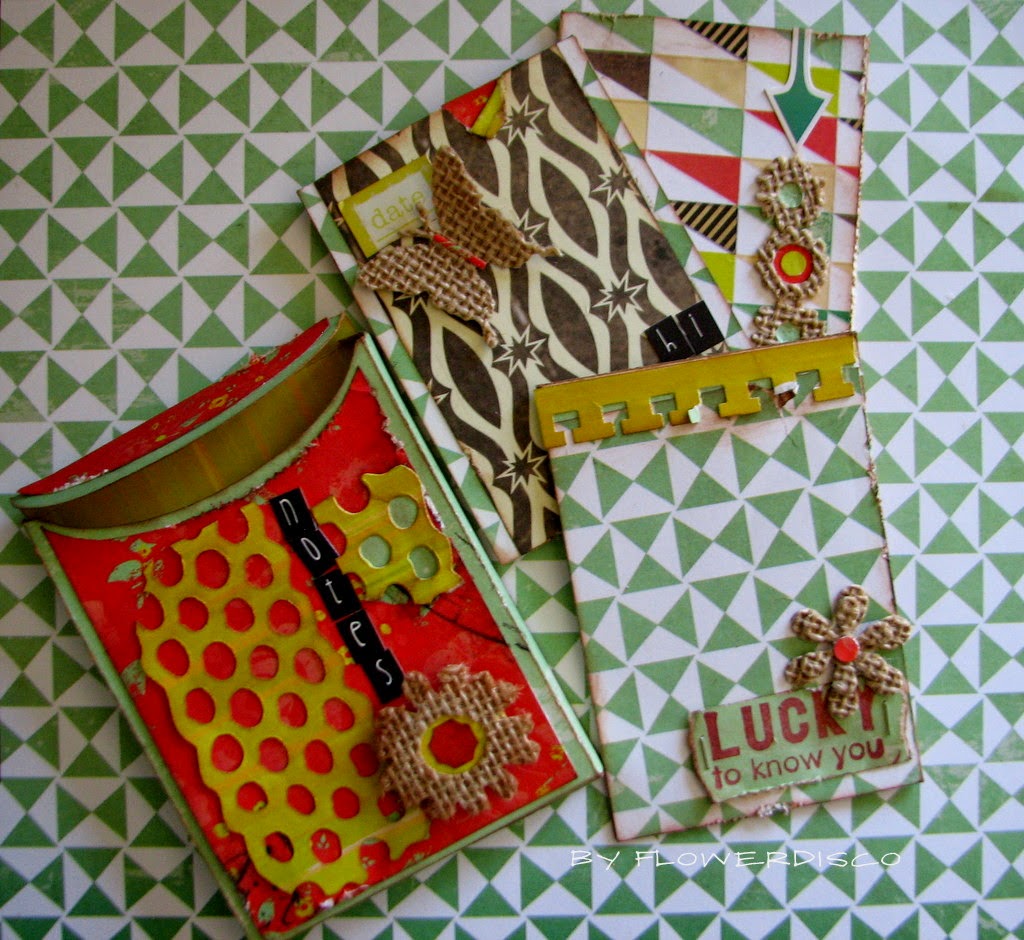
A SET OF NOTE CARDS IN BOX

just for fun and because it was my turn to post at 

i hope you like my card set and box and give you some ideas.

i am using FINLEY from Glitz.
it is a beautiful collection and i love the bright colors of it all.

NOTES
-pic heavy-
using my cricut expression i made cut the box. it is from tags, bags, boxes and more.
it measures 3" wide and 3-7/8" tall. take note the size i used in my cricut was 5.50".

here you can see it when closed.
i used a few supplies from stash but the papers and alpha stickers are from FINLEY. 
the burlap is from dcwv and cuts fine using my cuttlebug.

i made three note cards that go inside and i embellished them but left some space for a handwritten note or small photo. in addition the back has been covered with the same paper,  if needed, for more pics or message.

i used different patterned papers from FINLEY.
i distressed the edges and inked them with brown ink. i added some stickers also from FINLEY: arrow and date.

the lucky to know you was hand stamped using a red rubber stamp from unity.

a side view from the box. 

and here is the complete set.

always happy you stopped by and i hope you all had a great holiday.

just a reminder, if interested: 
we are offering FREE SHIPPING with any order of $50 and up.

have a great week!