Showing posts with label TREAT BOXES. Show all posts

Friday, July 22, 2016

THEY WILL BE TREATED- a set of mini favor boxes for the kids and not

Hello all, 
As I slowly continue to get my family get together tasks done I finally get to share with you the treat boxes I decided to make for the kids to take home afterwards.
I still have to buy the favors but I couldn't wait to share the boxes. They are turning out fabulous if you ask me and I am so happy I used the Gold Glitter cardstock again and was able to try the awesome silver Bright Foil too. They are giving my boxes such an elegant and glamorous touch it's almost a sin giving them to the kids, lol.
They both cut perfectly, I have to add. The phrases and stars were cut very small and I had no problems with either one. The rest of the colored cardstocks I used are a mix of Basis and Pop Tones, also from Cut Cardstock.

I used the Tags, Bags, Boxes and More 2 Cricut cartridge and cut the boxes at 7-3/4" wide and after assembled, they come out to be around 2" squared by 1-1/4" tall, not counting the small handle. Perfect for some small treats for them.
You can also find these boxes in the Cricut Access Digital Library, M3C751 is the ID#. The embellishments are from Life's a Party (out of this world, shooting star) and the Party word is from Cricut Font and Basic Shapes.
The first pic to the left is the Cricut Design Space virtual mat showing the box flat prior to cutting and you will notice how easy they will be to score and assemble. The second pic shows a mark where you need to add the adhesive and the third pic shows after the flap is closed. You can also see the pretty fold it makes on one side of the box.
(The blue permanent runner adhesive tape works very well and the store carries the green version).

A few pics to show some of the embellishments: the out of this World was cut at .81" in high, yeap, that small and look how nice it looks, the Party word was cut at .53" tall, wow! and the shooting star at 1.15".

I also cut the boxes in the gold glitter cardstock and the silver (Bright Foil) cardstock. Did I mention how nice these cut in the cricut? The glitter one I had used in my last project and I knew already how it cuts but not the silver one. Well, it is as great as the glitter one. Loove them both and you will too. The Bright Foil is almost like stainless steel. Awesome finish!
They are both on sale this week, if interested.

This is the end of my monthly projects for Cut Cardstock.
I hope you enjoyed my mini series. You can check part one here (masks).
If any questions arise, please do not hesitate to contact any of us.

Thanks so much for stopping by and I'll see you next month.

blogged by flowerdisco 
(copyrighted)

Note: My apologies for such an almost non-existent tutorial, but life has been a bit hectic at home lately. 


Cut Cardstock Supplies used:
Pop-Tone Discount Card StockGold Glitter Card StockBRIGHT FOIL SILVER

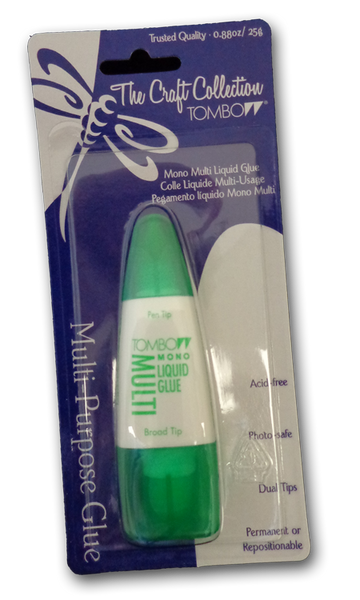
BASIS paper 8.5 x 11 scrapbook glueMono Multi-Purpose Liquid Glue


Wednesday, September 2, 2015

A TRICK OR TREAT SCALLOPED PURSE TREAT HOLDER


for today's digi playground post i chose to make this cute scalloped purse and treat it as a trick or treat candy box. so easy to put together you do not even need glue because it has some nice tabs that you engage for the need of no glue at all, lol. 
cool, huh?

Trick or Treat 
(size around 5 inches in diameter and 2 inches in depth)
 the main ingredient here is the scalloped purse svg. it was designed by miss samantha walker and you can find it
here.
i know i keep saying this but it is really so easy to put together, it will be perfect for a get together kid parent project for halloween, school, birthdays, weddings and the possibilities are almost endless with these type of treat boxes.

anyway, i have to tell you the pretty cardstock is from an oldie dcwv stack. i do not know if you can find it anymore.
the tag is from a paper punch, the sentiment from a g studio clear stamp and the ink from prima.


this collage of pics i made to show some of the process and i know you are wondering about the "back to school" and "owl" pic. hehe.
well, i tell you that was what i had in mind.
i wanted to add them but i cut them too big. they will be saved for a round card tough because i love how they turned out.
i used my explore and design space to print and cut them and that is why i wanted to include them.
i wanted you to see you can print and cut too.
they are both svg files from the digi playground and i linked them for you if interested.

and...did you notice the tabs for a glueless project?
i think is such a nice feature.

this is it for today.
i thank you again for taking the time to visit and i hope you have a great week.
if you have any questions, please, do not hesitate to contact any of us.
we are here to help.

blogged
by
agnes
from
flowerdiscosscraphut

Saturday, August 17, 2013

DESTINATION UNKNOWN...just let me grab my purse

i couldn't help it with the silly tittle for my cute little purse from the cutting cafe, hehe

(you get 5 different styles of purses in this file)

Destination Unknown
(treat box)
they are all so pretty but i chose this one to work with.

once again, i used the pdf document, super easy to cut by hand. i did all the faux stitching with a white gel pen.
i had the metal tag and heart in my stash and i thought it went perfect with my purse.

 -a side view-

and here you have one of the cutest and prettiest treat box purse you can have, :P

i bet my teammates projects are even better. these ladies are so creative and so talented.

any questions about it, please i will be happy to help you.

btw, the patterned paper is from dcwv and the black solid cs is from recollections (same dcwv brand i believe). 

here is all the file info from the shop, if interested.

thank you so much for stopping by the hut, i sure appreciate it.


Sunday, June 23, 2013

LOCALLY GROWN...a strawberry treat box

who does not like strawberries? 
i haven't met one person who does not like them. 
i love them in smoothies, i even put a bit of hershey's chocolate syrup when making them, :P
YUMMY!

this time my strawberries come in a pdf doc from the cutting cafe and this treat box is a darling to work with.

Locally Grown
hehe
not including the handle this box measures approximately 3-1/4 inches high by 6-1/2 (from strawberry to strawberry)---but you can resize it to your liking.
you know i cut by hand, and i am just saying it again because sometimes i have to get creative.
 those tiny seeds are bigger on the file but my hands are bad so i got mine from the negative residues of one of my paper punches, hehe. so, do not let not owing a digi cutter stop you if you like these files. just have to get creative and make with what you have in your stash. wink-------

a pic from above

i attached the handle with some tiny eyelets

see the cute sentiment? i love it....i am all for locally grown, recycling, re-purposing...oh yeah!
i love the pretty flower too. 

there are so many files at the cutting cafe and they are so reasonably priced. you get a lot for your buck there. this is why i am so happy to be in the dt. i get to showcase some of the files and enjoy myself while making them. it has been a great journey so far.

also, you will find tons of inspiration for all kind of projects. 
have fun and thank you for stopping by.

---below is the info about this strawberry treat box file all linked to the cafe---


Sunday, March 31, 2013

A PUMPKIN SPICE BLOG CHALLENGE...using a gable box

where we are challenged to use any

Spring Animals or Insects
 (Use your Imagination)
who can resist sweet spring animals and insects.. even bees and caterpillars are cute, right?! 

cool challenge this one!

Sweet Friend
bee gable box 
the bee will be my insect for this challenge
the bee  is from a cricut cartridge and i used regular cardstock to make it. BUT, i stamped the body and wings for that blotchy look and inked all the edges. i cut her to fit my box at 2.50 inches tall.

 a bit closer and you can see how cute she is. i used foam dots to raise her from the background.

take note i cut the gable box at 5.5 inches tall but it really comes out to be approximately 3.75 inches tall. 
this gable box is from another cricut cartridge. the cartridge gives you the scoring template.

TIP: since i use my gypsy, i put the die cut in one page and the scoring marks on another page making sure they are both at the same coordinates (x and y- on the top right corner of the gypsy screen) and i do the scoring first with the blade upside down. 

here are the supplies used in my project:
gable box patterned paper:     cosmo cricket earth love collection
yellow, mustard color and brown cardstock:   recollection
gold cardstock:     dcwv
cricut cartridges:     tags, bags, boxes and more2 (gable box); kate's abc's (bee)
bee hive:     cutlebug die
tag:    sizzix die
sentiment:     whimsical designs clear stamps

click here to join us!
and,
do not forget to have fun!!!!

thanks so much for stopping by!


  • The winner of each weekly challenge will receive a 'Pumpkin Spice Weekly Challenge Winner' button to display proudly on your blog or Facebook.
  • A shout out in the monthly newsletter with a link to your blog and picture of your project
  • and a chance to win a Surprise worth at least $25 retail.
    •  Every month PumpkinSpice will pick a winner from all the entries, not just the winners.
    •  Random pick will be announced on the 1st blog hop of the month, along with what that winner will be receiving, so be sure to watch for your name.

How do I enter?  I am so glad you asked.
  • Create a NEW project for this Challenge. Each submission must be a new project.
  • Post your Challenge Themed project on your blog. 
  • Mention and link the ShopPumpkinSpice.com store somewhere in your blog post. 


HAPPY EASTER!


Friday, January 18, 2013

A VALENTINE'S DAY CANDY BOX...

to keep celebrating the month of love, friendship, hearts and more.

soooo, i hope you went to see the valentine's kit from the pumpkin spice shop I blogged about yesterday.
what a deal!!!
today i am using one of the stamps from the "with love" stamp set that my friend stephanie designed and that my other friend denine used in her valentine's kit (for sale at the pumpkin spice shop). 

You Make my Heart Feel Super Happy
a valentine's day candy box
4" tall
this is the sentiment from the kit....so cute! i love it! and i am in cloud 9, hence the clouds.
this candy box is from the tags, bags, boxes and more 2 (TBBM) cricut cartridge. the speech bubble is from create a critter. the white cardstock is from bazzill. the mini white rose if from tim holtz. the mini hearts are from the same stamp set: with love. i stamped the hearts on the back of the papers and cut. the rest of the supplies are from my stash.

and this is it for today.
(these dt's are keeping me feeling productive, :D)

do not forget to check the valentines day kit and see all the goodies that you will get on this kit.
(quantities are limited so hurry up and get yours before they are all gone)

thanks for stopping by!
blogged by flowerdisco from flowerdisco's scrap hut


Saturday, September 8, 2012

HALLOWEEN TREAT POCKETS...using k&co embellishments

 i am so happy i was able to share my "publication" news with you all and see you were all so happy for me too. thanks again! 

today, i will share a few treat pockets/pouches i made that you can use not just for halloween but for any occasion you need to give some goodies away. they are so simple and i am sure you have seen them around a lot. you just have to add your personal touch to them and voila!, they are good to go. 

Halloween Treat Bags
4.5" inches tall by 3" wide

hehe, i love the rat. he is from a sizzix die cute die.

all i needed was a piece cardstock cut at 7" tall by 3.25" inches wide which i folded at 2.5" to make my pouch/pocket. i cut a few other pieces of patterned paper to embellish along with some bats from a martha stewart paper punch and the 3D embellishments from k&co. so easy! and the beauty of it you can make them any size you like. you can even use fabric for the pouches if you want.

i know some of you might know to make this but others do not. i sometimes get from granted we all know how to make some things and boy, i am so wrong!
anyway, i put these up on my etsy shop, yes, yes! the one  i have been trying to get up and running again with not much success of my part (darn pain stops me from it too). anyway, i wanted to share this easy project with you all since we have some holidays coming up soon.

take care you all!


Thursday, March 15, 2012

EPHEMERA POUCHES---with graphic 45 and knco patterned papers

i forgot i had bought this boardwalk patterned paper from graphic 45, lol. i found it hid it 
in the pile of 8 x8"s. lol.
i wanted to make some st. patrick's day treat pouches but somehow ended up like this.
WARNING: photo heavy

Ephemera Treat/Favor Pouches
2.75 by 4.25
2.75 by 4.50
2.75 by 5.25
all started with empty paper towel rolls.


the images are from graphic 45---on the boardwalk
the patterned paper is from k&co---portabello road
--some of the embellishments like the star, happy days, measure twice..., old stamp have been with me for a long while. 
the measuring tape is a border from k&co too, the staples are from tim holtz so is the ink i used to distress. 
some glitter glue from g-studio, wire from my supplies and the adhesive you use is very important. you need something like red tape or the scor tape i used on these.
i also stitched the bottom of the pouches using a decorative stitch. 

oh!... and i used the all night media liquid embossing on the star and the  measure twice embellishment and..... i made the accordion flower 3/4 of an inch and it gave me a bit of hard time...grr! :P and..that tape you see is from my first aid kit---i distressed it very well if you ask me, hehe

i think i like them a lot.

---thanks for stopping by--

Friday, October 14, 2011

MY PINK STAMPER PINK-A-LICIOUS BLOG HOP

hello and welcome to my blog!
my name is Agnes and as you already know i am a my pink stamper designer. i enjoy my paper crafts, gardening and sewing and i am so proud to be a designer in this team.

this is my project to share with you today. 
the requirements are to use a stamp from the "Yummylicious or Sweet Goodness" stamps set and make a treat/goodie bag for any holiday or any theme.

Sweet Goodness
4" x 5" 
matchbox
this is a beauty of a goodie box.

my sweet goodness stamp is from the Yummylicious set from no other than my pink stamper, of course ;D this is her hop and i am a proud designer of hers...as i mentioned before. i do not own the "sweet goodness set" but you will find the sweet goodness phrase on both sets:
just different fonts.

 you might be able to tell or not...that this is a matchbox from tags, bags, boxes and more. :P
 i cut it at 5"
above you see the top cover..
the jar is from doodlecharms and i cut it on cardstock and vellum. the vellum is the one on top.
the fruits are from the preserves cart and were wet embossed .
the tag is from home accents and the sentiment you already know is from the yummylicious stamp set from my pink stamper. the blue ribbon is a dyed bias tape i received as a rak.
this matchbox turned out to be a perfect goodie box.
and you will find many awesome stamps to match any of your paper projects in my pink stamper stamps. i invite you to click ----HERE----  and see it for yourself. you will also will find the online retailers who carry her stamps.

remember at the end of the hop going back to my pink stamper website and participate in the challenge.

NOTE: i have a goodie for you too but you must participate in the challenge for me to enter your name in it. one person will win it and that person will have three days after i announce the winner on oct 18 to claim the candy.


because i know you do not want to miss any of the stops.....
thanks so much for the stop,
and have fun with the hop.


Tuesday, April 19, 2011

MPS APRIL DESIGN TEAM PROJECT

hope all of you are doing well

today is about favors...what kind of favors? 
party favors, wedding favors, baby showers favors and the list can go on and on-- :)

Birthday Girl
party favors
(i had in mind to make a "you've got purse-onality" party favors when i started, but the stamp wasn't fitting well on my already made banner--wink-wink--so i used the "birthday girl" instead)
 the stamp is from the "pink-a-licious" set.

the banner is made with triangles from "george and basic shapes".
the stars and the scalloped border are rub-ons.
the cupcake is from a paper punch.
  

all purses are from the "forever young" cartridge using the purse creative feature, and all were cut at three inches but they do differ in size.
this green purse is image#2.


this one is image#4


this one is image# 1

i did use the hide contour feature to hide the openings they have on the front.


here is another view.

we are 20 designers and robyn, my pink stamper,  has all of our projects posted on her blog since this is our monthly design team project. please click here to go to robyn's site and enjoy the fabulous projects my team mates created.

i thank you for stopping by and i certainly hope you enjoyed my project.

------------

    love you all!
*_*


Friday, April 8, 2011

PINK-A-LICIOUS MPS BLOG HOP

ETA: it is 10:20 AM EST  and comments are closed now.

THANKS SO MUCH FOR THE LOVING COMMENTS AND WELCOME TO MY NEW FOLLOWERS.
-------------------
-------------------
hello to all of you and welcome to my blog

i am agnes and bloggers know me better as flowerdisco
as many of you already know, i am not much of a scrapbooker BUT i love making cards and play with paper and fabrics in my spare time. i also love my cricut and my gypsy and have an obsession with pretty paper. 
did you just call me a hoarder? lol....

anyhow...most of you are hopping with us because you love robyn, my pink stamper. 
i love robyn too and i am so honored to be in her design team with a group of very spectacular crafters whom are my team mates. you make sure to visit all of them and drool over their creations. you might find some candy along the way too. who knows.
our theme for this hop is birthdays and here is my project.


mmmmmm...
I'll diet tomorrow
 5" tall
 hehe...this is so true to me
---i'll diet tomorrow--- 
but i promise you  i am doing my best, lol
i used the spring holiday cards seasonal cartridge, image#49. 
the cupcake is from "smiley cards"--gypsy exclusive-- image# 1 cut at 3.75" tall.

the sentiments are from the lovely i am in love with "sweetest cupcakes" from my pink stamper new stamps 
set. it has the cutest phrases about cupcakes. love it! 
i used three of them: 
mmmmmm..., i'll diet tomorrow and happy birthday sweetie!
 the tag came from an old piece of chipboard that i covered the papers i was working with and the ribbon is from target dollar bin. what a nice finding that was!

the butterflies are from a paper punch and covered with fine glitter. i also used glossy accents for the dots/sprinkles on the paper.
 a better look at the phrases.

and below two pics of the box top. a feature i fell in love with.

lovely box, isn't?


well, i certainly hope you enjoyed my project.
any questions?...just leave them in the comment area or email me at 
flowerdiscos scrap hut at g mail dot com.
i will randomly select a comment entry for the candy below


thanks so very much for stopping by.


--------------------
below you find the blog hop order in case you need it.


love u all!
*_*