Showing posts with label SCHOOL THEMED. Show all posts

Friday, August 19, 2016

HELLO

Hello All,
This is Agnes welcoming you to another Cut Cardstock blogpost. Today I am sharing with you what I think it turned out a great card.This card came to mind after talking to a dear friend of mine who is a school teacher and because I know she does a wonderful job with her students I wanted her to know how much she is truly appreciated.

I used the Esse 100lbs black textured cardstock from Cut Cardstock for this card.
I used it for the card's base, I also used it for some of the embellishment shadows and for my greeting. The patterned paper is from Pink Paisley: Memorandum and Atlas and you also can find them at the Cut Cardstock store.


I fuzzy cut the clipboards from the Memorandum patterned paper, die cut the shadows using my die cutter (Cricut Explore) and adhered them to the front of the card. I then punched out some circles using a paper punch, die cut some stars and the letters a, b and c using some thin dies and layered them on top of the clipboard as shown in pics.
I then used another thin die and cut the Hello and glued on top.
I also added some smaller stars to the front and to the inside.

I loved how this Esse cardstock performs. Despite is a 100 lbs. cardstock I had no problems using my thin dies to cut some of the embellishments. I also didn't have any problems cutting the chipboards shadows when I used my die cutter and you can see how small those tiny cuts are.


Here is a close up of the greeting.

And here is the completed card with a peek at the inside.
I know my friend will be thrilled and I know she will frame it to display it in her classroom.
I hope you like it too.

As always, we appreciate your visit.
Thanks so much for stopping by.

Note: The school is an image from the My World Cricut Library and was cut at 2-1/4" tall and the clipboards from Sportsmania.

blogged by flowerdisco
(copyrighted)

Cut Cardstock Supplies used:
Heavy black discount card stock
Memorandum Print 6x6 card stock
Pink Paislee Atlas 6x6 paper pad
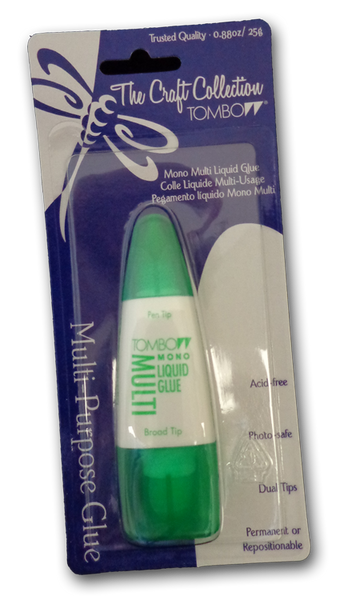
Mono Multi-Purpose Liquid Glue3-D Foam sticker adhesives
scrapbook glue

Friday, August 5, 2016

A DIY SCHOOL LOCKER PENCIL BOX

Hello all, Agnes is here sharing a super versatile storage box: a Locker Shape Pencil Case. It is an SVG file from a digital store. After uploading it to the Cricut Design Space, I duplicated it three times and re-size them to the following sizes: 10.75", 8.75 and 6.75".
It is a Locker shape box that serves as a pencil case or to store any other kind of goodies. Since school days are near, I thought this would come in handy. You could even use it as a gift box.

I chose this Esse cardstock for my base because it is a thick cardstock (100lbs) perfect for when you need a good sturdy base or cover for any project.

To the left, you see all parts ready to be cut.
I also used the Locker Talk Cartridge for the embellishments. I also used a Cricut marker (black ink medium tip) to write the words instead cutting them.
To the right, you see the first cut I made: the pencil case front.
This SVG cuts dotted lines for scoring purposes but you can change the settings to score but because this is a thick cardstock it is more convenient and easy to score if you let it make the dotted lines.

Sorry about some of this blurriness, I didn't realize until now and it was too late to start over. Please, accept my apologies. 
The first pic shows the Explore writing the words prior to cut them, the second pic shows all the cut parts and the third shows a close up of the words. I decided to fill them in with ink and used the same Cricut marker I used to write.
The colored cardstock is a mix of Pop tones and Basis. You can find these cardstock collections at the Cut Cardstock store.
Again, from left to right: folding along the dotted lines on the pencil box and to the right shows how well the explore writes. I did manipulate the size and shape of the High School sign to fit my locker front. I mounted the embellishments on foam tape square for dimension.
The tab at the right is used to open and close the lid.

 A few more pics showing some pencils and markers inside the pencil cases.

And more pics...I want you to check the texture of this Esse cardstock. It is beautiful. I am in love with it. I also want you to take notice of how the pencil box top goes in the bottom part instead going over it like a common box will close. I think that detail is very nice.

I hope you enjoy today's project. I think is a darling and very useful.

Thanks so much for stopping by and I wish you have a great weekend.


Cardstock Products used:

Heavy black discount card stock  3-D Foam sticker adhesivesMono Multi-Purpose Liquid GlueBASIS Colors - CREATE YOUR OWN  Assortment Pack Pop-Tone Discount Card Stock

Friday, September 18, 2015

SCHOOL DAYS MINI ALBUM


hello all,

i have to say i always liked this type of mini. i like the different sizes and the sneak peek of the pages. very easy to make as we all know and you can embellish it any way you want for whatever occasion you need.
just add some pretty pattern paper, die cuts, stickers, pics and you are ready to show it off.

i made it for a nephew who just started kindergarten. my niece can add some pics and notes about that special day. if she needs more pages (sure she will), she will let me know (she will) :D
i just wanted to share it with you all in my today's 


the size is approx: 9" long x 2-3/4' tall not counting the inserts.


-the pretty school theme paper is from we are memory keepers-


-a few more pics-
 -some of the embellishments are stickers and others die cuts i made-
the mini pockets and inserts come with the svg file as you saw on the screenshot.

no need to say my niece and nephew loved it and i loved making it for them.

it turned out simply adorable!


this is the original file
designed by carina gardner


-and, below is a screenshot of how it looks on my virtual mat is prior to cut-
(as you might know i use the cricut explore and cricut design space for my die cutting including all my digi playground svg's.)
Note: when in design space, do not forget to attach the score lines to the images, in this case the mini album base.

hope you enjoyed it and if you have any questions, please do not hesitate to ask them.

 once again, 
thanks for taking the time to stop by.


Friday, September 4, 2015

A BACK TO SCHOOL OWL CARD TAG

hello all,

this is the owl i had in my picture collage in the "previous post" that i couldn't use on my last project. remember i used
the cricut explore PNC (print and cut) feature and an svg's from the digi playground.

Back to School Card Tag
4.25"
i will try my best to explain the "how to" since i had some emails asking about the process.


step #1
-insert your images to the cricut design space-

step #2
-hide the back to school background by closing the eyes on the layer section to the right-

Step #3
-add two circles, change colors if desired, position them to the back of images (owl and back to school) , click "attach all" located at the top of virtual mat or by right clicking your mouse or touchpad, then click on "flatten" (see top right of pic) and
you will see the printer icon next to the layers sections instead the scissors for cut.

step#4
-click go and you will see the markings on your virtual cutting mat indicating it's ready to print-
***make sure you do not exceed the printing area. if you do exceed the printing area, go back and resize to a smaller size, hit go and print. after printing you are ready to cut in the explore.
if you have any questions, please contact me and i will try my best to help you.

here are some more pics of the card/tag:
-all the faux stitching was done with a white gel pen-


-the embellishment was made using a paper punch and a g studio clear stamp-

-the inside-

-cute little owl-
you also can cut the owl's layers individually or just some parts of it to add dimension and texture.

hope you enjoy my post for today.

see you next time,

blogged 
by
flowerdisco


Friday, August 5, 2011

BITTEN BY THE BUG 2 DESIGN TEAM


 (click on this link to see what the rest of the team has made and to participate in the challenge)

***

hello my friends...hope all is well with you all.

you read the title right.....i am in a new design team:
Bitten by the Bug 2

i am so excited that Heather invited me to be in their design team. i have been lurking and stalking this site since Regina used to run the first one. i invite you to be part of it and enjoy all the work that these talented ladies have to offer and to participate in the challenges too. this is a new adventure for me and for you too and i am ready to start.

we were asked to work with the  
Locker Talk
  cartridge and use any school supply image for our project.

I am very happy to present my first project for the fabulous design team of BBTB2...

*_*
Science Notes


 i first made the pencil from page #37 image 6 . i decided not to use the card feature and using my gypsy i welded two of the "pencil cuts" using the shadow creative feature. i also cut a blackout cut from the rest of the layers, which i covered then with pattern papers, to give my card more definition and more substance in real life. the word "notes" was done using the "all mixed up" cartridge. the red brad look alike is a red button i had in my vintage button box. i also inked every layer but the black ones ;p.
i then was thinking the pencil looked very lonely and i made a book to take "notes" from--lol.


 this "book" is on page #47 and the "science" word you find on page #63---using shift and the "phrase/layers" feature.
the goofy face was done using bits and pieces of scraps.


and here you have it again.

i hope it inspires you to start using some of these older cartridges. while looking through the handbook i was amazed at how much this cart has to offer.

i want to Thank Heather publicly, the owner of the BBTB2, for giving me the opportunity to be part of their team and for believing i am up to the task :)
 and to Lori who picked the theme for this challenge i had so much fun making my project.

i think all is good here and i hope you feel the same way. if you have the time, please go and visit this wonderful blog and wonderful design team.
you will be drooling over all the projects there and filling up your head with so many ideas---that is what happens to me anyways, lol

love you all!!!

****************

and soon i will have some "sneak peaks" of the new clear stamp sets releases from

sooooooooooooo...stay tuned! --------hehe

and thanks for stopping by---!!!!

Sunday, August 15, 2010

U R The Apple of my Eye

Hello all

ETA: hovering not working :(

On this post I am trying something new I found on the web so please be patient with me while I learn the whole process. I am not computer savvy :( and it does takes me a while to comprehend the instructions and details of it.
  If you hover over the photo(s) you are going to find some small white dots and those little white dots will give you some information on my projects. It is a bit time consuming for me so far but, I hope it does get easier with practice :)

U R The Apple of my Eye card
5 by  inch card
 (The only photo with the tags is this first one)


How did you like the hovering?  
:) 
Fun, uh? 
hehehe
***


The U R letters are stickers from Making Memories.


The scroll is from Give a Hoot.

All the dots (they are beautiful in real life) were made with a Gelly Roll Sakura pen called Clear Star and it is like glitter...soft  glitter if I can call it that.


On this photo above I want you to notice the texture on the apple stem. It was done with...
this
 I believe I bought it at Joann's in a pack of six. It is a fabric marker made by Marvy Uchida. I love this brown color texture but so far that is the only color I have tried. What you do is  you heat the ink/paint with your heat tool and voila.

Also, in the background you might notice two black with red objects hehe. Those are the stamps I bought from Eileen's Ebay Store. You can win one of her stamps if you win the Sweet Pagoda challenge. These ones are self inking and very pretty to look at too, lol.

Well, I hope you enjoyed today's post and the new Tag Tool I played with.
Hugs to All!