Showing posts with label HALLOWEEN. Show all posts

Monday, September 19, 2016

SPOOKY WHAT?

Hello all, Agnes' here sharing a Spooky What? 
Spooky what is the name of the game here because this project can be a banner, a home decor or a treat box...for the treat box I would add some clear transparency behind the letters and maybe secured the lid with some adhesive.

You can find these boxes in the 'Tags, Bags, Boxes and More' cartridge. You can also find it in the Cricut Access Library. 
You can find the cardstock at Cut cardstock . The links will be at the end of this post. 
BTW, I loove this glitter cardstock. I have been using it a lot lately. You have to give it a try. You are going to love it. 


These boxes have a window on the front as you can see in the above pics. I used that window to weld the S P O O K Y letters. Thi font is from 'Happy Haunting', another Cricut Cartridge. 
I also cut the letters on gold glitter cardstock and glued them on top of the welded ones. Then it was time to scored and fold them. (The third pics shows a shape which I did ended up not using, sorry. It was the shadow of a pumpkin :)) 


Here you can see you end up with a lid (where the letters are) and the insert that makes it a box. To decorate the inside I cut some pieces of cardstock, embossed them and glued them on the inside.

This is how it looks all finished. 
Ready to highlight a little space in my home.


But that is not all...
in case I want to hang them instead, I added a piece of rustic twine and I have an instant  banner.
(Sorry about the blurry pic but it was hard to get a pic with the glitter shining). 

I love how they turned out. 
If you decide to give them a try and have any questions on the 'How To', please do not hesitate to ask in the comments area.

Remember, all brown, all gold and all orange cardstock are on sale this month and they are a true delight to work with.

Thanks so much for stopping by!


Cut Cardstock Supplies Used:
Moroccan Cocoa Card StockGold Glitter Card StockBasis Dark Orange Card stock
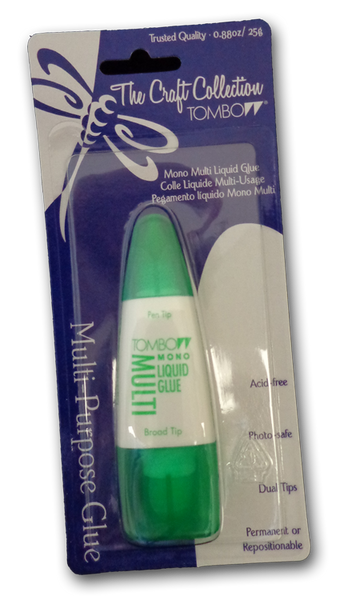
Holiday Green Discount Card StockMono Multi-Purpose Liquid Glue


Monday, September 5, 2016

MAGIC, POTIONS AND SPELLS BOOKS SOLD HERE

Hello again,
Agnes' here once again sharing a project for my dear Cut Cardstock Design Team.
The colors for this month's projects are brown, orange and gold: a beautiful color combo if you ask me. Perfect for Halloween and/or Thanksgiving. 
My project for today focus on Halloween: I have made the books that witches and wizards use for their daily routines.  :)

I used some thin dies to cut the shapes of my books. I decided to add some texture with embossing folders and embossing powders.

After they were embossed I distressed them to get the wrinkles on an old leather book. I used another shape of the thin dies for the distressed titles and used foam squares on them for dimension.
I then used some sketch paper, torn them to look like old pages and stamped an assortment of Halloween images on them.

I also distressed the pages for the well-used/old look of the books. As the last step, I stapled covers and pages together but then I changed my mind and bound them with rustic twine.


and...here are the finished Witches and Wizards Books. Totally awesome!
You can always change the theme and colors for your needs.


Thanks so much for stopping by.

blogged by flowerdisco
from flowerdiscosscraphut
(copyrighted)

Cut Cardstock Supplies Used:
Gold Glitter Card StockMoroccan Cocoa Card StockTangelo Card StockCarmelized Mustard Card Stock3-D Foam sticker adhesivesMono Multi-Purpose Liquid Glue

Tuesday, October 27, 2015

A HALLOWEEN TOWN HAUNTED VILLAGE

BOO!
welcome to the grand finale of the 
halloween haunted village.

if you have been following you already know i took the mission of reproducing this
halloween haunted village as my digi playground project for the month of october.

i started with this cat house on part 1 but changed my mind about the colors. 

the new part 1 but actually part 2 of the haunted village can be found here and includes: the bat house, the cat house, the crow house and the haunted tree; part 3 is just some sneak peaks of the finale but if you want to see them they can be found here.

today i am revealing the completed project and i certainly hope you enjoy it as much as i did.
know that most of these buildings can be adapted for any other occasion: just change your colors and do some snipping here and there.
(be warned that all the posts about this project are pic heavy since i spent a great amount of time with details i wanted to share with you)

HALLOWEEN HAUNTED VILLAGE
by
the village consists of 11 pieces: bat house, cat house, crow house, ghost mansion, pumpkin mansion, spider house, a witch tower, a cemetery, a coffin,a tree and a fence (not included). 

below i am showing the last buildings that were made to finish the village. as i mentioned before, the rest of them are here.


GHOST MANSION
-i love this one, i think is my favorite-


SPIDER HOUSE


THE WITCH TOWER


THE CEMETERY

THE COFFINS
these coffins can be made into candy containers too: just add the candy before gluing them
closed.

remember all the buildings with the exception of the bat and crow house have openings on the bottom to accommodate a battery candle for a nice glow especially if you use vellum for the windows.

any questions please let me know on the comments section of my blog and i will make sure you get a reply.
and now as always...
 thank you very much for stopping by and for taking the time to take a look at this fun village. 

enjoy
the 
tricking 
or the
treating!

happy halloween.
yikes!


Wednesday, October 21, 2015

INTRODUCTION TO JOY CLAIR CLEAR STAMPS

 i am delighted and honored to have been chosen to join their design team and to work with their beautiful stamps.
their stamps are made here in the usa (georgia).
they are made of a high quality photopolymer, nice and thick, non yellowing, strong deep edges, they adhere so nice to the clear blocks and they take ink very well. 
their designs are unique and so very pretty and the fonts and sentiments are gorgeous.

joy clair has many plans for all of you to enjoy: challenges, videos, discounts and more. sign up to their newsletter and you won't miss any of it.

below is my first project to show off some of their great designs.
hope you enjoy it!

-A Halloween Frame-
by flowerdisco
hehe, let's start with a nice sneak peek.

i used my die cutter machine for the card base, layers and banner and worked
with 3 different stamp sets on this project:


i started stamping each "halloween" letter on a 1" piece of punched paper using different colors of pigment inks and then outlined each letter with a black permanent ink fine tip marker.

as you can see i distressed most of my cardstock too and later on you will see i "dry embossed" the black base.

as i mentioned before the polka dots banner was cut using my die cutter.
 i wrapped a fuzzy and thin green jute around it for an added detail.

the pumpkin and the boo word were stamped with a dye ink. i stamped the pumpkin first, did some fussy cutting around it and then stamped the boo word. i adhered it to the banner with some foam tape for dimension.

the skulls border to the right was stamped before i adhered the halloween letters keeping in mind their placement.


 the border has 4 joined skulls but i just had room for three of them.

 see the dry embossing on the black layer? it is a chevron shape but hard to see, sorry. i used a core-dination cardstock and after sanding it a nice orange color came through.

here is the finished halloween frame.
(i used a steel die to make a chipboard easel for the back to prop it up).

so what do you think of the stamps? really nice, huh?

you can click on the joy clair logo and it will take you the store where you can take a look at the rest of them.

and remember that only good vibes are welcome, the rest are deleted, lol.

see you next time and as always
-thanks for taking the time to visit-


blogged by
flowerdisco
from flowerdiscosscraphut

(all content and worked has been copyrighted)

Tuesday, October 20, 2015

A HALLOWEEN TOWN- PART 3

ok, so the haunted village continues.
i should be ready to have it all set for the 27th. 
that is my day to post on the
digi playground blog
 and it will be there first.

here is the ghost mansion sneak peek


 here is a sneak peak of the pumpkin mansion


and one of the spider house

they are coming out super spooky, lol and boo-tiful.

-see you on the 27th-

Tuesday, October 13, 2015

A HALLOWEEN TOWN- PART 2

hello all,
agnes here with some halloween 3d projects from the 
-"halloween haunted village"-
my plans are to make the entire village before halloween. 
you will be able to see the finished project here at the digi playground and on my blog on 
october 27th.

there are 12 11 pieces to this collection by miss carina gardner:
a bat house, a cat house, a coffin, a fence, a ghost mansion, a haunted tree, a little crow house, a spider house, a spooky cemetery, a pumpkin mansion and of course, a witch tower.

BAT HOUSE
approx: 2" wide by 3-1/4" tall
-the bat house includes the 2 big bats-
(the smaller bat is from a paper punch)

CAT HOUSE
approx: 3-1/4" wide by 5-1/2" tall
-the cat house includes 2 cats and 3 ghosts-

CROW HOUSE
approx: 2" wide by 2-1/2" tall
-this one includes one crow and the canopy and a place to add a battery candle)

HAUNTED TREE
approx: 4-1/2" wide by 6-1/2" tall


-below are some extra pics from different angles-


to be continued...

thanks a bunch for stopping by and remember to come back to see the entire finished village.

any questions, please do not hesitate to ask,
we are here to help.


(copyrighted)