Showing posts with label DIY: BANNERS. Show all posts

Monday, September 19, 2016

SPOOKY WHAT?

Hello all, Agnes' here sharing a Spooky What? 
Spooky what is the name of the game here because this project can be a banner, a home decor or a treat box...for the treat box I would add some clear transparency behind the letters and maybe secured the lid with some adhesive.

You can find these boxes in the 'Tags, Bags, Boxes and More' cartridge. You can also find it in the Cricut Access Library. 
You can find the cardstock at Cut cardstock . The links will be at the end of this post. 
BTW, I loove this glitter cardstock. I have been using it a lot lately. You have to give it a try. You are going to love it. 


These boxes have a window on the front as you can see in the above pics. I used that window to weld the S P O O K Y letters. Thi font is from 'Happy Haunting', another Cricut Cartridge. 
I also cut the letters on gold glitter cardstock and glued them on top of the welded ones. Then it was time to scored and fold them. (The third pics shows a shape which I did ended up not using, sorry. It was the shadow of a pumpkin :)) 


Here you can see you end up with a lid (where the letters are) and the insert that makes it a box. To decorate the inside I cut some pieces of cardstock, embossed them and glued them on the inside.

This is how it looks all finished. 
Ready to highlight a little space in my home.


But that is not all...
in case I want to hang them instead, I added a piece of rustic twine and I have an instant  banner.
(Sorry about the blurry pic but it was hard to get a pic with the glitter shining). 

I love how they turned out. 
If you decide to give them a try and have any questions on the 'How To', please do not hesitate to ask in the comments area.

Remember, all brown, all gold and all orange cardstock are on sale this month and they are a true delight to work with.

Thanks so much for stopping by!


Cut Cardstock Supplies Used:
Moroccan Cocoa Card StockGold Glitter Card StockBasis Dark Orange Card stock
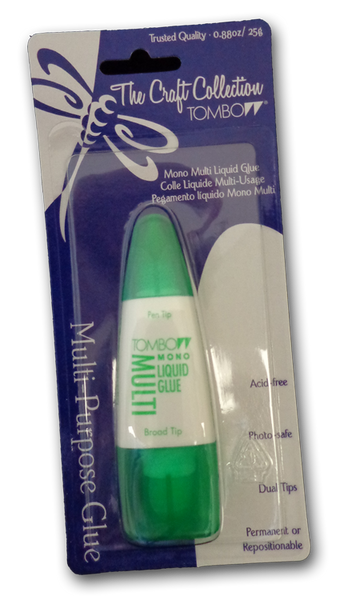
Holiday Green Discount Card StockMono Multi-Purpose Liquid Glue


Saturday, July 4, 2015

INDEPENDENCE DAY PARTY DECORATIONS

happy july 4th fellow americans, 
here i am sharing with you some of the decorations i made for our family get together.
WARNING: post is pic heavy since i am trying to explain some of the "how to".

you can find more details at the digiplayground

Independence Day Decor
i made a banner, a centerpiece with pinwheels, some popcorn boxes, water bottle tags and some loose tags to make a mini album or play a game. not sure yet.

(remember, you can zoom in by clicking on pics)


here we go...


THE BANNER
 was made using a free file from the digi playground store:
patriotic stars
Patriotic Stars
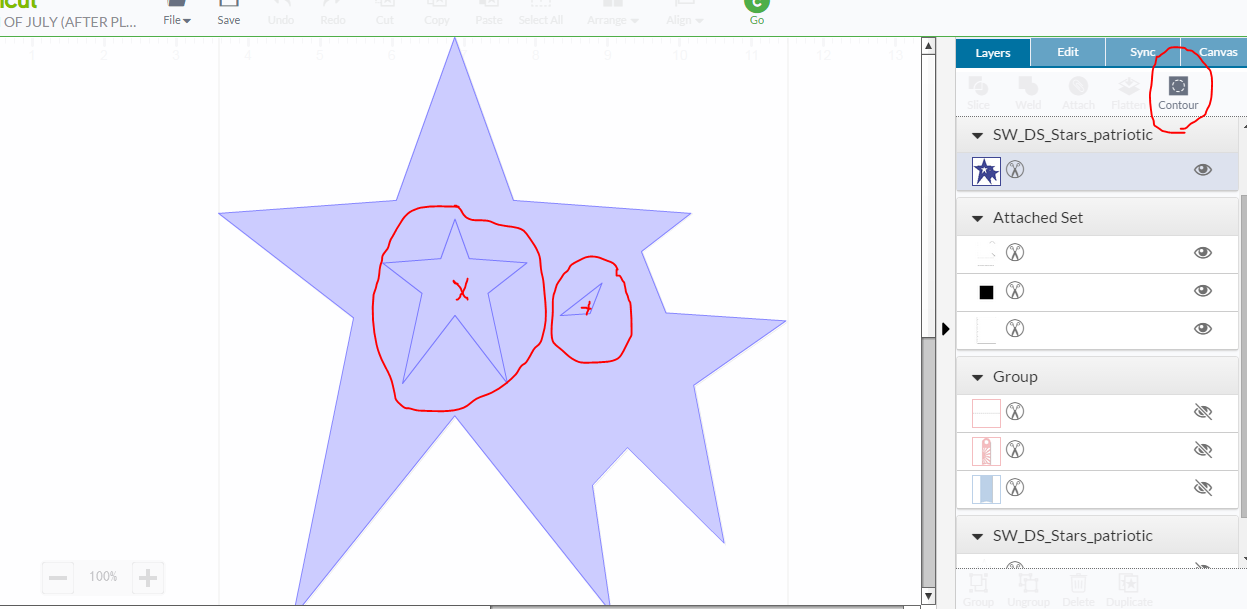
i used my cricut explore along with the cricut design space software to resize and cut my stars. i cut 5 stars at 7.75" tall. i also made a white backing for my stars using the contour feature on design space. 


---in case you are new to the cricut software, to use the contour feature in design space  first select, duplicate or copy and paste your image, then you select the image you want to manipulate (you can close the other image), ungroup it if necessary, click on the contour button, (your image will change in appearance) and click on the area you want to hide (in my case the center of the stars).
 ---the red circles show where the contour button is located and the areas i clicked on.


this is what it should look like after the "contour" has been applied.


stars die cuts including the white backing

stars assembled

<><><><><><><><><><><><><><><><><><><>


now onto 
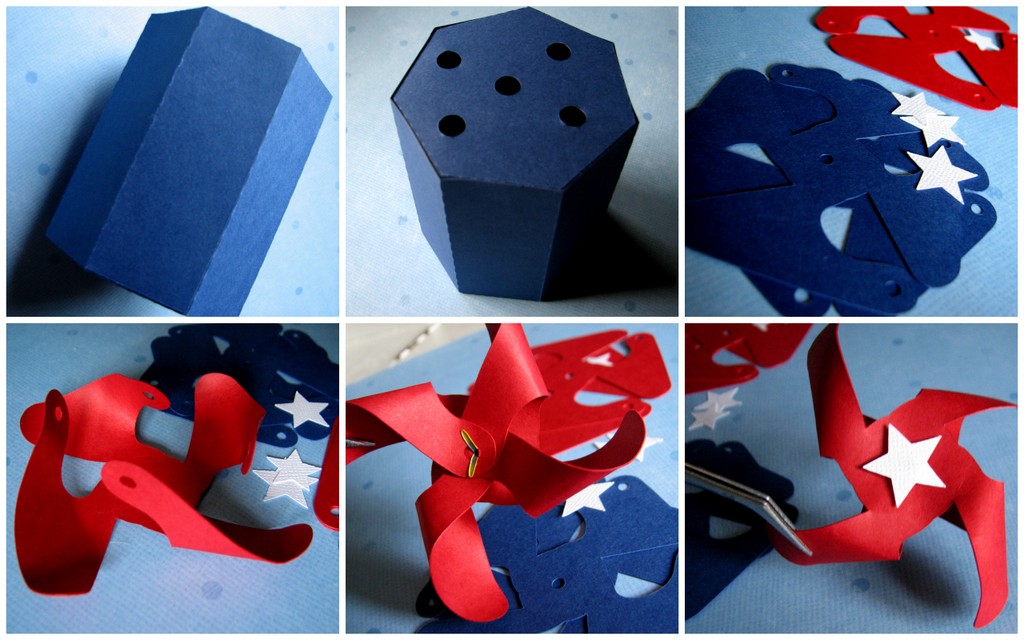
THE PINWHEELS CENTERPIECE
(the medallion/rosette is from a cricut cart called "independence day")


for the vase you score, fold and glue. as simple as that, it might look hard but is not. 
for the pinwheels i recommend a pliable cardstock or designer paper. i was using a thick cardstock and you can see some creases on some of them. 
i attached brads in their centers and covered them with the white stars.

the wooden dowels are attached to the pinwheels back with hot glue but you can use any  adhesive.

below is the pic of the file i used: also from dpg (digi playground)
3d pinwheel centerpiece

<><><><><><><><><><><><><><><><><><><>


THE POPCORN BAGS and WATER BOTTLE TAGS
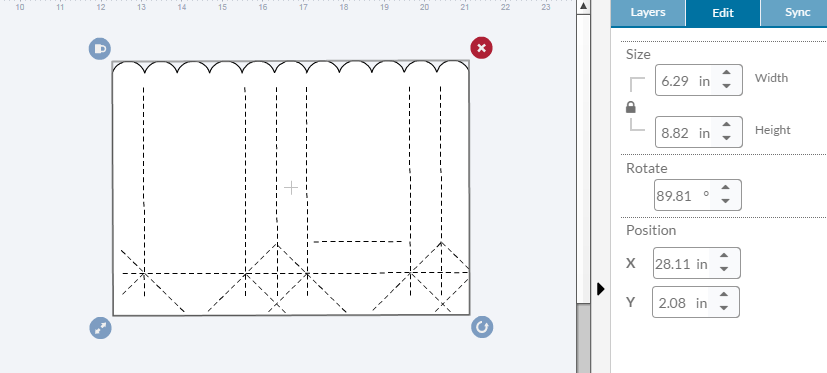
lots of scoring on the popcorn bags but like the vase, it looks scarier than what it is.
you do have to remember to "group and attach" the score lines to the box.
i made the blue and red stripes with the explore but the popcorn word and one oval is included in the svg file along with the bag/box.
on the bottle tags i added the white semi-circle using a circle punch, attached half of it  
and then cut the extra.


-both images below are linked to the store-
Small Popcorn BagSunshine Bottle Tag

<><><><><><><><><><><><><><><><><><><>


THE WANNA BE MINI ALBUM TAGS
these are the tags i am thinking to use on a mini.
-they are also a freebie from the digi playground store-
4th of July Tag

another pic of some of the ensemble
it takes time but the results are worthy.

if you have any questions, please, do not hesitate to add it to the comments.


and now i have to say until later....

have some fireworks to enjoy!


blogged by 
agnes
from