Showing posts with label BANNERS. Show all posts

Monday, December 4, 2017

IT'S BEEN A WHILE...

Hello all-
As we all know life keeps us busy.
Because all is good we are dealing with other health issues I don't care to discuss right now but is the reason why it took me a while to craft and post.

However, I am sharing with you today my 2017 Christmas Cards.
My inspiration was taken from Pinterest but I couldn't recreate the beauty of the original not that I ever want to. This is my take on it.

Christmas Cards
2017
4" Round Card
I used more than a few die cuts and took me a while to cut and build the prototype.

-Let's start with the Cricut images-
The circle base is from the Cricut cartridge 'Wild Card', Cricut Access #m2fa54.
The circles are from the 'Shapes' feature in Design Space. Cut at 4" and 3-3/4" also to get the ring around.

The candles are from the 'Christmas' cart, Cricut Access #m40ade.
Some of the foliage (green in this card) is from 'Storybook', Cricut Access #m34132 and the banner strips are from 'Bits and Pieces', Cricut Access #mfb1ff.

The font is called 'Wildflower'. I didn't know about it but it showed up in the fonts area and I was able to use it. I am assuming
it is a Free font or was Free at the time I used it.
I liked it very much and it wrote beautifully.

-The rest of the die cuts-
Cottage Cutz: wreath, tiny bow, and the neck applique.
Impression Obsession: the tiny red flowers (reminded me of poinsettias).
Martha Stewart paper punch: the red branch up on top.
Ek Success paper punch: the star on the foliage.

The embossing was done with a Tim Holtz embossing folder called 'Collage and Notebook'.
The sentiment is from Joy Clair stamps and it was embossed using a gold embossing powder, which it went array as I can see in the pics but not in real life, :). Oh well!

For those who are interested...here is the link for my inspiration. It takes you to the post itself.
As I mentioned before, I found it on Pinterest first.
-Absolutely Gorgeous- in my opinion, that is.
Hope you enjoy it and this blogger won't take offense I linked her project.

Before I finish here I am taking the moment to wish you all:
 'Happy Holidays', 'Merry Christmas' and or 'Happy Hannukah'
Better do it now in case life continues to surprise me and I can't come back for a bit.
*-*'

Take care you all!


Saturday, October 28, 2017

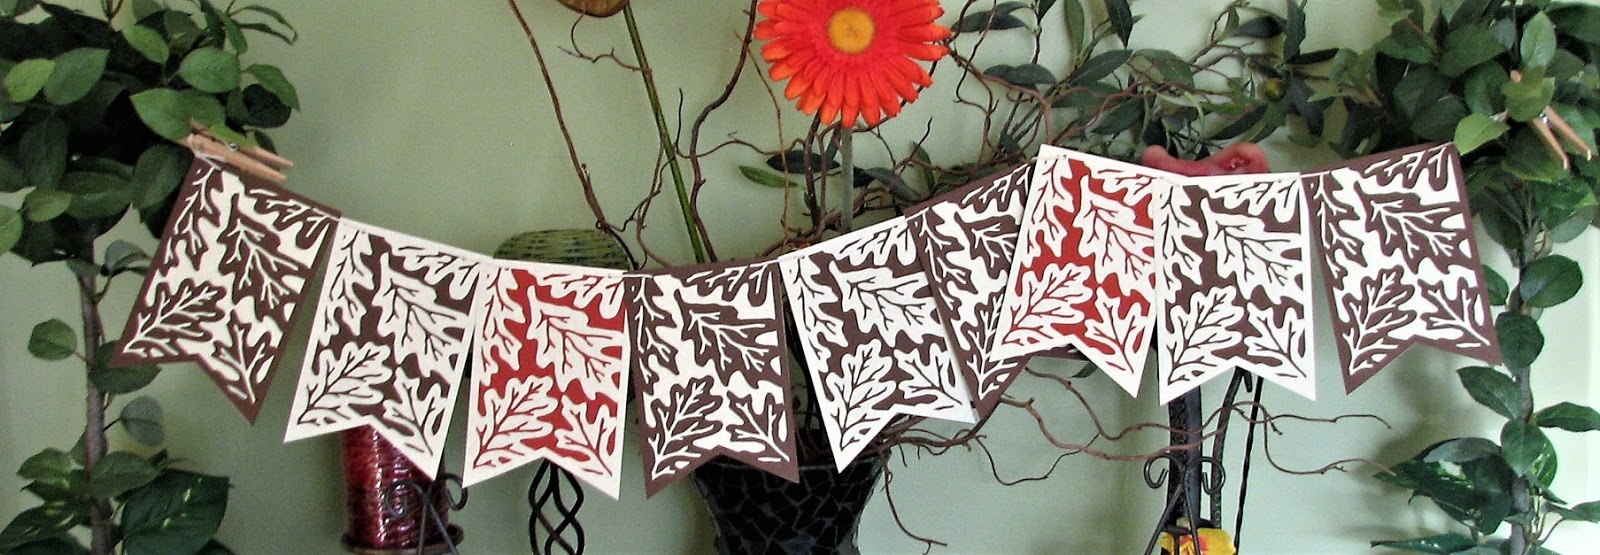
AN OAK LEAVES BANNER!!

Hello all,


Simplicity at its best!! 

What do you think?
 I have listed this banner as a RAK on my Etsy shop and thought to share it with you here in case you want to make your own.

I used the Cricut cartridge Pretty Pennants and each section was cut at 4" x 6"tall.

Have a great weekend!!


(all contents copyrighted)


Thursday, February 25, 2016

CUTE BUGS DIGI STAMPS CHALLENGE

adriana from 
 invited me to be a guest designer for a friend of hers who is designing some digital stamps for her etsy store and on her blog 
Michelle, the owner, is starting challenges with digi stamps.
since i am all pro small business, i said yes, of course.

here is my take on her first challenge

Cute Bugs
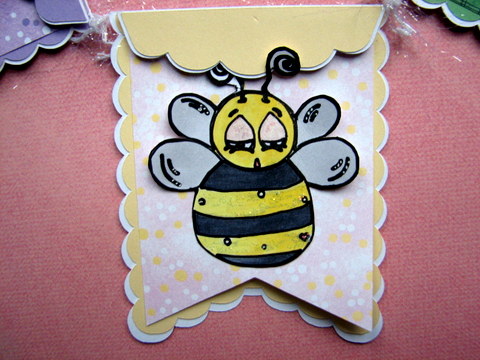
-mini banner
these pretty papers are from sizzix, from looong time ago. hehe 
you know i do not use many pastel colors but these i love.

 -the size of each pennant is around 2-3/4 wide x 3-1/2" tall.-


 -here you can see some of the dimension on the top part-


on this one i tried to pop the bee's belly a bit for a more round look, like she just ate some yummy pollen, lol.


and this one is simply beautiful. hard to see but there is a bit of stickles too.

these are such cute images, perfect for a little girl bedroom or nursery.


the banner die cuts are from cricut pretty pennants cartridge. 
the top part of the banner was adhered using foam tape and all the wings have been bent for more dimension. a bit of stickles for bling, of course.
the coloring was done with alcohol markers and images were cut by hand BUT drawn by the cricut explore.

if you have any questions, please, email me. i will do my best to get back to you in a timely manner.

remember, 
do not miss this fun challenge and the chance to support small business too.
these challenges run for two weeks and this one ends on march 10.
the theme is "anything goes" and you do not have to use a cre8tive hands digi stamp to participate.
a random prize winner will receive one bundle of choice from michelle's etsy store.

as always,
thanks so much for stopping by!
blogged 
by 
flowerdisco
(copyrighted)

Wednesday, December 16, 2015

LAISSEZ LES BONS TEMPS ROULER!

hello all, 
welcome to my last project for joy clair
today i am showcasing the mardi gras stamp set.
ironically the sentiment i chose for my card is: 
let the good times roll. 
i haven't have a good time for a while now and for the same reasons i won't be able to stay.
  it is so funny that unconsciously i chose this phrase. i sure will have to 
"laissez les bons temps rouler" 
for real. 
lol.

these masks are so pretty. i used its digi dies to cut the masks. i then used an embossing pad to add gold embossing powder and glitter.

i used a pearlized cardstock for the card layers. the golden splashes were done with a gold acrylic paint and a cheap watercolor brush.
the black ink i used smeared a bit on the slick surface and it took a while to dry. 
the tiny fleur de lis are also from the same stamp set. the stitched border was done with a fiskars paper punch.


i cut these pennants from a cricut cart and the tiny fleur de lis here are from a g-studio paper punch. i covered them with stickles.
the gold tone cs is from dcwv. 
the other masks were not glued to the pennants and that is why the middle mask is crooked. 
normally, i can't photograph purple well for whatever reason but today i did. lol. i couldn't chance to wait for another day. hehe.

the stamp set is so pretty. 
Joy Clair Mardi Gras Clear Stamp Packaging  Mardi Gras Digital Die

here is some history info on mardi gras in case you are as curious as i am. i wish one day i could visit new orleans too, i have some friends who visit it often and they love it.

well, and this is it for today.

you guys take care and,

thanks for stopping by!


Wednesday, August 5, 2015

CIRCUS ELEPHANTS...

fun?
hopefully no more. 

my post today started just as a crafty project but when i was starting to write, it  just hit me. it hit me hard.

and i started googling about circus elephants while thinking of cecil, the lion that was just killed in the name of fun. i felt really bad. so bad i was just thinking to start another project but no, i chose not to. 
instead, i will use this project as an eye opener. as an awareness. as an advocacy.

and, i will use my banner project to honor all animals, especially the ones suffering in captivity.

let me introduce you to 
-miss ellie or mr ellie-
whatever the gender might be.
at one time we really did not know better, but now we do, right?
right!

anyhow, these letters (font) are from a cricut cart called carousel. it is a beautiful cart.
lots of pretty images.
the embossing was done with a sizzix folder from tim holtz called: springtime backgrounds.
so pretty!

these blue circles were used to add dimension instead using pop dots.
(to tell you the truth i did this not because i have no pop dots but because i was too lazy to get up to get them, lol)

the beautiful pachyderm is an svg from the digi playground.
it was a pleasure to put together.
i did ink the edges for definition and also did some dry embossing on the body with an old fiskars texture plate i had in my stash.

the scalloped banner sections are also from the digi playground.

while googling about them i found out many circuses will be stopping the use of these animals.
 i was happy to read that, we are getting there.

well, and this is all for today.

i am hoping you enjoyed today's project, i really do.

take care and have a great day!


Friday, April 3, 2015

A CHRYSANTHEMUM DOILIES BACKGROUND BANNER

i found this beauty at the 
and wanted to share it.
it has a background but i wanted to use it without it. 
it also cuts perfectly with the cricut explore. 
i love intricate cuts.
(there are a few intricate cards i can't wait to try them)

DOILIES BANNER
7 inches
 -don't forget you can click on pics for a bigger view-


-i will be using it in my dining room for easter brunch-

change the colors and use it for summer, fall, winter...and or any other occasion.

Have a Blessed Easter,

and thank you for taking a peek!

Wednesday, January 28, 2015

XOX BANNER

hello bloggers, family and friends.
hope you are ok. 
we skipped the blizzard and got just a few inches of snow. i will put pics at the end of the post.
up north of us were the worse. 
hopefully, all are well and no one lost nothing.

today i want to start the series using bits and pieces
they will be scheduled to go up on wednesdays.

i was late with my first, :(
i started making this banner yesterday, then it got too late to take pics. 
i took the pics this morning in a hurry so excuse me if they are not the best.
i have many things to do today and wanted to post asap in case i do not have a chance later on.

here we go.

XOX
a valentine's banner
 
 if you will be following this series i think it is important to explain this:
the images in design space are not in the same order of the handbook, as you might already know.
i will be identifying any images used in these projects by the number they were assigned in design space.

---polka dot tag is #M100103
---hearts #MFB1D2
---font is from cake basics

the tags were cut at 4.25"
but you can cut them smaller or bigger, it is your preference.


---hope you like it--- 
i do not think i will be able to do every single image but i will do the ones i like the most.

now here are some pics from the snow:
DECK 

 NEIGHBORHOOD

LULU'S PATH 

have a great week fellows,
and thanks or taking a peek.


Sunday, June 8, 2014

4TH OF JULY....banner

hello,
today i am sharing with you all a pretty banner i made using my cricut.

USA
very similar to a one section banner i made when designing for my pink stamper. 
you can see it here.

i used the stand and salute cricut cartridge for the hat (page #27 of the handbook), the fireworks (page #50 of the handbook) and the usa (page #63 of the handbook).
each section measures approximately 4" wide x 7" tall, decreasing the layers in size by an 1/8 of an inch. 

i love the velvety polka dots cardstock. this is the last of it all. sorry i can't remember the manufacturer.

the cute border here was done with a fiskars paper punch and the golden glitter dots were made with a regular office one hole punch.

the usa has been also layered 3 times: black, red and blue; a bit of diamond stickles  was applied here and there.

 these are the fireworks: 2 at each end of the banner.

and here we have a pretty 5 sections banner ready to be used on the 4th of july celebrations.

this banner will be for sale on my etsy shop.

(these banners looks so easy to make but they are so time consuming, right?
but i think they are worth it tough). 

(you can click on the pics for a bigger view)

thanks for stopping by.

Friday, February 21, 2014

ALWAYS N' FOREVER....a framed card

hello fellow crafters,
hope you all are doing well.
i am fighting a cold that hubby gave me, grrr!
 but before i got sick i had made this cute framed card i will be placing in my family room along with some other goodies i make and like to display.

i am still using the 'love you more' collection from elle's studio. i am in love with the bits and pieces and labels and tags and wanted to play some more. 

Always n' Forever
3.75" x 4.75"

the background patterned paper is called 'hugs' from the same love you more collection i have been using.

got enough distressing yet?
hehe
it seems that stitching and distressing are my 'to go' techniques lately :D


-the labels/tags here are from the bits and pieces pack-
and the 'my favorite' yellow one is from the journal tags below

----

 i cut a small easel from a tim holtz metal die cut for the back. this way i can display it and if i want to send it to someone i can easily fold the back.

here is the entire card/frame.

hope it inspires you somehow.

the 'love you more' elle's studio collection can be found at nani ke ola's scrapbooking.

thanks for stopping by.


Sunday, January 12, 2014

SO SWEET...using 7 dots studio

hello and welcome.
yay!...we are back at nani ke ola for a glorious 2014.
this card i made uses the Love is in the Air collection from 7 Dots Studio.
i hope you enjoy it.
So Sweet
BY FLOWERDISCO FOR NANI KE OLA UISNG 7 DOTS STUDIO (6)
i chose to distress and sew on my pretty patterned papers to make this So Sweet Card.
i am loving the watercolor/mixed media  look this collection showcases and that i did not use traditional colors for this valentine's themed card.
BY FLOWERDISCO FOR NANI KE OLA UISNG 7 DOTS STUDIO (2)
the paper i used for the base is called "rising of the sun" and the green one is called "whisper of the tree". i cut two pieces (one was cut at 3x6 and the other one was cut at 2.75x5.75").
BY FLOWERDISCO FOR NANI KE OLA UISNG 7 DOTS STUDIO (3)i
i added a strip of paper to the right from the back of the whisper of the tree (the patterned papers are double sided)  and i cut the bottom into an upside down "V" for a banner looking element.
i also added the sentiment from their 12x12 elements sheet.
the heart is from my stash (die cut) and the ink used to chalk the edges is from "powder puff".
i even added (stitched) a piece of paper to the inside to write a love note to my hubby.
BY FLOWERDISCO FOR NANI KE OLA UISNG 7 DOTS STUDIO (5)
i hope you enjoyed my project for today.
BY FLOWERDISCO FOR NANI KE OLA UISNG 7 DOTS STUDIO (1)
all the supplies are linked for your convenience.

Saturday, December 21, 2013

MERRY CHRISTMAS

hello all,
and happy holidays.
i want to wish you a very happy and healthy christmas and a fabulous and happy new year.
today is my turn to bring you some inspiration using some of the  fabulous little pretty studiogoodies i have and since it was love at first sight, i had no problems getting in the creative mood with this collection.
 my last card was whimsical and super cute with that so very pretty reindeer and the bright colors. for this project i chose to  take a nostalgic vintage turn. let me introduce you to:
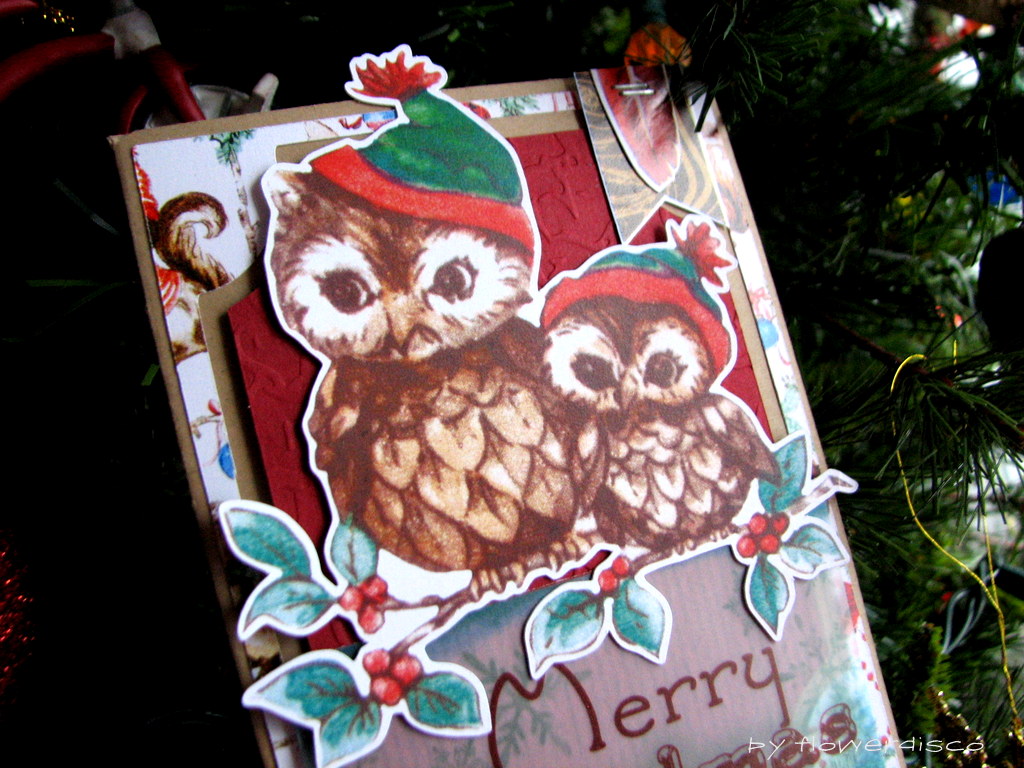
Merry Christmas
BY FLOWERDISCO FOR NANI KE OLA (5)
 -lovely vintage owls here-
BY FLOWERDISCO FOR NANI KE OLA (4)
-some embossing on the red cardstcok and a banner and a feather attached with some tiny staples-
BY FLOWERDISCO FOR NANI KE OLA (2)
the base for my card was made using my cricut and the sentiment is piece of vellum from quick quotes. the color and translucency of it was a perfect match for my owls.
BY FLOWERDISCO FOR NANI KE OLA (1)
- i believe i achieved the vintage woody look side of this collection-
i am so very happy with it all and very happy with its versatility and quality.
if you want to see the entire collection it can be found here.
see you next time and thank you so very much for stopping by.
hugs,