Monday, December 4, 2017

IT'S BEEN A WHILE...

Hello all-
As we all know life keeps us busy.
Because all is good we are dealing with other health issues I don't care to discuss right now but is the reason why it took me a while to craft and post.

However, I am sharing with you today my 2017 Christmas Cards.
My inspiration was taken from Pinterest but I couldn't recreate the beauty of the original not that I ever want to. This is my take on it.

Christmas Cards
2017
4" Round Card
I used more than a few die cuts and took me a while to cut and build the prototype.

-Let's start with the Cricut images-
The circle base is from the Cricut cartridge 'Wild Card', Cricut Access #m2fa54.
The circles are from the 'Shapes' feature in Design Space. Cut at 4" and 3-3/4" also to get the ring around.

The candles are from the 'Christmas' cart, Cricut Access #m40ade.
Some of the foliage (green in this card) is from 'Storybook', Cricut Access #m34132 and the banner strips are from 'Bits and Pieces', Cricut Access #mfb1ff.

The font is called 'Wildflower'. I didn't know about it but it showed up in the fonts area and I was able to use it. I am assuming
it is a Free font or was Free at the time I used it.
I liked it very much and it wrote beautifully.

-The rest of the die cuts-
Cottage Cutz: wreath, tiny bow, and the neck applique.
Impression Obsession: the tiny red flowers (reminded me of poinsettias).
Martha Stewart paper punch: the red branch up on top.
Ek Success paper punch: the star on the foliage.

The embossing was done with a Tim Holtz embossing folder called 'Collage and Notebook'.
The sentiment is from Joy Clair stamps and it was embossed using a gold embossing powder, which it went array as I can see in the pics but not in real life, :). Oh well!

For those who are interested...here is the link for my inspiration. It takes you to the post itself.
As I mentioned before, I found it on Pinterest first.
-Absolutely Gorgeous- in my opinion, that is.
Hope you enjoy it and this blogger won't take offense I linked her project.

Before I finish here I am taking the moment to wish you all:
 'Happy Holidays', 'Merry Christmas' and or 'Happy Hannukah'
Better do it now in case life continues to surprise me and I can't come back for a bit.
*-*'

Take care you all!


Tuesday, November 14, 2017

TOY SOLDIER FOR THE HOLIDAYS!!

Hello you!!!

These Toy Soldiers I made with a Tim Holtz Sizzix die. 
So cute!

The pictures show the first out of 12 soldiers but couldn't resist to share them in case you want to make your own.

Toy Soldiers
-Set of 12-
The glittered cardstock is from Core-dinations and the boots are made of these glossy black cardstock I had for a while. I am sorry I can't remember who is the manufacturer.

This die does not come with the yellow dot for the hat but I thought it looks better if I added it, so I punched some with a paper punch and that is what I got. :)

I know you can't see it but I covered the plume and gloves with some shimmer. I used a shimmer pen, similar to the Wink of Stella, from the brand Art. They also have different colors but I bought the clear one to compare. I have to say I think I like it a bit more than the Wink of Stella. In case you want to try them, I purchased mine at ACM and of course, I used a coupon.

Hope you like the soldiers!!

Have a great day!

(all contents copyrighted)

Monday, October 30, 2017

PILGRIM HATS TAGS

Hello all,
Just a quick post sharing some tags I made for Thanksgiving. 
Super easy and super cute!

Pilgrim Tags
They are from the Cricut Autumn Celebrations cart.
-Please, do not mind the watermark, :)-
Until next time!!

blogged by flowerdisco
from 
flowerdiscosscraphut

(all contents copyrighted)

Saturday, October 28, 2017

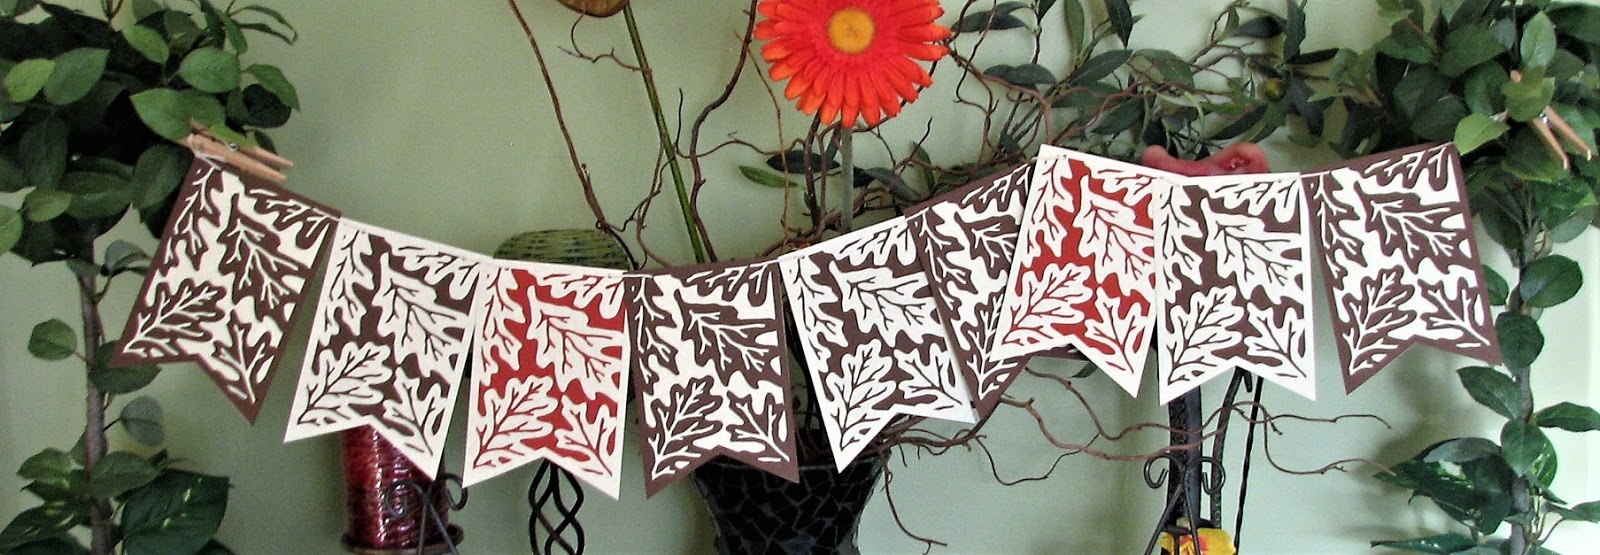
AN OAK LEAVES BANNER!!

Hello all,


Simplicity at its best!! 

What do you think?
 I have listed this banner as a RAK on my Etsy shop and thought to share it with you here in case you want to make your own.

I used the Cricut cartridge Pretty Pennants and each section was cut at 4" x 6"tall.

Have a great weekend!!


(all contents copyrighted)


Thursday, October 26, 2017

DAY OF THE DEAD OR DIA DE LOS MUERTOS

Hello all,
I am back and what a better time to be back than close to the "Day of the Dead" or for us Hispanics, el "Dia de los Muertos", since I thought I was not going to make it, lol.
As you can see I haven't lost my sense of humor.

Today I feel comfortable enough to share with you some of what has been going on in my household...

I had a Pipeline Embolization to address a brain aneurysm I have had for many years but never grew or moved until the beginning of this year. When they did the routine tests, it just didn't show it grew considerably, but they found 2 more in the carotid artery: one on the left and one on the side and the one in the brain is sharing my left ophthalmic artery with the risk of losing my vision in that eye. The neurologist didn't want to waste any time but it took a while for me to feel comfortable with a doctor to get this procedure done. I found a great doctor at the University of Philadelphia but having my husband very sick I had to look for someone close to our home. It took me a little longer to get another awesome doctor but I did. Dr. Patel did an excellent job placing the pipeline and despite we won't know for sure if the procedure will completely block the aneurysm blood supply, he was able to position this pipeline exactly where it needed to be with no damage to anything else or any disability as a result of this less invasive procedure. Now, we will have to wait a few more months (6-8 months) to go for another test and see if this aneurysm is dying or not. But, I haven't lost any vision or had any strokes or any have any kind of disability associated with it yet. In the meantime, I am on blood thinners, (black and blues everywhere), I have to take a 325mg aspirin for the rest of my life and watching every day for the risk of clotting. But God is great and my Dr. Neil V. Patel is great and with both of them on my side, I am very hopeful looking forward to all that is there to enjoy.

Prior to my discovery, my husband had been diagnosed with cardiomyopathy (July of 2016) with an ejection fraction of 10%, it has been a battle but last month's test showed an improvement and now he has a 25% EF and looking forward to increasing that number. He is and has been in good spirits and has been getting great care from another great doctor. Despite his condition, he is feeling much better and we keep praising our Lord forever.

But......... we lost the LULU, two weeks after the husband was diagnosed. Lulu suffered from a collapsed trachea and on July 27th of 2016, she passed away.  She died in my arms. We had taken her to the hospital after an awful coughing spell. She was being treated for her collapsed trachea condition but the doctors gave us not a good prognosis and even kind of suggested there was nothing else they could do but keep her comfortable. We took her home with some medication but she wouldn't stop coughing and we decided to take her back and just as I was getting out of the front door, she died. She has been gone for over a year now and we still miss her so much our hearts ache every day.
God works in mysterious ways, I have to say that, nonetheless that pain of not having her around still with us.

Now you know why it took me so long to get my bearings together...
Thank you so much to all of you who kept me going during this rough time. You know who you are. No need to mention names. I love you all!!

and...back to today's post.

-Here are a few skulls I want to share with you-

Dia de los Muertos Skulls


Super cute! 
They are from the Cricut Cartridges Ole and Rock Princess.

See you next time!


(copyrighted)

Friday, May 12, 2017

THANKS

Better late than never, right?
This is a card I just sent out to Cut Cardstock owner Cindy. I hope she knows how grateful I am for all her generosity while doing my term for her Cut Cardstock Design Team.

Thanks
A bit of info about the card:
But, I can't remember the size, hehe. Mind is truly gone. I do know I used Curious Metallic for the flowers and leaves: Super Gold, Violette, Mandarin and Botanic. Super pretty and thick cardstock. The flowers and leaves were cut using a Sizzix Thinlit die from Jen Long (660367) and the sentiment (thanks) is from Paper Smooches (J2D056). I used the 130# Classic Crest Recycled for the card base.
In case you like the patterned paper used: Memorandum from Pink Paisley.

I love it and I hope I can express my gratitude with this lovely handmade with love card.
I also hope you like it too and inspire you maybe for a Mother's Day Card.
Talking about Mother's Day I wish you have a perfect day with your loved ones.

Thanks for stopping by.

blogged by flowerdisco
 from
 flowerdiscosscraphut

Saturday, May 6, 2017

PAPER SMOOCHES!!

I had entered a Paper Smooches giveaway (you know how much I like their dies because all they need is one pass through your manual die cutter, and I just love that plus their prices are so very affordable) and I won. Yay for me!!

It indeed brightens my day. Kim is so sweet and she kept in touch. She even emailed me from her honeymoon to apologize for a bit of delay in shipping. Who does that anymore? and from her honeymoon, WOW! this kind of gestures is what really shows what we are made of, right? I was truly appreciative and I have to give high kuddos to this girl.
Thank you, Miss Kim, you are such a sweetheart!!!

Anyways, here is what I picked because I love their font and this way I have all the letters handy for my projects.

Alphawhimsy
FBD001


Well, I can't wait to start blogging for good again. 
I have a procedure scheduled for May 9th and it will be the beginning of a few more but I am still around and still loving paper. So...counting on God who has kept me sane and strong while on this journey, I will be back. 

Hang in there my friends and Thank you so very much to all who have kept in touch. 
I love you all.


Friday, February 24, 2017

WEDDING "BOWS"

Welcome to the Cut Cardstock blog! 
Today is about weddings and I have made a super simple square box with a scalloped edge lid, a few rectangles to use them as cards/tags to display the bow pins and a few rosettes just for decoration.

I chose the Classic Linen cardstock as my main cardstock. I like the texture and I like its weight. It was perfect to hold and display the small guests "mementos".
I also chose the lovely Gold Glitter cardstock to complement the Linen cardstock. 

The box and lid are from a Cricut cartridge called "Sweet Tooth Boxes". I cut the box at 4 inches and it is a square box.
The heart border is from Ribbons and Rosettes. The hearts are super tiny but cut amazingly well on the Gold Glitter cardstock.  I used the double-sided score tape to assemble the box and lid.


The bows are from a digital shop but Cricut has many to choose from. 
I added a thin rectangular gold strip around the heart cards to continue the gold and white color combination.
I used a glue gun to attach the pin to the back of the bows and a piece of square foam tab to adhere it to the card, as seen below. 
A small white pearl was then added to the center.

A few more pics of how this small ensemble is coming together.

The rosettes were made with one-inch strips of the Classic Linen cardstock and scored at every 1/4 of an inch. 
A gold heart was added to the center.
All Done!
A Svery pretty and simple ensemble for any event, in this case, a wedding. 

Hope this project helps as an inspiration to you all.

Take care!
and a huge thank you for all your love and likes.

Enjoy the new team!


Cut Cardstock Supplies Used in this project: 

Classic Linen Solar White Card StockGold Glitter Card StockScor-Tape for paper crafting3-D Foam sticker adhesives


Friday, February 10, 2017

I AM NOT WEIRD...

This quote makes me laugh and I wanted to have it around the house. I chose to work with the 130# Classic Crest Recycled cover cardstock because its thickness, great for a sturdy base, the burgundy 80# Royal Sundance Linen cardstock  (the color is a beautiful dark red wine) and the 54# Gold Glitter to add some sparkle to this so cute quote.

The size is a 8 x 10. I cut the base first, then some thin frames to mount around the base.  I used score-tape to attach them to the base and then cut the words using my die cutter machine but...I first cut them on scrap paper, to use the negative as my positioning tool. After I made sure it was properly centered, I proceeded to add the letters to the base.  

Then I thought it needed some "bling" so, I got my beloved Gold Glitter cardstock, die cut another thin frame and heart and I was very pleased with this add-on. I also die cut an easel from the Classic Crest cardstock because I wanted to place it on a flat surface instead of on the wall.

Cute, huh? plus it puts a smile on anyone's face.
Hope you are grinning too.

Thanks so much for stopping by!


Monday, January 30, 2017

THE SHAKER

Hello all, today's project was "tweaked" a bit from a Pinterest project I saw where you make a bag/pouch or purse in my case using an envelope. I do have to apologize because I didn't save the pin but browsing around I found something similar here. The tweaking part comes in when instead snipping off one of the envelope sides, you snip off the top when in landscape view instead.


Ok, let me explain: take an envelope, close it shut with a strong adhesive, be a tape runner, sticky tape or score tape as I used on mine and, snip off about 1/8th of an inch from the wider side of that envelope. The envelope should be in a normal regular common position which would normally be on landscape view.

The next step is to open the envelope (minding the score lines) while forming a flat base as on left figure; next fold in the bottom triangular flaps and add strong adhesive on flaps to close shut, as on figure 2. The sides are folded along the score lines to gusset the inside if needed.


It should look something like the above pics. And there it is, so very simple!
I love making simple projects because they are so handy when in a hurry.


Time to decorate: Above are the embellishments I used to decorate the bag or purse (as I called it) when I decided to turn the envelope bag into a purse. A Shaker Purse, that is.
The pretty zig zag or commonly named chevron paper will be the background. It is from the same "Crush" 6 x 6 pack I used on my last project. For the frame and hearts, I used this red glitter cardstock (it won't leave glitter all over). The hearts will be the shaker pieces along with some red sequins. Because I needed the hearts be double sided, I just punched a few more hearts and used them as the backing for the previously punched hearts. the handle was made with thin wire covered with ribbon.

A few more pics from different angles.
and the "Shaker Purse" below.
Adorable!

And you can fill it with whatever treats you want. I was thinking a long handle would have been nice too and let a little girl use it to hold her candy to share.

Thanks a bunch for stopping by today and,
 I hope you find this Shaker Purse worth the try. 

Most of the supplies used are linked, including the must haves: glitter cardstock and the envelopes which are size A7 and the color is a beautiful brownish color called Rubbed Sage. Also very good looking and they have the cardstock too. 

(copyrighted)


Cut Cardstock Supplies used in this project:
Rubbed Sage (taupe)Red Glitter Card StockValentine 6x6 card stock paperFoam adhesive strips double sidedScor-Tape for paper craftingBlack

Monday, January 16, 2017

TRUE LOVE NOTES ENVELOPE POCKETS

Hello all

My post for today is about making some Love Notes for Valentine's Day. I am using A7 Brown Bag envelopes and the Cricut Design Space Print and Cut feature (PNC) for my project, among a few other supplies. I don't know about you but I normally forget about the PNC awesome feature of the software.

I started by choosing some images from the Cricut Access Library, I sized them according to my needs and also tweaked the colors a bit. Then, I click on each image layer to change the "cut" icon to the "print" icon. Please, if there is an easier way of doing this, let me know in the comments. I would love to learn a better way. Another "good to know" is you can also customize the colors and add or subtract layers. I bet you already know that, right? :)

To make sure my images will fit in the allowable printed area for Chrome (the browser I am using at the moment), I added a rectangle measuring 5.5" x 8", which is Chrome's printable area for Design Space, and positioned all images within this "printable area" to make sure all images would fit prior to print. I then hid the rectangle, selected all images and attached them, prior to click "go".

This is how I made the pockets:
First, I used two envelopes for the big pockets where I planned to put in the Love Notes. I folded the flap inside envelope #1 using liquid glue to secure it- see pic on the top left.  For envelope #2 the glue was added to the back of the flap, before inserting it inside envelope #1 and seen on top right pic. Make sure you do not bother the score line for proper closure. 
The bottom two pics show how they look on the inside and on the outside (back of envelopes).
It is a really easy process. I have seen crafters adding many more envelopes for albums and other projects.

I used some patterned paper I had available to cover the envelopes and I had decided to distress them a bit for a rugged look (thinking these love notes were read over and over again, :)). I also embellished the front with some of the die cuts I printed out, a piece of embossed vellum and a few sequins. The second pic shows the pockets that the two envelopes made.

These are the Love Notes and each one has its own pocket which was also made using the same envelopes. This time I just glued the flaps and cut envelope in half. After covering them with patterned paper, I used a circle punch to make a small half moon to make it easier to take the Love Notes out. All of them were embellished with the images made with the Print and Cut feature.

-Below are some more pics of the finished Love Notes and Envelope Pockets-


Hope you enjoyed today's project and have fun making some Love Notes Pockets for your loved one or for your kids to take to school.
And...Do not forget Cut Cardstock is having a Design Team Call. You can check the details here. I believe January 31st is the deadline to submit your application. 
Great company, Great cardstock! 

Have a great day!


Cut Cardstock Supplies Used:
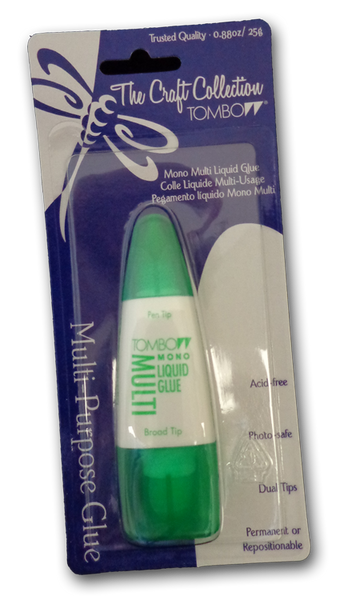
Brown Bag Kraft A7 Bag flap envelopesValentine 6x6 card stock paperMono Multi-Purpose Liquid GlueClear Translucent Vellum Inkjet Card Stock