Showing posts with label C- LIFE'S A PARTY. Show all posts

Friday, July 22, 2016

THEY WILL BE TREATED- a set of mini favor boxes for the kids and not

Hello all, 
As I slowly continue to get my family get together tasks done I finally get to share with you the treat boxes I decided to make for the kids to take home afterwards.
I still have to buy the favors but I couldn't wait to share the boxes. They are turning out fabulous if you ask me and I am so happy I used the Gold Glitter cardstock again and was able to try the awesome silver Bright Foil too. They are giving my boxes such an elegant and glamorous touch it's almost a sin giving them to the kids, lol.
They both cut perfectly, I have to add. The phrases and stars were cut very small and I had no problems with either one. The rest of the colored cardstocks I used are a mix of Basis and Pop Tones, also from Cut Cardstock.

I used the Tags, Bags, Boxes and More 2 Cricut cartridge and cut the boxes at 7-3/4" wide and after assembled, they come out to be around 2" squared by 1-1/4" tall, not counting the small handle. Perfect for some small treats for them.
You can also find these boxes in the Cricut Access Digital Library, M3C751 is the ID#. The embellishments are from Life's a Party (out of this world, shooting star) and the Party word is from Cricut Font and Basic Shapes.
The first pic to the left is the Cricut Design Space virtual mat showing the box flat prior to cutting and you will notice how easy they will be to score and assemble. The second pic shows a mark where you need to add the adhesive and the third pic shows after the flap is closed. You can also see the pretty fold it makes on one side of the box.
(The blue permanent runner adhesive tape works very well and the store carries the green version).

A few pics to show some of the embellishments: the out of this World was cut at .81" in high, yeap, that small and look how nice it looks, the Party word was cut at .53" tall, wow! and the shooting star at 1.15".

I also cut the boxes in the gold glitter cardstock and the silver (Bright Foil) cardstock. Did I mention how nice these cut in the cricut? The glitter one I had used in my last project and I knew already how it cuts but not the silver one. Well, it is as great as the glitter one. Loove them both and you will too. The Bright Foil is almost like stainless steel. Awesome finish!
They are both on sale this week, if interested.

This is the end of my monthly projects for Cut Cardstock.
I hope you enjoyed my mini series. You can check part one here (masks).
If any questions arise, please do not hesitate to contact any of us.

Thanks so much for stopping by and I'll see you next month.

blogged by flowerdisco 
(copyrighted)

Note: My apologies for such an almost non-existent tutorial, but life has been a bit hectic at home lately. 


Cut Cardstock Supplies used:
Pop-Tone Discount Card StockGold Glitter Card StockBRIGHT FOIL SILVER

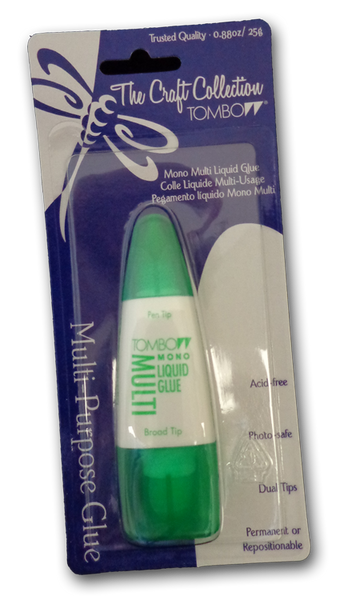
BASIS paper 8.5 x 11 scrapbook glueMono Multi-Purpose Liquid Glue


Sunday, May 5, 2013

WELCOME TO MY FIRST POST FOR THE CUTTING CAFE

hello all,
so happy to show you the rest of my sneak peek of my first project for my new team.
i am sure you know regina easter. she was the owner of the original bitten by the bug blog where she had another fabulous team creating projects using the cricut. when she closed it down she started working with her own digital images and opened 
i was on the bitten by the bug2 team with heather, who came after the first was closed down. i had so much fun there too but i was dealing with lots of life stuff at the time and couldn't stayed for long.
anyway, that is a little of a background for you to know why i am so happy i am working with regina's files.
i always admired her work and i am so happy and proud to finally made it to her team. a bit apprehensive but i think is normal. you will be too if you see what these talented ladies in her team are all about.

i chose an oldie file for my project.
there are so many i would have loved to work with but i had to choose one and i chose the
 summer fun
my card is a round card
enough of the sneak peek, right? hehe
--i stamped the background waves with a so old wooden stamp from plaid i believe i could call it vintage right now--


the umbrella, the sandals, the beach bum sign and the starfish are included in the bundle. these are not the only images in this set, there are many more. actually, they are 33 images in this printable stamp set.
here is the link to the summer set and i warn you,
you will be amazed at all the gorgeous files regina has in her shop. and you will drool when you see all the inspiration offered. oh my, i can't hardly contain my excitement.

now, a bit about my card
the base for my card was done with the cricut cart called life's a party. i punched the two holes on the left with the cropadile to insert the pretty ribbon i found in my stash.  i made that cute bow with the help of a fork. i colored my images with the spectrum noirs alcohol markers. i am still avoiding the shading, lol.

NOTE: for some of you who are not familiar with regina's blog, anyone who comments is automatically enter to win some digital stamps from her shop. yeap, that is right, you heard well...a chance to win some free digis if you comment on her blog. you can also subscribe to her newsletter so you do not miss any news.


and this is it for now.

thanks you so very much for stopping by.
xoxo


Monday, October 10, 2011

YIKES!---A BITTEN BY THE BUG CHALLENGE

as a newbie for this
 

Bitten by the Bug team,
i was very surprised they gave me the opportunity to host this weeks challenge. i had to pick an image for the challenge and i chose the vulture from life's a party, page #28. i hope you like the image and if you do not have this cartridge you know you can use another "cute" bird as long as is as handsome as this one, lol.

Yikes!
3.5" x 5.5"
so handsome, he even lost an eye in a battle.
life's a party is another wonderful cricut catridge. you can find this awesome vulture on page@28 of the handbook and it is image #8 on the overlay. i cut him at 2.50" high.

you know i have been onto layering for thickness. i cut several layers and glue them together for thickness. i hope you can see it better on these two pictures. the bat is from another punch and glossy accents was added for details.

the card base is from from the same cart: image #18 on the overlay. the black frame around the embossed red cardstock i made it inserting a smaller layer inside the original, do i make sense? i hope i do :P

the grayish marbled base was a gray cardstock i inked to make it look like a marbled tombstone :-) the RIP is from happy hauntings (image #30 of the overlay) and the bottom flourish is the negative from the card layer. i tweak things around and not everything is "by the book".

the nice brick embossing is from a tim holtz embossing folder called "bricked". look at the details. it is a must have!
*****i will have one embossing bricked folder for a lucky winner who participates in this challenge. you have to let me know you entered the challenge at Bitten by the Bug 2. i will go and look at it and next monday i will  post the person who won. you have 3 days to claim your prize.*****
---
now, i will show you the completed card.
------you can always click on the pictures for a greater view------

 the inside was stamped with a my pink stamper stamp set called spooky puns. it is a set from last year. i purchased it this year so they still have it. you can click here to see what other stamps are in this set.

thank you so much for stopping by and i appreciate you participating in this week challenge.

you can click here to read about the BBTB challenge rules.

see you later!


Monday, August 15, 2011

BOSTON RED SOX CARD

HELLO
this is my third project for the 
Design Team

  this week we had to work with the
-Life is a Party-
cricut cartridge
and use the baseball from page #37. the baseball is image #17,
you will find this baseball using shift and the layer creative feature.

below is my take on this challenge.

Boston Red Sox Card
3.75"


my husband is a huge Red Sox fan. our family room is his domain and you will find all kind of Red Sox items and in the bathroom a Red Sox toilet seat--hehe-- yeah! you heard right. :)
anyway, i am giving him this card to honor his love for the team.

the letters are from Storybook cricut cartridge and they were cut at .75". the heart is from Beyond Birthdays. the socks are actually stockings from Christmas Cheer, that i manipulated by hand to make them look like socks. the white on them was done by hand too. 
the stitches on the ball are the negative because i want them on top of the red.

this is the inside.  
i used two of the My Pink Stamper stamps:
Sport-tastic for the "Home Run" and the new Font-abulous one for the dots around it....and..... it is not dirty by accident, i had to make it look as it had been played with, lol. imagine is dirt from Fenway--wink.

if you click on My Pink Stamper it will take you where the stamp sets are.... and if you click the BBTB2 logo, it will take you to the site where you can see where my teammates have made with this image and you can also play along with us and make one of your own and link it to the BBTB2 site.

 i am so happy you decided to stop by and i certainly hope you decide to
"have a ball".
;p
Love you