Showing posts with label GIFT CARD HOLDERS. Show all posts

Saturday, May 9, 2015

A "HOW TO" TUTORIAL OF A HINGED GIFT CARD BOX

happy mother's day to all parents.
wishing you a fabulous day/weekend!

-this is just a sneak peek-
of a sweet and short slideshow tutorial

on the how to make this box

can be found at the 

thanks for stopping by and have fun!


Thursday, April 16, 2015

THE CHECKBOOK THAT IS NOT

excuse the non- spring colors but i had the itch to use these old collection from teresa collins: far & away.
 i do not know why but i am very attracted to traveling papers and stuff, especially if they are vintage looking not that this one is specifically vintage looking, lol.

let's start with
"Favorite Voyage"
is the name of my project.
(did not intend to rhyme, lol)

(the checkbook that is not, but it can be and also it can be a mini album, a gift card, money holder, photo holder, tickets, passports... and anything else you want it to be.)
i cut this one at
6-1/2" wide x 3" tall

anyway, i grabbed a checkbook svg from the digiplayground designed by miss samantha walker, that i have been meaning to make to keep in my purse for all the bb&b coupons and lists i have in this ugly and torn envelope that needed to be replaced like ten years ago. another mouthful, huh?
(just kidding on the 10 yrs)

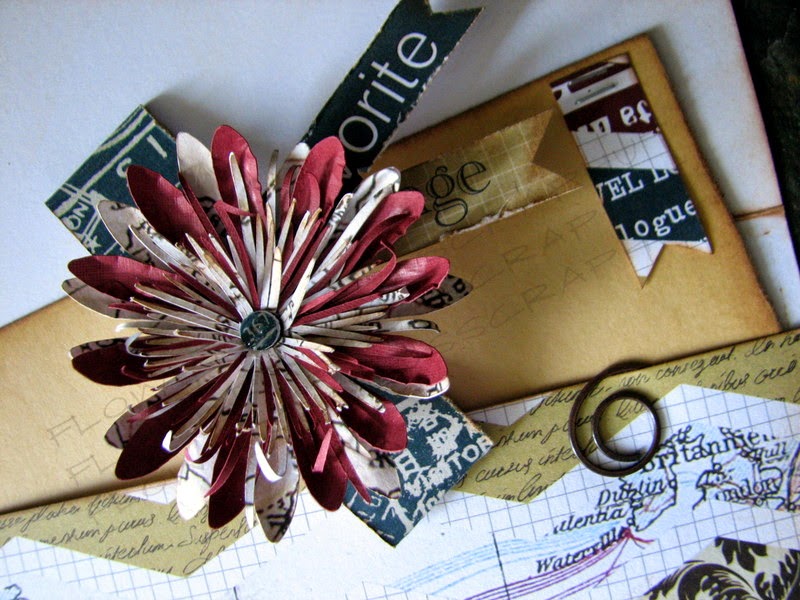
the pic below shows the inside, the closure band with the flower, the old vintage wanna be antiqued cardstock, the small banner that is attached with the tiny stapler and the curly metal embellishment clip i had in my stash forever. hehe.
  i added two more hand cut banner strips that read "favorite voyage" to add to the flower. they are also from the same tc collection.

now about the flower.
i also grabbed it at the digiplayground and is called "bractless mentzelia"
what a beautiful flower. it is supposed to look like this:

and like this in real life:
(photo courtesy of dave's garden)


i made mine with a totally different look which i think is really pretty too.
(i bought the susan's garden flower tool kit not too long ago and i really love two of the tools and the foam mats).

i used some of susan's tools to shape miss jamie cripps bractless mentzelia svg flower below. you can also use a big ball stylus which i happened to have too from another set or anything else you have on hand to shape any paper flower and or leaves.


i added a bit of glossy accents to the center of the flower
(hardly noticeable but is there)


last pics for you to take a closer look to the edges of the petals, how they shaped,
so cute. that was done with one of the tools i liked the most from the kit.
also, a look of the front flap.

of course i inked all the cardstock edges and distressed some.

what do you think? do you like it?

both projects were really easy to make and of course i used my cricut design space software along with my cricut explore die cutting machine for the making of this project but they are available in other formats for other die cutters.

so easy to make!

hope you enjoyed my post for today and as always
thanks for stopping by.

have a great weekend!

Monday, September 23, 2013

YOU EQUAL AWESOME...made with a brown paper bag

happy fall to you all
the weather in my area has been beautiful, cool and crispy. i hope you are enjoying it too.

today's post for artful delight was inspired by a pin from pinterest. i will show it at the end of the post.


You = Awesome
Me = Grateful
using a small brown paper bag 
(all supplies minus the paper bag are founded in the artful delight september card kit)
 
folding the bag in certain way to have a pocket where you can insert a note, money, tickets or whatever you would like. i stitched the two patterned papers with my sewing machine onto the bag, hard to see because of the edges being distressed.

i cut strips of the brown panel paper into strips to add some of the sentiments from the paper smooches stamp set called many thanks ALSO included in the september card kit, and tuck them inside the pouch. i made the semi circle on the patterned paper with a circle punch to match the one already in the paper bag. i added it the rounded fleur d lis paper clip just because to me it was the perfect spot :D.
i wrapped it all in jute and also added one of the small arrow chipboard on the center of the bow.

more arrow chipboards where added pointing to the chipboard cloud where i stamped another sentiment from the paper smooches stamp set.
this project has many uses....just use your imagination, :D

if you would like to join us in this month's challenge, please click here. you will also find more projects there made with our september kits (scrapbooking and/or card).

hope you enjoy it.
here is my inspiration from that pin

have a great week!


Monday, June 24, 2013

A JOURNALING POCKET...using my june card kit from artful delight

hello all,
hope you all had a great weekend. 
we had beautiful weather and of course did some more yard work and also went for a ride in the country. 
awesome scenery!

today is my turn to post for artful delight.
and to make something other than a card i made this cute journaling pocket. in my mind it has various uses and i can assure you will find another purpose for it too.
so easy to make!

Joy
5" x 3"
first i want to say all the supplies are from the kit. 
the extras are my adhesive, sewing machine and thread.

i cut the super thick yellow cardstock base to a 7-1/4" x 3" and scored at 2-1/4" inches. the patterned papers were cut a 1/4" smaller.

i then adhered them with a bit of glue in the center so i can sew them without gluing my sewing needle. i did some zig zag stitching first (while the pocket was open) and then went and did a regular stitch around it to close the edges.
i used the fork method for the tiny ribbon using the red twine and added one of the second set of stick pins in the kit. i also added a journaling page in the pocket. did i already tell you i heart that heart against the polka red dots. well, i do :P

 i had to show off the floral paper in this kit too. i think is stunning and it even has some texture to it. awesome!

at the end i added that little handle on the top left just for fun and added the pretty "hi" brad . i like to leave the ends of my thread "fluttering" around. i think it gives the project a whimsical touch. 
and... this is my non card project for you today. :P

 pss!...hope you entered our monthly challenge.
 the prize for a lucky entry is a monthly kit of their choice, nice, huh? 

 this is it for today.

wish you all a great week!


Wednesday, June 12, 2013

A PUMPKIN SPICE PROJECT...mini gift cards

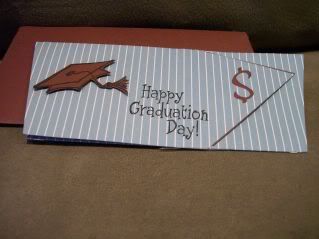
i was thinking about graduation parties and chose to make some gift tags, not just for the graduate but for any occasion. i made three of them.

Congratulations, Let's Celebrate and Sweet Friend 
3.5" x 2.5" when folded
i used my cricut expression to die cut the gift cards using a cartridge called cindy loo
(image #50 on the overlay)
i also used some patterned paper from my mind's eye, some chipboard from crate company and a sticker from dcwv.
the sentiments were stamped using clear stamps.


this is an olive green color, so sorry i couldn't captured it well but even in that color it looks awesome.
 they turned super cute and i know i will be making more of them. 

i will be submitting the one that says "CONGRATULATIONS" for this week's challenge at the pumpkin spice. 

thanks you so much for stopping by!

Saturday, January 5, 2013

A PUMPKIN SPICE BLOG HOP...a happy birthday card


hello my dear friends, 
i am happy to welcome you to our first
 blog hop of 2013.

as you might know i am one of the new ladies in the team and...i am so delighted to be part of this awesome and so very friendly group.
we had to make a project that made us think of the new year. my mother's birthday is on january 1st and that is the very first thing i think of when we are welcoming a new year.
 "Happy Birthday mami, happy birthday to you"

and because i looove making cards, this is what i made for today's hop.

Mom's Special Day
Jan. 1st
 the beautiful paper i used is from a basic gray 6x6 pad called Lucille.
i got it at the "shop pumpkin spice".
 i hand cut the flowers from another paper in the same collection. i then dusted them with some diamond dust (i am getting better at it). don't they look pretty?


 the sentiment and the card base were cut using my electronic die cutting machine: the cricut expression and i used the lyrical letters cart for the font. the brown insert strip is where i put the gift card.


and an entire view of the card here.
(remember you can click on the pics for zooming)

Now, the pumpkin spice blog will start weekly challenges this year and they will be every saturday. our hops will be the first saturday of the month. this week's challenge coincides with the theme we have going on about the new year.
click here to go to the pumpkin spice blog for more information about how to enter, requirements and prizes of our weekly fun adventure.

have lots of fun and if you want to sign for the post feed or google reader, do so . you won't regret it and you won't miss a thing. :D

thanks so much for stopping by!


blogged by:
flowerdisco from flowerdiscosscraphut


Friday, November 4, 2011

A LITTLE SOMETHING FOR YOU- GIFT/MONEY HOLDER CARD

did i tell you Lulu got sprayed by a skunk a couple of days back around 1:30AM? i did the tomato bath and i tell you,  it just masks the odor. she still smells around her neck and the laundry room is not the greatest place to be around right now, lol. today, she will get a bath with another homemade remedy i found on the net. let's see! and wish us luck :P
we all can write a book with anecdotes and it would fit between drama and comedy and some action with violence, parental control advice. perhaps, we can have our own reality tv show. :P
i bet we do, right?

anyway, here is a card i made

a little something for you
5 inch
(no skunk involved, i promise)
just a gift/money holder card
--LOL--
 the santa's hat is from winter woodland cricut cartridge and the cute sentiment from my pink stamper set called: winter treats & sayings.
 (the inspiration came from here)

the star brad acts as a hinge and connects the front and back.

when you cut the hat it already gives you a slit---the dollar sign is to show you where the gift card or money will go: is from the wild card cart. i added some green stickles for the bling in money...hehe

i cut this hat 4 times: 3 times in the red patterned paper and one time on the beige color. the fuzzy thread was added with double sided tape.

 this circle was added to hide the brad prongs.

 envelope made using the new arrival cart. 
the "from and to" are also from a my pink stamper clear stamp set.

 we are going to need lots of these gift card/money holders for the upcoming holidays. 
i wanted to share this one idea and how you can make it your own,  from many others in the web.

have a great one!


Wednesday, January 19, 2011

HAPPY EVERYTHING


and an mps blog hop and health update.
---
i went yesterday to the reuma doctor for the first time and she was very nice. she will be examining some tests i have had done, but all it seems to point out to a bad flare up of my condition. i am back on one of my old medicine. i thought that medicine was not really working, but she says none of them will take completely my pain away--mo magic wand here either. :(  it is not the first time i hear that. 
 this is a condition i have to live with for the rest of my life and it will flare up for the rest on my life too. i have to go for a blood test for lupus. i never had that test done tough, let's see.  i have had every other therapy, massages, injections, rx that has shred my stomach and more... and nothing really works. oh well...put my 
"big girl smile on again", and keep forward. that is all i can do :)
i feel much better and last night i was able to sleep the whole night. i still have my son's cold and now my lower back pain has moved to my middle back, but i should be back to "normal" soon.
---
 my mps blog hop winner will be announced sometime tomorrow th, jan. 20.

---
now onto a card i made the other day with a new set of clears stamp from my pink stamper, robyn.

Happy Everything
5 x 4
I needed to think happy these days and this sent
image got my mind in gear.:P
made with kraft cardstock and K&Co embellishments.
i really liked how clean the sentiment came out. i used a colorbox ink for it, very nice.
if you would like to see more of this Happiest Moments set,  
 where she has lots more to choose from too:)


i think it came out very pretty.

----

I also wanted to show you a pic of the ice storm we just had. if look a bit closer you can see the ice shining on top of the snow that we already had.
  this is it for now,
i will be back tomorrow with a winner for the blog hop.
hugs to all and thanks again for being there to hear me vent ;p

Tuesday, May 11, 2010

WILD CARD WITH LISA/GIFT CARD

Hello everyone...
I hope all the Mama's had a terrific day with
their loving families.
I had a big surprise...my brother and his family 
came over from Puerto Rico and spend almost two days with me.
They had a wedding to assist in Florida and they stopped here before they went down south.
I was in heaven. I haven't seen them in 5 years and they have a new addition to the family whom I got to be delighted with.
A 6 months old nephew!
The most adorable and happy baby I have ever seen.
I had a terrific Mama's day as you can see.
Priceless in my heart.

Well, now onto the series.

Today we have the Gift Card from page #70 and #39 in our series.

My Gift Card
5 inches


 This card you can cut on a 12x12 mat up to 7-1/4inches they say.

I was a bit at lost an in a hurry making this card. I did try the Glossy Accents. I bought it since I started making cards and tried it once before but it was a mess, lol since. As you can see on the hogs and the phrase, it looks pretty cool this time :)

I used Kraft cardstock for the base and band, construction paper for the envelope and the patterned paper is from a pack I purchased at Ross a while ago.

Now, I will present you
Lisa's Gift Card
 Don't you love it,
when we have such a different approach with the same card?

To visit Lisa's Blog,
click
HERE 

I hope you enjoy the card for today, get inspired a bit and come back to visit me.
Comments are always welcome....
don't be shy and please say hello, 
xoxo


Tuesday, February 16, 2010

WILD CARD WITH LISA/ALL IN ONE

Hello friends!

Today we have the All in One card, #15 and on page #46 of the cartridge booklet.

My All in One Card

4-1/4 inches


Lisa's All in One Card
 Enjoy both cards and if you have the time go to Lisa's Blog 
and check out more of her projects.
Note: I have been working on the Cookbook when time allows and 
I think I should have it done by next week. I just wanted to update on the status of it.

Have a great Tuesday!


Sunday, December 6, 2009

Thursday, November 12, 2009

JUST FOR FUN - GIFT CARD HOLDER


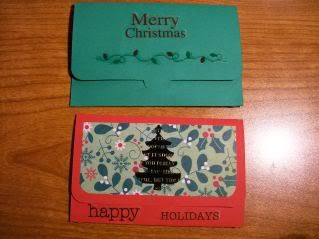
OK, I have the Gypsy and I do not know why I did not use it for this card, instead I was playing with CDS (Cricut design Studio). The Cricut cartridge I used was George and Basic Shapes: I welded a rectangle with two circles (very simple procedure here, lol) and I do not know how to share the file so, I am very sorry. You will have to play a bit with it. The punch I used for the band is from Fiskars and the paper is from K&Co, Urban Collection.
Thanks for stopping by!