Showing posts with label FAVOR BOXES. Show all posts

Friday, February 24, 2017

WEDDING "BOWS"

Welcome to the Cut Cardstock blog! 
Today is about weddings and I have made a super simple square box with a scalloped edge lid, a few rectangles to use them as cards/tags to display the bow pins and a few rosettes just for decoration.

I chose the Classic Linen cardstock as my main cardstock. I like the texture and I like its weight. It was perfect to hold and display the small guests "mementos".
I also chose the lovely Gold Glitter cardstock to complement the Linen cardstock. 

The box and lid are from a Cricut cartridge called "Sweet Tooth Boxes". I cut the box at 4 inches and it is a square box.
The heart border is from Ribbons and Rosettes. The hearts are super tiny but cut amazingly well on the Gold Glitter cardstock.  I used the double-sided score tape to assemble the box and lid.


The bows are from a digital shop but Cricut has many to choose from. 
I added a thin rectangular gold strip around the heart cards to continue the gold and white color combination.
I used a glue gun to attach the pin to the back of the bows and a piece of square foam tab to adhere it to the card, as seen below. 
A small white pearl was then added to the center.

A few more pics of how this small ensemble is coming together.

The rosettes were made with one-inch strips of the Classic Linen cardstock and scored at every 1/4 of an inch. 
A gold heart was added to the center.
All Done!
A Svery pretty and simple ensemble for any event, in this case, a wedding. 

Hope this project helps as an inspiration to you all.

Take care!
and a huge thank you for all your love and likes.

Enjoy the new team!


Cut Cardstock Supplies Used in this project: 

Classic Linen Solar White Card StockGold Glitter Card StockScor-Tape for paper crafting3-D Foam sticker adhesives


Friday, July 22, 2016

THEY WILL BE TREATED- a set of mini favor boxes for the kids and not

Hello all, 
As I slowly continue to get my family get together tasks done I finally get to share with you the treat boxes I decided to make for the kids to take home afterwards.
I still have to buy the favors but I couldn't wait to share the boxes. They are turning out fabulous if you ask me and I am so happy I used the Gold Glitter cardstock again and was able to try the awesome silver Bright Foil too. They are giving my boxes such an elegant and glamorous touch it's almost a sin giving them to the kids, lol.
They both cut perfectly, I have to add. The phrases and stars were cut very small and I had no problems with either one. The rest of the colored cardstocks I used are a mix of Basis and Pop Tones, also from Cut Cardstock.

I used the Tags, Bags, Boxes and More 2 Cricut cartridge and cut the boxes at 7-3/4" wide and after assembled, they come out to be around 2" squared by 1-1/4" tall, not counting the small handle. Perfect for some small treats for them.
You can also find these boxes in the Cricut Access Digital Library, M3C751 is the ID#. The embellishments are from Life's a Party (out of this world, shooting star) and the Party word is from Cricut Font and Basic Shapes.
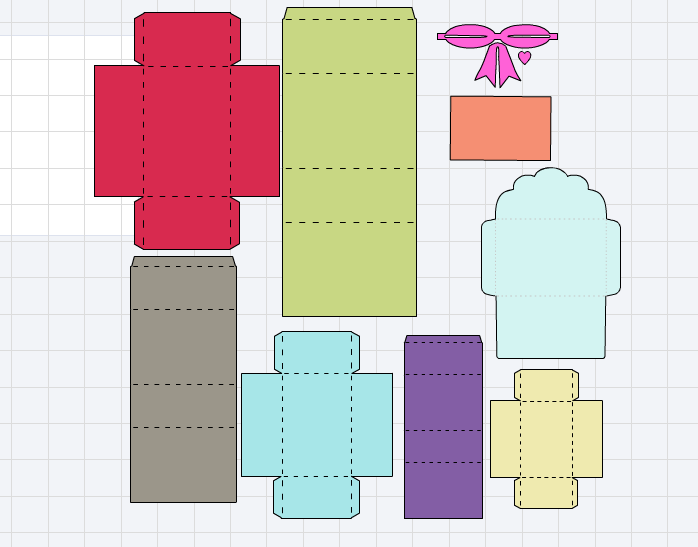
The first pic to the left is the Cricut Design Space virtual mat showing the box flat prior to cutting and you will notice how easy they will be to score and assemble. The second pic shows a mark where you need to add the adhesive and the third pic shows after the flap is closed. You can also see the pretty fold it makes on one side of the box.
(The blue permanent runner adhesive tape works very well and the store carries the green version).

A few pics to show some of the embellishments: the out of this World was cut at .81" in high, yeap, that small and look how nice it looks, the Party word was cut at .53" tall, wow! and the shooting star at 1.15".

I also cut the boxes in the gold glitter cardstock and the silver (Bright Foil) cardstock. Did I mention how nice these cut in the cricut? The glitter one I had used in my last project and I knew already how it cuts but not the silver one. Well, it is as great as the glitter one. Loove them both and you will too. The Bright Foil is almost like stainless steel. Awesome finish!
They are both on sale this week, if interested.

This is the end of my monthly projects for Cut Cardstock.
I hope you enjoyed my mini series. You can check part one here (masks).
If any questions arise, please do not hesitate to contact any of us.

Thanks so much for stopping by and I'll see you next month.

blogged by flowerdisco 
(copyrighted)

Note: My apologies for such an almost non-existent tutorial, but life has been a bit hectic at home lately. 


Cut Cardstock Supplies used:
Pop-Tone Discount Card StockGold Glitter Card StockBRIGHT FOIL SILVER

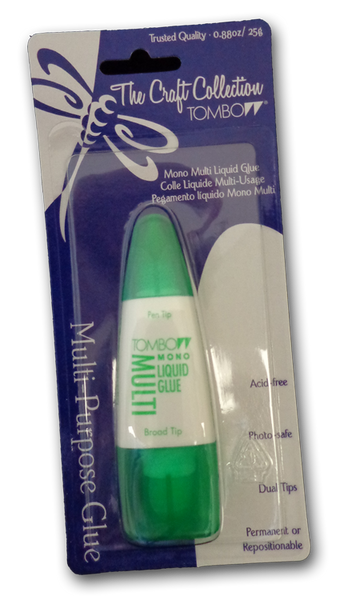
BASIS paper 8.5 x 11 scrapbook glueMono Multi-Purpose Liquid Glue


Thursday, March 3, 2016

DIMENSIONAL PAPER CRAFTING...mouse cart svg

hello all,

i want to share with you a 3d project i made with a samantha walker digital file and it turned out super adorable and i know you are going to love it.

3D
please know this is a photo heavy post. 
i wanted to capture all sides and details.
int this pic you see where i will display my mouse cart. it will stay here for a while. it looks really nice and the colors match with the background, :D


i used my cricut explore and its software to open and cut the file.
the mat i used is a 12x12 but the software will say you need a 12x24 but do not pay attention. it cuts just fine on the 12x12.
NOTE one of the canopy sections is not attached just yet but the entire cart base is. you will attach that layer later on. it makes it easier not being attached at this point.
(sorry about this pic, it was a bit cloudy when taken)


here i am showing the left side and right side of its face.
adorable, isn't it?
the patterned papers i used are from mme: away we go collection (6x6)

 these pics are showing left and right sides again.
see those diminutive parts of the bike. well, they cut perfect. 
check the size of the pedal, it is actually two to pieces, lol. 

  you won't be able to attach both parts completely but do not worry because that is how it was designed. 

i recommend a good strong adhesive and for the base a nice thick cardstock.
i added some extra details:  stamped a subtle pattern on shirt, edge of papers were inked for more definition, some wet embossing on the ice cream and on the tiny round parts on the wheels. 

like it, huh? i think they can be great for a birthday party decoration, as favors filled with candy, as a gift box and who knows what else you can think of i am not.
3D mouse-cart Box
the mouse cart has been linked to their store, if interested.

let us know if you make one, and show us too, please. we would love to see your take on it.

thanks for stopping by!


Saturday, January 16, 2016

STACKING BOXES- LOVE MINI CARDS KIT SET

hello crafters,
 a mini tutorial for a mini card kit set.
many variations can be used: candy, jewelry, love notes, love coupons...)
using
 these stacking boxes from carina gardner, 
stacking sliding boxes

this puckered bow from jamie cripps,
Set of 4 Puckered Bows

and,
the envelope from the penny slider card from samantha walker.
A2 Penny Slider Bike Card

i re-sized all elements except the stacking boxes.

i used the cricut explore and its design space software for this project.
 these svg's come in different formats for different machines and some you can even cut by hand and or print and cut.

Note: the score lines on them need to be attached. to do this, simply select the item in question, right click and click on attach. if all the images are grouped, un-group them first by right clicking and clicking un-group, then right click again and click on attach.

how i did it:

#1- all elements were cut and scored
#2- box assembly
#3- box cover/bow assembly (i used mini glue dots for the bow assembly)
#4- mini cards assembly (cards were cut at 4"wide x 3"tall and scored at 2")
#5- mini cards and mini envelope (envelopes were cut at 3.9"wide x 5.25"high and scored where applicable)
#6- cards presentation
(note: the small hearts are from a martha stewart paper punch)

#7- inside stacking boxes (hearts, twine and mini cards)
#8- finished project
#9- another view
#10- another view
Note: the mini cards front were covered with patterned paper.

and this is it:

-awesome assemble for valentine's day or an everyday thinking of you set-

any questions???
please, leave them in the comments section and one of us will get back to you asap.

thanks again for stopping by and i hope you have a great day!


Tuesday, June 16, 2015

POPPIES, POPPIES AND MORE POPPIES

just sharing...

the poppy cut is sooo pretty!


the svg files can be found here.

-you can click on the pics for a close up-

i used the cricut explore along with cricut design space for the awesome intricate cuts.
i customized the setting and used the print paper one.

enjoy!


Saturday, September 8, 2012

HALLOWEEN TREAT POCKETS...using k&co embellishments

 i am so happy i was able to share my "publication" news with you all and see you were all so happy for me too. thanks again! 

today, i will share a few treat pockets/pouches i made that you can use not just for halloween but for any occasion you need to give some goodies away. they are so simple and i am sure you have seen them around a lot. you just have to add your personal touch to them and voila!, they are good to go. 

Halloween Treat Bags
4.5" inches tall by 3" wide

hehe, i love the rat. he is from a sizzix die cute die.

all i needed was a piece cardstock cut at 7" tall by 3.25" inches wide which i folded at 2.5" to make my pouch/pocket. i cut a few other pieces of patterned paper to embellish along with some bats from a martha stewart paper punch and the 3D embellishments from k&co. so easy! and the beauty of it you can make them any size you like. you can even use fabric for the pouches if you want.

i know some of you might know to make this but others do not. i sometimes get from granted we all know how to make some things and boy, i am so wrong!
anyway, i put these up on my etsy shop, yes, yes! the one  i have been trying to get up and running again with not much success of my part (darn pain stops me from it too). anyway, i wanted to share this easy project with you all since we have some holidays coming up soon.

take care you all!


Tuesday, February 22, 2011

MPS FEBRUARY DESIGN TEAM PROJECT

hello my friends
i can't believe we had snow on sunday night :(-- i got up yesterday morning to another winter wonderland sight. it did melt fast and the roads were clear. that was nice! :)
---------

today we have our second designer team project for my pink stamper. we all know robyn and HERE is the link to her site where she will be posting all her designer projects.
this is my project and it is done with the cricut circle exclusive cart (for now--wink) 
cricut everyday.  
this is our third cartridge received as a circle member.
i used the expression without the gypsy for this project. oh, lala!! hehe
this is the first in months or maybe almost a year. since i bought the g i normally use it with my e.

 these boxes are super cute!
the sentiments are from my pink stamper clear stamp set called 

this box was cut at 8.25" and when assembled it measures approximately
2.5 inch square  (if counting the top flaps, add an inch or so)


---------------
sorry i forgot to take a pic of the middle box, the black one---oops!!!
but it was cut at 5.5 inch and when assembled it measures approximately 1.5 inch squared.

--------------


this tiny one was cut at 3 inch and when closed is around 1 inch. so tiny and adorable, ;p the little swirl is from one of the first stamp sets from robyn, when i was serving my first term with her. you can find it here, on the products section.
----------

below is another view of all the boxes again
 hope you like them too. they are a breeze to make and with so many different clear stamp sets from robyn aka my pink stamper, assure yourself  to find the right one for your boxes/projects/cards too. 
(wink-wink infomercial here, lol)

i am planning to use make the middle box as a treat box for my son's graduation :P
 in the school colors. they will be awesome.

if you have any questions about today's project or any other project, and you think i can assist you-- please-please....just shoot me an email or write it in the comments area and i will get back to you asap.

thanks for stopping by and do not forget to stop at
to see what my other team mates have made for your inspiration. these ladies are super talented and you will find tons of inspiration and ideas to play with in your crafting time.

love you all!
*_*