Showing posts with label C- MY WORLD. Show all posts

Monday, November 14, 2016

MERRY CHRISTMAS DIY HOLIDAY CARDS

Hello all, today I am showing you how I made this set of Christmas Cards.
So far I've made 6 of them and I still have a few more to go.
I used cardstock from the Basis Collection (red) and Pop Tones (green). The white is a linen cardstock called Solar White and the brown used on the deer is from a Core-dinations pack.


The card bases or frames were cut using the Fancy Frames Cricut cartridge and My World for the Christmas trees. (Please, do not mind the trees to the left, most of the time I choose die cuts I end up not using).  I cut a few bases, embossed the background, did some distressed inking and stamped some snowflakes and stamped a design on the trees.


I wanted some snow banks behind the deer and I found a cute one in the Give a Hoot cart. I spread some Tombow liquid glue with my fingers on the surface (I should have used a cheapy brush) and then covered with Diamond Dust. 
The deer I die cut with a Cottage Cutz die. 


I glued the tree to the background using Tombow again and added some sequins too. I added the snow bank and the deer and then I decided to cut some acetate and use it as windows for some of the cards. The green card above is one of them. To attach the acetate I chose score tape.


 I do not know which one I like the most. I think they both came out very nice.
(This red one has no acetate on the front).
The greeting is from a Joy Clair stamp and its digital die. 


A few more pics.


And, that is all for today. 
I hope you were able to get some ideas for your holiday cards and or decorations.

Thanks so much for stopping by!


Cut Cardstock Supplies Used:
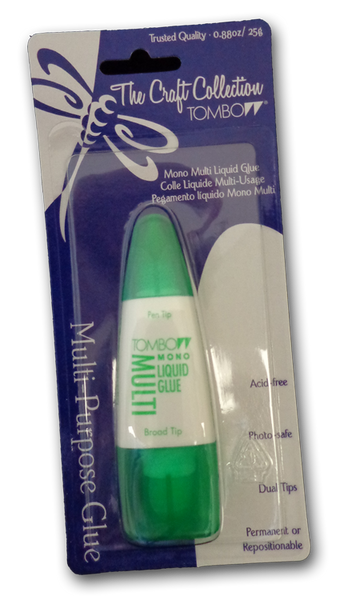
Holiday Green Discount Card StockBasis Dark RedClassic Linen Solar White Card StockCore'dinations Premium Safari 12x12 Card Stock Assortment - 20 sheetsMono Multi-Purpose Liquid GlueScor-Tape for paper crafting


Friday, August 19, 2016

HELLO

Hello All,
This is Agnes welcoming you to another Cut Cardstock blogpost. Today I am sharing with you what I think it turned out a great card.This card came to mind after talking to a dear friend of mine who is a school teacher and because I know she does a wonderful job with her students I wanted her to know how much she is truly appreciated.

I used the Esse 100lbs black textured cardstock from Cut Cardstock for this card.
I used it for the card's base, I also used it for some of the embellishment shadows and for my greeting. The patterned paper is from Pink Paisley: Memorandum and Atlas and you also can find them at the Cut Cardstock store.


I fuzzy cut the clipboards from the Memorandum patterned paper, die cut the shadows using my die cutter (Cricut Explore) and adhered them to the front of the card. I then punched out some circles using a paper punch, die cut some stars and the letters a, b and c using some thin dies and layered them on top of the clipboard as shown in pics.
I then used another thin die and cut the Hello and glued on top.
I also added some smaller stars to the front and to the inside.

I loved how this Esse cardstock performs. Despite is a 100 lbs. cardstock I had no problems using my thin dies to cut some of the embellishments. I also didn't have any problems cutting the chipboards shadows when I used my die cutter and you can see how small those tiny cuts are.


Here is a close up of the greeting.

And here is the completed card with a peek at the inside.
I know my friend will be thrilled and I know she will frame it to display it in her classroom.
I hope you like it too.

As always, we appreciate your visit.
Thanks so much for stopping by.

Note: The school is an image from the My World Cricut Library and was cut at 2-1/4" tall and the clipboards from Sportsmania.

blogged by flowerdisco
(copyrighted)

Cut Cardstock Supplies used:
Heavy black discount card stock
Memorandum Print 6x6 card stock
Pink Paislee Atlas 6x6 paper pad
Mono Multi-Purpose Liquid Glue3-D Foam sticker adhesives
scrapbook glue

Wednesday, June 6, 2012

PAPER DOLLS DRESS UP SERIES---episode 7

i was really stumped with this assigned page. i wanted to make the super girl but i had made many dolls already and i wanted something different.
here is what i ended up making, :-)
(i will give you a glittery sneak peek first---hehe)

Have a Super Birthday!
3.5" round card
---nice fresh and clean colors---

i looked in my stash of "cuts for another day"
(i keep changing the name because i forget what i called it before, lol)
and found this cut from my world (overlay image #14 using shift) and used it as my base.
i then cut a white circle for the background.
the small stars are from a paper punch and the big yellow one is from pddu pg #50.
the lightning bolt is also from pddu pg #51.
the small circles across the space ship were made with the crop-a-dile :P


and the inside has a stamped sentiment from my pink stamper boy crazy stamp set:
"Have a Super Birthday".
something different from my usual. i like it. :P

let's see what my teammates made for this week with their assigned page.

 makes me think of dear potter


 and someone had fun at a magic show, cool!


 and another futuristic project.
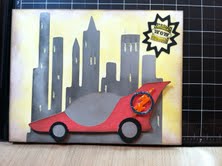
love this car too and the the background city makes a perfect companion, imo that is. :)


i hope you had some enjoyable time here with these cool projects from the pddu
and....thanks for stopping by the hut, i really enjoy your company!

Daily Life: on monday i went for an upper gi since my gerd has been out of control, and next wednesday i will have gallbladder surgery since i spent the day after mother's day in the emergency room with excruciating pain on my upper abdomen which turned out to be gallstones :(
not feeling too well these days, just that you know.