Showing posts with label FLOWERDISCO AS A GUEST DESIGNER PROJECTS. Show all posts

Wednesday, March 9, 2016

FAIRIES DIGI STAMPS CHALLENGE

hello all,
welcome to our
today we are showcasing fairies.

Believe
(in magic)
is a card/tag mini set
she is absolutely gorgeous, isn't she?
-i used my cricut explore to draw and cut her-
she measures here approximately 2-1/2" tall but you can make it larger or smaller.

I used some alcohol markers for coloring and added some white polka dots with a gel pen and some gold glitter to the star on her magic wand.

the tiny flowers and leaves were cut with a thin die. the tag, card and envelope are from cricut cartridges.

i also applied a thin coat of wink of stella but for some reason it looks a bit muddy on the pic, :(

anyway, i am enjoying these challenges at cre8tive hands friends and michelle (the owner) is a darling. She has many plans for the immediate future. you might want to check her out and also join us in this challenge. 
you do not need one of her digis but she does offer some freebies if you are interested. she wants to make it easier for you to participate.
let's support her.

my final pic.

and a huge thank you for stopping by.

have a great weekend!

blogged
by
flowerdisco
(copyrighted)

Thursday, February 25, 2016

CUTE BUGS DIGI STAMPS CHALLENGE

adriana from 
 invited me to be a guest designer for a friend of hers who is designing some digital stamps for her etsy store and on her blog 
Michelle, the owner, is starting challenges with digi stamps.
since i am all pro small business, i said yes, of course.

here is my take on her first challenge

Cute Bugs
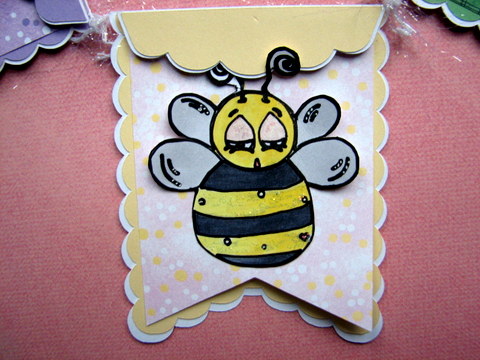
-mini banner
these pretty papers are from sizzix, from looong time ago. hehe 
you know i do not use many pastel colors but these i love.

 -the size of each pennant is around 2-3/4 wide x 3-1/2" tall.-


 -here you can see some of the dimension on the top part-


on this one i tried to pop the bee's belly a bit for a more round look, like she just ate some yummy pollen, lol.


and this one is simply beautiful. hard to see but there is a bit of stickles too.

these are such cute images, perfect for a little girl bedroom or nursery.


the banner die cuts are from cricut pretty pennants cartridge. 
the top part of the banner was adhered using foam tape and all the wings have been bent for more dimension. a bit of stickles for bling, of course.
the coloring was done with alcohol markers and images were cut by hand BUT drawn by the cricut explore.

if you have any questions, please, email me. i will do my best to get back to you in a timely manner.

remember, 
do not miss this fun challenge and the chance to support small business too.
these challenges run for two weeks and this one ends on march 10.
the theme is "anything goes" and you do not have to use a cre8tive hands digi stamp to participate.
a random prize winner will receive one bundle of choice from michelle's etsy store.

as always,
thanks so much for stopping by!
blogged 
by 
flowerdisco
(copyrighted)

Thursday, May 30, 2013

JUST A CUTE CARD...i made for a guest designer spot at


it was so nice to be invited to this blog. i met georgina (the host diva) at whimsical designs. she is one of my teammates there. really nice gal.

anyhow, here is the project i made for their blog.

Any Ocassion Card
4" x 5.5"
pretty-pretty card!

since they are die cuttin' divas i needed to use die cuts in my project, right?...of course!

the pink embossed area was done using the "shall we dance" cricut cartridge and then embossed with a tim holtz sizzix embossing folder using my cuttlebug. i then inked it a bit with some brown and some white ink.
the pretty clouds and the circle are from a paper punch. i added some glossy accents to that center.
the flower was cut using "florals embellished"---another cricut cartridge.

the scallop was done using birthday bash. the border was done with more punches.


the patterned papers are:
chevron: heidi swapp
  travel themed paper: me and my big ideas
and,
the pretty twine is from the may card kit from artful delight.

as i mentioned before this is an any occasion card and i left it blank (no sentiment)  for that very purpose. when the time comes, i just need to add a sentiment for whatever occasion i need it.

i am very happy i was able to produce such a pretty card for the die cuttin divas guest designer spot.

thanks for stopping by!


Thursday, March 28, 2013

STICKLES TEXTURED WASHI TAPE TECHNIQUE

HELLO everyone, 
this is agnes aka flowerdisco in this web of crafters and i am so excited someone invited me to share with you a what i sometimes do with my stickles.

i make patterns with my stickles on a piece of tape (paper tape, masking tape, fabric tape) any of these will work. stickles rock! and they adhere to anything i have tried them on, :)

first, a peek of my project!


when i started experimenting this is what i did:
(turquoise, yellow and candy cane stickles were used on these samples)
 you can see the first one is paper tape and i found this roll in the floral department, the second tape is just old and plain regular masking tape from the dollar store and the last is the fabric tape i found in the first aid section of a drugstore/department store. 
i also textured them:  the first two were textured using a comb and the last one using a pencil eraser top. i also use the stickles bottle tip sometimes, but my fav texture so far is the one i make with the eraser top.
---i like the mountains and valleys look---

check this orange strip
(orange peel stickles)
cool, huh?

-here is a card i made using my fav texture, hope you like it and try it the technique-
(i used the paper tape)
...you can try anything if you ask me...

Sending You SMILES Across the Miles
5" x 7" card
i also added some stickles (snow frost) to the clouds---kind of zig zagged it and i added some tiny dots to to the patterned paper too (on the brown stars-like).

 some more dots (a bit bigger) on this hot balloon die cut.
these dots were done with the candy cane stickles.


other details from my card:
the dots are from a rub-on and a pretty sentiment was stamped. the heart is a punched element and was covered with glossy accent. the small round tag it is also another die cut. some sewing machine stitching and some cotton twine finish the details. the colorful papers are from the echo park scoot collection.
--so pretty!


i hope you try it and, again
thank you so much for visiting "all that stickles" 
and thank you to ashley for having me as a guest designer today.
( i have linked some supplies to the store i purchased them in case you are interested)

bye now and take care!
XX
---------------------------------------

blogged by agnes
 from
flowerdiscosscraphut

Wednesday, December 1, 2010

STAMP BY STEP CONTINUES


HELLO my dear friends

Today I have the last two projects for  
Don't forget to make a comment on both days: today's and yesterday's telling me which project you like the best. Even if you change your mind I will count your entry just one time :( ..........
These were the requirements; easy peasy, lol

Requirements: 
1- Must be a FOLLOWER for this one
2- Must leave a comment today and tomorrow telling me which project is your favorite
3- Must leave me a way to contact you

Now onto my projects.
(I am also entering this ornament below to two challenges:
Paper Crafts Star and Fantabulous Cricut)


I used the beautiful stamp from Stampendous again here and I wanted to embossed it as I did on my card yesterday but did not have a pigment teal color ink so I used my Stazon one. I also used the same Basic Gray papers I used yesterday for these tags.


Great, aren't day?
 I hope you enjoy it and enter for the giveaway.
**********
NOTE: Just a few more days for making the Jingle Bell ornament. Nobody else has entered but TR.
I tried and keep trying to give you some candy but if you don't want it, TR does.
I will randomly choose a winner on December 5th.


Love you all!

STAMP-BY-STEP GUEST DESIGNER


I want to introduce
...an online store who carries a variety of paper crafting products and tools. They even have a "Classifieds" section where you can purchase "used" products at very low prices too. In their "Clearance" section you will find items for pennies...literally...just have to keep looking back ;).
Some paper lines they carry are Graphic 45, October Afternoon, 7 Gypsies, Basic Grey. They also carry a variety of stamps, inks, embossing powders, embellishments, cardstock and much more. You must check them out...I find the prices are very-very reasonable. I am always looking where to save a penny or two and where I get an excellent customer service.

AND............
 I am super excited and very honored to be their 
Guest Designer 
for this month of December. 
 Stamp-By-Step also will be sponsoring a December Giveaway for one lucky follower of this blog of mine. You will get a $10.00 certificate with free shipping. The free shipping is only for the $10 order.
But, life is good and I am very Thankful for the opportunity to get to know them and very Thankful to them for sponsoring a giveaway for me to give to you.

Love you all and...
if I was you I would start looking at their store just in case you get to be that lucky
FOLLOWER
of this blog...
wink-wink
*-*

As a their December Guest Designer I needed to make 6 projects for their shop and that is what I had been working on and not around much. I won't go onto descriptions and supplies because as always I do not have all that info  :). I used some of their supplies and some of mine. I still have to make 2 more projects and I will do that tomorrow. In the meantime...take a look at some of the Basic Grey gorgeous Christmas papers I used. the "Season's Greetings" cling stamp is from Stampendous.


I know is a really busy time for all of us so I will randomly picked a winner from the comments for the
Gift Certificate
donated by
Stamp by Step.

Requirements: 
1- Must be a FOLLOWER for this one
2- Must leave a comment today and tomorrow telling me which project is your favorite
3- Must leave me a way to contact you

I will announce a winner asap and this person will have 3 days to contact me back with their address and if I do not hear from them I will continue until one lucky follower replies.

See you tomorrow with my last project for
Stamp by Step.


Wednesday, July 21, 2010

TUESDAY TREATS PROJECT

Hello my friends...
this is a copy and paste of my post for the Tuesday Treats.
I was invited to replace one of their designer who couldn't make it for yesterday.
I was sooo happy to be there among so many talented and well known crafters.
Enjoy!

*********
Hello to all!
My name is Agnes
aka
flowerdisco from 

I am so very happy to be at Tuesday Treats. I was invited by Pam to fill in for somebody who couldn't make it today. A bit intimidated to be among so many great talented ladies and hoping you like my card.
The cart of the month is Sentimentals and I chose the phone from page 59.  I used my Gypsy to weld both sides of the image and to weld the doorknob from page 34 to use it as a closure and as a stand for the card. It did not come out as I had it in my mind so I had to tweak it a bit and change plans.

Here is my 
Hi card
at 4.5 inches high
 I used the DCWV Songbird Collection stack for this project.
========
The Hi was cut at 1 inch and you can find this on page 25 of the handbook.
================
A closer view of the dimensional dial.
==============
I am showing here a strip of black paper and that is the doorknob cut that I ended up 
welding to the card base.
===========


Here you can see the front of the doorknob.
===========
 The back of the card and the other side of the doorknob.
===========
I am showing here a little pouch I made with a scrap of cardstock to insert the one side of the doorknob.
==============

This is the inside. 
When I started the card I started it with a white cardstock as the base but then I decided to use black instead and the white insert you see here was from that first try :)
============

This is a photo of my Gypsy screen where I added all my images ready to be duplicate to cut on the next layer. This is how I do most of my trials and errors. After I am satisfied, then I re-arrange everything to be cut, if possible, on one 12 by 12 mat.

I appreciate you stopping by 
and 
Thanks to Pam 
for inviting me over.

Hugs to all!


Friday, March 26, 2010

GRAND FABULOUS NEWS

ETA ON 3/29 9:45AM EST

JILL'S BLOG IS WORKING AGAIN
THE SITUATION HAS BEEN FIXED
THE LINK IS WORKING FINE

THANKS FOR STOPPING BY


*****************************************************

 ETA ON 3/27   11:30 PM EST

SOMETHING IS WRONG WITH JILL'S BLOG LINK
I CAN'T GET TO IT WITHOUT REDIRECTING ME SOMEWHERE ELSE
JUST A WORD OF CAUTION...SHE DID EMAILED ME SAYING SHE WAS HAVING PROBLEMS WITH BLOGGER TODAY  


*****************************************************


Happy Friday for Me

I have been selected by Jill Hayes to have my work featured on her blog. Jill has started a blog with  many fun ideas and one of them is the Featured Friday Project and that is where I come in.

She liked my work so much, this is what she said:

"ABSOLUTELY!  Love your designs, Agnes!  I like your altered art too!  I would be so honored to have your creative and beautiful work on my blog.  Send me anything you want. . .I just ask that it has not be posted on your blog in at least the last 6 months-a new project is welcome too, but no pressure.  P.S.-I'm following your blog too!"
and it has been featured today on her blog.
I am super excited, Thanks Jill.
I hope I can continue working with you.

Jill's blog's name is:
http://vivaciousvavoom.blogspot.com/
 what a fun name, right?

and this is the link to my work
Flowerdisco's

Please, stop by Jill's blog and see what I created for today.

Love you all!!!

*_*

and... if you like my work please leave a comment over there.
It will really make my day!

Hugs!

Monday, March 15, 2010

YOU GOT TO LOOK AT THIS.....

Not too long ago I emailed the owner of ONE PRETTY THING to ask her if my Shamrock was good enough to post on her site. 
She reply back and said yes and asked if I had a link for a tutorial. 
Today, while I am deciding what colors I am going 
to use on my Grow canvas project, I was browsing on my favs folder 
and saw Rachel had posted my Shamrock on her site.

 You are really-really going be sooo inspired by what she does
you are going to be flipping backwards.
Here is the link again to where she posted my Shamrock 
and please, make sure you have enough time to look
because you are going to need it.

Shamrock on One Pretty Thing
Please...

Hugs to all and a  
HUGE THANKS to Rachel 
for give the opportunity to expose my work.