Showing posts with label HOME DECOR. Show all posts

Friday, February 10, 2017

I AM NOT WEIRD...

This quote makes me laugh and I wanted to have it around the house. I chose to work with the 130# Classic Crest Recycled cover cardstock because its thickness, great for a sturdy base, the burgundy 80# Royal Sundance Linen cardstock  (the color is a beautiful dark red wine) and the 54# Gold Glitter to add some sparkle to this so cute quote.

The size is a 8 x 10. I cut the base first, then some thin frames to mount around the base.  I used score-tape to attach them to the base and then cut the words using my die cutter machine but...I first cut them on scrap paper, to use the negative as my positioning tool. After I made sure it was properly centered, I proceeded to add the letters to the base.  

Then I thought it needed some "bling" so, I got my beloved Gold Glitter cardstock, die cut another thin frame and heart and I was very pleased with this add-on. I also die cut an easel from the Classic Crest cardstock because I wanted to place it on a flat surface instead of on the wall.

Cute, huh? plus it puts a smile on anyone's face.
Hope you are grinning too.

Thanks so much for stopping by!


Wednesday, November 30, 2016

TEPEES FOR CHRISTMAS?

I know the tepee cards seem to have been around for a long time and while making some
 -just to practice- because I had never made one before, the idea came to mind.
Tepees for Christmas. Yes! Why not, right? I said to myself.


 I started gathering what I needed: cardstock, embossing folder, ink, scoring board and adhesive.

I grabbed some green, red and white cardstock from the Pop Tones collection and cut 3 square pieces at 4 x 4" that I embossed and inked to achieve a distressed look that coordinates a bit with my distressed Christmas Cards.
After I inked them I needed to score them down the middle as shown above. Try your best to align the points but if you don't and when you fold is not even, you can always make adjustments with your scissors.


After scoring, it was time to adhere the three pieces together. I started with the white piece making sure I positioned the green piece just next to the scored line as shown in the left pic. At this point, I also double check if any adjustments were needed and where I was supposed to apply the score-tape. After that, I added the score-tape to the back of the green cardstock and adhered it to the white cardstock. I did the same process for the red piece that was going to be on the left side. In the pics above you can also see how it needs to look before you close it to make the tepee.
(Note how I adhered the score tape. If you add adhesive to the entire edge, you will have exposed adhesive where you do not want it. Make sure you make a pencil mark where you need to add the adhesive). 


This is how you close it: tape the green over the white or vice-versa. It does not matter unless you would like to match the colors or patterned paper if you decide you want to add the later.


I am showing here the 3 different sides after taped them close with more score tape. you do not need score-tape for any of it, you can use liquid glue too but you have to make sure you have a good bond.

I had mentioned I started with 3 pieces of 4 x 4" cardstock. That is the biggest size I cut and the base of the tepee trees. I also cut 3 pieces at 3 x 3" and 3 pieces at 2 x 2" and followed the same steps.
Now, I had three different sizes I could mount on top of each other and give the trees more dimension. 

To the left, you see how it looks after being stacked from the biggest to the smaller and on the second pic you see the tree sizes (4, 3, and 2) and some snow tops I made from 1 square white cardstock. I thought it would great with some imaginary snow. The third pic shows one of the folds.


At the end, I decided to add some bling and I added some tiny ornaments I made using the gold glitter cardstock and a paper punch.

I apologize for the many pics but I thought they were my best bet to show the process. Remember, this was my first time making these tepee cards and I know there are tons of tutorial videos on the web but if you have any questions, feel free to do so in the comments area.
Hope you enjoyed your visit today.

Thanks so much for stopping by and taking the time to check out my tepees.
As many paper projects, they have infinite uses and sometimes just changing colors will do.

Have a great week!


Cut Cardstock Supplies Used:
Pop-Tone Discount Card StockScor-Tape for paper crafting

Monday, September 19, 2016

SPOOKY WHAT?

Hello all, Agnes' here sharing a Spooky What? 
Spooky what is the name of the game here because this project can be a banner, a home decor or a treat box...for the treat box I would add some clear transparency behind the letters and maybe secured the lid with some adhesive.

You can find these boxes in the 'Tags, Bags, Boxes and More' cartridge. You can also find it in the Cricut Access Library. 
You can find the cardstock at Cut cardstock . The links will be at the end of this post. 
BTW, I loove this glitter cardstock. I have been using it a lot lately. You have to give it a try. You are going to love it. 


These boxes have a window on the front as you can see in the above pics. I used that window to weld the S P O O K Y letters. Thi font is from 'Happy Haunting', another Cricut Cartridge. 
I also cut the letters on gold glitter cardstock and glued them on top of the welded ones. Then it was time to scored and fold them. (The third pics shows a shape which I did ended up not using, sorry. It was the shadow of a pumpkin :)) 


Here you can see you end up with a lid (where the letters are) and the insert that makes it a box. To decorate the inside I cut some pieces of cardstock, embossed them and glued them on the inside.

This is how it looks all finished. 
Ready to highlight a little space in my home.


But that is not all...
in case I want to hang them instead, I added a piece of rustic twine and I have an instant  banner.
(Sorry about the blurry pic but it was hard to get a pic with the glitter shining). 

I love how they turned out. 
If you decide to give them a try and have any questions on the 'How To', please do not hesitate to ask in the comments area.

Remember, all brown, all gold and all orange cardstock are on sale this month and they are a true delight to work with.

Thanks so much for stopping by!


Cut Cardstock Supplies Used:
Moroccan Cocoa Card StockGold Glitter Card StockBasis Dark Orange Card stock
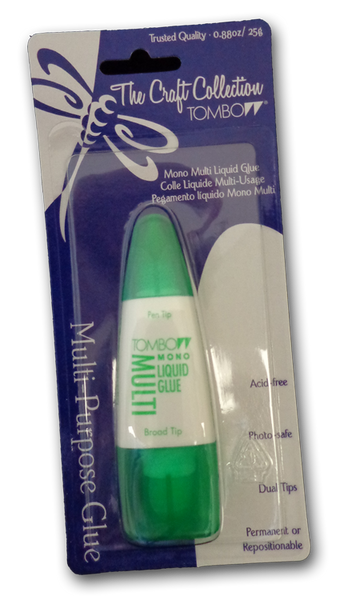
Holiday Green Discount Card StockMono Multi-Purpose Liquid Glue


Saturday, November 14, 2015

AUTUMN SUBWAY ART

hello all
and 
WELCOME
to another 
digi playground
tutorial.
this is agnes and today i have a home decor project perfect for thanksgiving and done in 
1, 2, 3.

the digi file i chose for today's project is from designer 
-jennifer wambach-

SHORT TUTORIAL STEPS
after i purchased my digital file or svg, i downloaded to my computer, extracted all items and uploaded the file with ds on the title to my cricut design space software to be cut.
---note my die cutter machine is a cricut explore and other machines required different steps. please consult your manual---
(any questions about how to do the above, please check here)

#1
 this is how it will look after you uploaded it to cricut design space.
(sorry about the bad pic, it was taken at night time)

#2
i cut it in white cardstock but for the sake of the tutorial i also cut on kraft for the pics. 
the actual project was done with white cardstock.

#3
after i finished cutting i used some alcohol markers to color the words in.

#4
carefully i lifted the cardstock leaving the words on my (dirty, lol) cutting mat.

#5
this is the negative OR what you will be trashing after lifting from mat.

#6
 and this is the final project.

#7
BEAUTIFUL


#8

pretty, huh?
i am planning to show it off when visit comes on thanksgiving.

#9
Autumn Subway Art
AUTUMN SUBWAY ART

any questions?
you are more than welcome to send an email or ask in the comments section and one of us will reply.

and this is my short and fast project tut for today.

hope you enjoyed it!

blogged 
by
flowerdisco
for
digi playground


(all contents have been copyrighted)

Tuesday, October 27, 2015

A HALLOWEEN TOWN HAUNTED VILLAGE

BOO!
welcome to the grand finale of the 
halloween haunted village.

if you have been following you already know i took the mission of reproducing this
halloween haunted village as my digi playground project for the month of october.

i started with this cat house on part 1 but changed my mind about the colors. 

the new part 1 but actually part 2 of the haunted village can be found here and includes: the bat house, the cat house, the crow house and the haunted tree; part 3 is just some sneak peaks of the finale but if you want to see them they can be found here.

today i am revealing the completed project and i certainly hope you enjoy it as much as i did.
know that most of these buildings can be adapted for any other occasion: just change your colors and do some snipping here and there.
(be warned that all the posts about this project are pic heavy since i spent a great amount of time with details i wanted to share with you)

HALLOWEEN HAUNTED VILLAGE
by
the village consists of 11 pieces: bat house, cat house, crow house, ghost mansion, pumpkin mansion, spider house, a witch tower, a cemetery, a coffin,a tree and a fence (not included). 

below i am showing the last buildings that were made to finish the village. as i mentioned before, the rest of them are here.


GHOST MANSION
-i love this one, i think is my favorite-


SPIDER HOUSE


THE WITCH TOWER


THE CEMETERY

THE COFFINS
these coffins can be made into candy containers too: just add the candy before gluing them
closed.

remember all the buildings with the exception of the bat and crow house have openings on the bottom to accommodate a battery candle for a nice glow especially if you use vellum for the windows.

any questions please let me know on the comments section of my blog and i will make sure you get a reply.
and now as always...
 thank you very much for stopping by and for taking the time to take a look at this fun village. 

enjoy
the 
tricking 
or the
treating!

happy halloween.
yikes!


Wednesday, October 21, 2015

INTRODUCTION TO JOY CLAIR CLEAR STAMPS

 i am delighted and honored to have been chosen to join their design team and to work with their beautiful stamps.
their stamps are made here in the usa (georgia).
they are made of a high quality photopolymer, nice and thick, non yellowing, strong deep edges, they adhere so nice to the clear blocks and they take ink very well. 
their designs are unique and so very pretty and the fonts and sentiments are gorgeous.

joy clair has many plans for all of you to enjoy: challenges, videos, discounts and more. sign up to their newsletter and you won't miss any of it.

below is my first project to show off some of their great designs.
hope you enjoy it!

-A Halloween Frame-
by flowerdisco
hehe, let's start with a nice sneak peek.

i used my die cutter machine for the card base, layers and banner and worked
with 3 different stamp sets on this project:


i started stamping each "halloween" letter on a 1" piece of punched paper using different colors of pigment inks and then outlined each letter with a black permanent ink fine tip marker.

as you can see i distressed most of my cardstock too and later on you will see i "dry embossed" the black base.

as i mentioned before the polka dots banner was cut using my die cutter.
 i wrapped a fuzzy and thin green jute around it for an added detail.

the pumpkin and the boo word were stamped with a dye ink. i stamped the pumpkin first, did some fussy cutting around it and then stamped the boo word. i adhered it to the banner with some foam tape for dimension.

the skulls border to the right was stamped before i adhered the halloween letters keeping in mind their placement.


 the border has 4 joined skulls but i just had room for three of them.

 see the dry embossing on the black layer? it is a chevron shape but hard to see, sorry. i used a core-dination cardstock and after sanding it a nice orange color came through.

here is the finished halloween frame.
(i used a steel die to make a chipboard easel for the back to prop it up).

so what do you think of the stamps? really nice, huh?

you can click on the joy clair logo and it will take you the store where you can take a look at the rest of them.

and remember that only good vibes are welcome, the rest are deleted, lol.

see you next time and as always
-thanks for taking the time to visit-


blogged by
flowerdisco
from flowerdiscosscraphut

(all content and worked has been copyrighted)