Showing posts with label C- TAGS BAGS BOXES AND MORE 2. Show all posts

Friday, July 22, 2016

THEY WILL BE TREATED- a set of mini favor boxes for the kids and not

Hello all, 
As I slowly continue to get my family get together tasks done I finally get to share with you the treat boxes I decided to make for the kids to take home afterwards.
I still have to buy the favors but I couldn't wait to share the boxes. They are turning out fabulous if you ask me and I am so happy I used the Gold Glitter cardstock again and was able to try the awesome silver Bright Foil too. They are giving my boxes such an elegant and glamorous touch it's almost a sin giving them to the kids, lol.
They both cut perfectly, I have to add. The phrases and stars were cut very small and I had no problems with either one. The rest of the colored cardstocks I used are a mix of Basis and Pop Tones, also from Cut Cardstock.

I used the Tags, Bags, Boxes and More 2 Cricut cartridge and cut the boxes at 7-3/4" wide and after assembled, they come out to be around 2" squared by 1-1/4" tall, not counting the small handle. Perfect for some small treats for them.
You can also find these boxes in the Cricut Access Digital Library, M3C751 is the ID#. The embellishments are from Life's a Party (out of this world, shooting star) and the Party word is from Cricut Font and Basic Shapes.
The first pic to the left is the Cricut Design Space virtual mat showing the box flat prior to cutting and you will notice how easy they will be to score and assemble. The second pic shows a mark where you need to add the adhesive and the third pic shows after the flap is closed. You can also see the pretty fold it makes on one side of the box.
(The blue permanent runner adhesive tape works very well and the store carries the green version).

A few pics to show some of the embellishments: the out of this World was cut at .81" in high, yeap, that small and look how nice it looks, the Party word was cut at .53" tall, wow! and the shooting star at 1.15".

I also cut the boxes in the gold glitter cardstock and the silver (Bright Foil) cardstock. Did I mention how nice these cut in the cricut? The glitter one I had used in my last project and I knew already how it cuts but not the silver one. Well, it is as great as the glitter one. Loove them both and you will too. The Bright Foil is almost like stainless steel. Awesome finish!
They are both on sale this week, if interested.

This is the end of my monthly projects for Cut Cardstock.
I hope you enjoyed my mini series. You can check part one here (masks).
If any questions arise, please do not hesitate to contact any of us.

Thanks so much for stopping by and I'll see you next month.

blogged by flowerdisco 
(copyrighted)

Note: My apologies for such an almost non-existent tutorial, but life has been a bit hectic at home lately. 


Cut Cardstock Supplies used:
Pop-Tone Discount Card StockGold Glitter Card StockBRIGHT FOIL SILVER

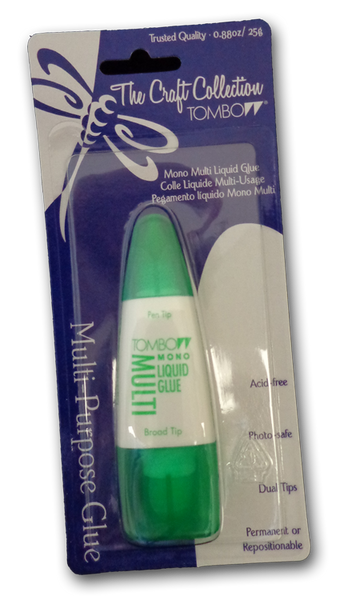
BASIS paper 8.5 x 11 scrapbook glueMono Multi-Purpose Liquid Glue


Wednesday, March 16, 2016

SPRING DECORATION BASKETS

hello all,
Agnes here welcoming you to my first post as one of the new members of the Cut Cardstock Design Team.
I am very happy to spread the word about their premium cardstock, stationery products and other supplies.

Today I want to share with you how I made these adorable Spring Decor baskets using a Curious Metallic Cardstock called Lustre
Lustre is a 92# cardstock and its shimmer is stunning. 

I am planning to use these baskets for decoration but they will also be perfect for any other occasion.

Here are a few words about how to make these cuties, in case you would like to make your own.
I used a Cricut Explore to make these ones but you can find free templates online too.
They are very easy to make. This specific one is from a Cricut cart called Tags, Boxes and More 2.

I sized them to be around 3-1/2" tall. This size allows to cut 2 baskets on the 8-1/2 x 11" Curious Metallic Cardstock.

To size them you can use the handles around the box or you can insert the desired size straight on the edit panel.
Tip: Each square on the grid measures 1" and it helps when sizing an image. If you count the squares on the left side, you will see is approx. 3-1/2".

As you can see, the edit panel shows: 7.45" wide x 4.12" tall. This is the size of one basket when open flat as you see on the pic.
After sizing, you can proceed to cut. 

The Cricut Explore does the scoring, just remember to insert the scoring tool in place prior to cutting.

The next step will be the embossing. I used my cuttlebug for this process but feel free to use any other embosser machine and an embossing folder of your choice. The embossing folder I used is called "Weave" and I believe is from Making Memories but not sure if they still available.
Tombo liquid glue was used to adhere the sides together. 

The bunnies were also cut with the cricut explore. In this case I used the "Gold Leaf" cardstock from the same Curious Metallic Collection.
This cardstock is also a 92# and it is a gorgeous tone of gold.
The rest of the items shown are some of the supplies I used: flowers and leaves, mini tags with "Happy Spring" hand-stamped on them, some Spanish moss, a glue gun, two pieces of thin wire and bias tape.

To make the handles, I wrapped the thin wire in bias tape using bits of hot glue here and there.
They turned out really nice.

The last step is to embellish them accordingly.

Here you can see the back of the box and a close up of the embossing.

Hope you enjoy how these cute pair of french fries boxes became "Spring Decoration Baskets".

If you have any questions about the process, do not hesitate to ask.

Thanks so much for taking the time to visit us.

Have a great day!


Cut Cardstock Supplies:
Curious Metallic Lustre      Curious Metallic Gold LeavMono Multi-Purpose Liquid Glue


blogged by flowerdisco
(copyrighted)

Sunday, March 31, 2013

A PUMPKIN SPICE BLOG CHALLENGE...using a gable box

where we are challenged to use any

Spring Animals or Insects
 (Use your Imagination)
who can resist sweet spring animals and insects.. even bees and caterpillars are cute, right?! 

cool challenge this one!

Sweet Friend
bee gable box 
the bee will be my insect for this challenge
the bee  is from a cricut cartridge and i used regular cardstock to make it. BUT, i stamped the body and wings for that blotchy look and inked all the edges. i cut her to fit my box at 2.50 inches tall.

 a bit closer and you can see how cute she is. i used foam dots to raise her from the background.

take note i cut the gable box at 5.5 inches tall but it really comes out to be approximately 3.75 inches tall. 
this gable box is from another cricut cartridge. the cartridge gives you the scoring template.

TIP: since i use my gypsy, i put the die cut in one page and the scoring marks on another page making sure they are both at the same coordinates (x and y- on the top right corner of the gypsy screen) and i do the scoring first with the blade upside down. 

here are the supplies used in my project:
gable box patterned paper:     cosmo cricket earth love collection
yellow, mustard color and brown cardstock:   recollection
gold cardstock:     dcwv
cricut cartridges:     tags, bags, boxes and more2 (gable box); kate's abc's (bee)
bee hive:     cutlebug die
tag:    sizzix die
sentiment:     whimsical designs clear stamps

click here to join us!
and,
do not forget to have fun!!!!

thanks so much for stopping by!


  • The winner of each weekly challenge will receive a 'Pumpkin Spice Weekly Challenge Winner' button to display proudly on your blog or Facebook.
  • A shout out in the monthly newsletter with a link to your blog and picture of your project
  • and a chance to win a Surprise worth at least $25 retail.
    •  Every month PumpkinSpice will pick a winner from all the entries, not just the winners.
    •  Random pick will be announced on the 1st blog hop of the month, along with what that winner will be receiving, so be sure to watch for your name.

How do I enter?  I am so glad you asked.
  • Create a NEW project for this Challenge. Each submission must be a new project.
  • Post your Challenge Themed project on your blog. 
  • Mention and link the ShopPumpkinSpice.com store somewhere in your blog post. 


HAPPY EASTER!


Wednesday, January 23, 2013

A PUMPKIN SPICE BLOG PROJECT...using tbbm2 cricut cartridge

hello pumpkin spice followers, friends, and visitors.
today is my day to inspire you. i hope you like my choice and that indeed, inspires you.

using the "with love" stamp set that comes with this limited quantities valentine's kit i made these cute milk container treat boxes.

let's call it:
 "in love"
(because i am in love with the stamps and papers i got from the shop).
 Supplies used:
cricut catridge: tags, bags, boxes and more 2 (milk containers, large hearts)
stamps: with love (whimsical designs/valentine's day kit)
patterned papers: basic grey (lucille); canvas (kraft script)
cardstockcoredinations (red glitter); white: bazzill
inkcolorbox (chianti)
jute: lara's crafts

NOTE: since we are adding so many new products to the store, and we are having a sale right now, some of the supplies used on my project might not show up. HOWEVER, you can always contact the owner HERE, and have her help you with your needs. she has access to over a hundred manufacturers.

 ---one more picture of my pretty valentine's candy containers---
thanks so much for stopping by!

blogged by flowerdisco from flowerdiscosscraphut for 
the pumpkin spice blogspot.
(copied and pasted from the post at the pumpkin spice)

Friday, January 18, 2013

A VALENTINE'S DAY CANDY BOX...

to keep celebrating the month of love, friendship, hearts and more.

soooo, i hope you went to see the valentine's kit from the pumpkin spice shop I blogged about yesterday.
what a deal!!!
today i am using one of the stamps from the "with love" stamp set that my friend stephanie designed and that my other friend denine used in her valentine's kit (for sale at the pumpkin spice shop)

You Make my Heart Feel Super Happy
a valentine's day candy box
4" tall
this is the sentiment from the kit....so cute! i love it! and i am in cloud 9, hence the clouds.
this candy box is from the tags, bags, boxes and more 2 (TBBM) cricut cartridge. the speech bubble is from create a critter. the white cardstock is from bazzill. the mini white rose if from tim holtz. the mini hearts are from the same stamp set: with love. i stamped the hearts on the back of the papers and cut. the rest of the supplies are from my stash.

and this is it for today.
(these dt's are keeping me feeling productive, :D)

do not forget to check the valentines day kit and see all the goodies that you will get on this kit.
(quantities are limited so hurry up and get yours before they are all gone)

thanks for stopping by!
blogged by flowerdisco from flowerdisco's scrap hut