Showing posts with label C- PAISLEY. Show all posts

Thursday, June 23, 2016

THE MATRYOSHKA DOLLS NOTECARDS

Hello all,
Agnes' here with some 
 paper nesting dolls from the Paisley Cricut Cartridge to share with you.

-Matryoshka dolls are originally from Russia and are also known as babushka or grandma's, as we would call it in the states. The first Matryoshka doll was made in 1890-

I used these dolls on note cards but think about the possibilities here: from paper dolls games to room decor, to banners and more.
How about a Matrioshka birthday party theme?
Awesome!
They are super easy and fun to put together.

I used the Pop Tones cardstock from Cut Cardstock with its beautiful and bright colors were perfect for these dolls. 
I set the Cricut Explore to the cardstock setting and cut the notecards base at 4". The dolls were cut at 2-3/4" tall. I also cut some squares to use them as frames for the inside. I cut those at 3 x 3-1/2" and 2-3/4 x 3-1/4". 
(In this pic you see white squares with some words written on them; I ended up not using them but they were written using the Cricut Explore).

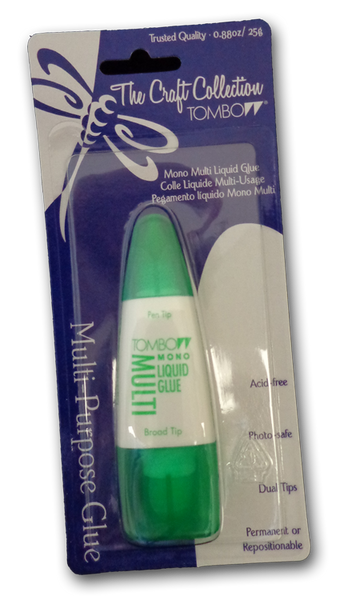
After assembling the dolls, I closed the notecard flap with the open shape and used that shape to position the dolls to the inside and glued them using some Tombo liquid glue.
I then stamped some clear stamps sentiments instead using the white cards I had previously made.
A girl can change her mind as many times as she wants to, right? 

See the opening on the first pic? that is the flap you bring over to help position the dolls. The sentiments read: Long time no see you, Thinking of you and Happy Hello. 

The Pop Tones colors used are Blue Raspberry, Wild Cherry, Tangy Orange, Gumdrop Green, Lemon Drop, Razzleberry and Grape Jelly....I say it again: these colors make me crave for frozen pops, lol.

Hope you like the Matryoshka dolls and the many ideas they can be used.

Thanks so much for stopping by!

blogged by flowerdisco
(copyrighted)

Cut Cardstock Products Used:


PopTone Card StockMono Multi-Purpose Liquid Glue


Wednesday, February 15, 2012

SWEET- a wall decor project

i do not know about you, but i am ready for spring. it does not matter that we hardly had any snow, or cold weather for that matter. i am skipping the gold from the irish for spring...lol.

 here i made a wall art decor. i already made some simple ones, but this one took me a bit longer. 
my inspiration was seeing my spring flowers already showing the green tops above the ground.
enjoy!

Sweet
3.5 by 7"
pretty, uh?
(wink)

i had/have these pieces of chipboard in my stash,  from albums i never altered---- they are like almost 1/4 of an inch thick and that is the base for my frame. 

this awesome tag is from k&co. i distressed it a bit with ink and added a bit if stickles to match the rest of the embellishments.

the sweet word is from paisley (cricut cart)---i wet embossed it with thick clear embossing powder and inked the edges too. i cut it four times, and glued the cuts together for dimension. after you have done this, they look like chipboard, and you get to use some of that cardstock in your stash before it rots, lol.

the square and circle are from the same k&co pack and the yellow pleated ribbon from recollections. the heart is from an old miss elizabeth product.

i made the holes with the pink crop-a-dile and added some eyelets and wire. the crop-a-dile is an awesome tool. it goes through everything--, including tin from pantry cans and new holes on your belt and sneakers if needed. ;p

this is the back. 
i added that strip of paper with re-enforcers to add sustainability.

here you can see the thickness of the chipboard.

and these, precious flowers below, are my own-- handmade.
i used ribbon, a needle with thread, made a few stitches until i gathered the 4 inches piece of ribbon and then glued it with my glue gun...ouch!!!. i got burned a few times. (i have to find a better way to make them)
 but----i LOVED the final product. you should try to make some.
 i also added a tear drop shape faux jewel to serve as a leaf. so cute!

any questions, please do not hesitate to ask...just shoot me an email or write on the comment area.

---thanks for stopping by---
your visits fuel my creativity and keep me crafting.
 thanks again!


Wednesday, December 2, 2009

PAISLEY JOY CARD

I used my Gypsy again and I cut the card at 4.37"H and the cat from layers 1.
I also cut a piece of cardstock to use as a base to adhere my black cat. This same piece of cardstock was glued to the back of the front side of the card. I inked all my cardstock, stamped the word JOY from one of my G Studio clear stamps, puched it out with my 1" Fiskars circle punch and attached it to the ribbon. I also did some faux stitching in white with my Sakura Gelly Roll pen on the front of the card.
This card will fit on a 5x5 square envelope that you can handmade.

Enjoy and Thanks for stopping by!