Showing posts with label CHRISTMAS. Show all posts

Monday, December 4, 2017

IT'S BEEN A WHILE...

Hello all-
As we all know life keeps us busy.
Because all is good we are dealing with other health issues I don't care to discuss right now but is the reason why it took me a while to craft and post.

However, I am sharing with you today my 2017 Christmas Cards.
My inspiration was taken from Pinterest but I couldn't recreate the beauty of the original not that I ever want to. This is my take on it.

Christmas Cards
2017
4" Round Card
I used more than a few die cuts and took me a while to cut and build the prototype.

-Let's start with the Cricut images-
The circle base is from the Cricut cartridge 'Wild Card', Cricut Access #m2fa54.
The circles are from the 'Shapes' feature in Design Space. Cut at 4" and 3-3/4" also to get the ring around.

The candles are from the 'Christmas' cart, Cricut Access #m40ade.
Some of the foliage (green in this card) is from 'Storybook', Cricut Access #m34132 and the banner strips are from 'Bits and Pieces', Cricut Access #mfb1ff.

The font is called 'Wildflower'. I didn't know about it but it showed up in the fonts area and I was able to use it. I am assuming
it is a Free font or was Free at the time I used it.
I liked it very much and it wrote beautifully.

-The rest of the die cuts-
Cottage Cutz: wreath, tiny bow, and the neck applique.
Impression Obsession: the tiny red flowers (reminded me of poinsettias).
Martha Stewart paper punch: the red branch up on top.
Ek Success paper punch: the star on the foliage.

The embossing was done with a Tim Holtz embossing folder called 'Collage and Notebook'.
The sentiment is from Joy Clair stamps and it was embossed using a gold embossing powder, which it went array as I can see in the pics but not in real life, :). Oh well!

For those who are interested...here is the link for my inspiration. It takes you to the post itself.
As I mentioned before, I found it on Pinterest first.
-Absolutely Gorgeous- in my opinion, that is.
Hope you enjoy it and this blogger won't take offense I linked her project.

Before I finish here I am taking the moment to wish you all:
 'Happy Holidays', 'Merry Christmas' and or 'Happy Hannukah'
Better do it now in case life continues to surprise me and I can't come back for a bit.
*-*'

Take care you all!


Tuesday, November 14, 2017

TOY SOLDIER FOR THE HOLIDAYS!!

Hello you!!!

These Toy Soldiers I made with a Tim Holtz Sizzix die. 
So cute!

The pictures show the first out of 12 soldiers but couldn't resist to share them in case you want to make your own.

Toy Soldiers
-Set of 12-
The glittered cardstock is from Core-dinations and the boots are made of these glossy black cardstock I had for a while. I am sorry I can't remember who is the manufacturer.

This die does not come with the yellow dot for the hat but I thought it looks better if I added it, so I punched some with a paper punch and that is what I got. :)

I know you can't see it but I covered the plume and gloves with some shimmer. I used a shimmer pen, similar to the Wink of Stella, from the brand Art. They also have different colors but I bought the clear one to compare. I have to say I think I like it a bit more than the Wink of Stella. In case you want to try them, I purchased mine at ACM and of course, I used a coupon.

Hope you like the soldiers!!

Have a great day!

(all contents copyrighted)

Friday, December 9, 2016

HOLIDAY COUNTDOWN SERIES, DAY 9

Hello, and Welcome to our Holiday Series!


Today I am sharing the 
MAKING of  FAST and EASY HOLIDAY GIFT TAGS

How many times have you found yourself wrapping a last minute gift and in need of an easy handmade tag to tie it all together? I have been in that situation plenty of times. In the past, I have made enough holiday gift tags ahead of time but I still encounter that last minute gift and the need or want of a tag. Other times I had made so many I have had so many leftovers because I went overboard and by the time Christmas came around the corner again, I had forgotten where I stored them or my taste had changed.
Nowadays, I die cut plenty of tags throughout the year when I have extra time but I do not embellish until I need them for a specific occasion. I use scraps of pretty cardstock, preferably in a variety of solid colors, I can use throughout the year.


Easy Tags

We already know we need to have plenty of die cut tags ready to embellish. Use a variety of solid colors for all types of gift tags: birthdays, graduations, anniversaries and so on.

All the supplies below are optional because...we are making last minute tags. I am mentioning them in case you want or have time for a few extra details.
A metal die cut was used to cut these tags but you can use scissors and a ruler or a paper trimmer, thin dies for the deer (deer and foxes) seem to be popular this holiday season), embossing folders and some manual texture tool I have in my stash, foam tape, score tape or any other double sided tape, liquid glue and some ribbon or twine and some bling (I used diamond dust, glitter and sequins).

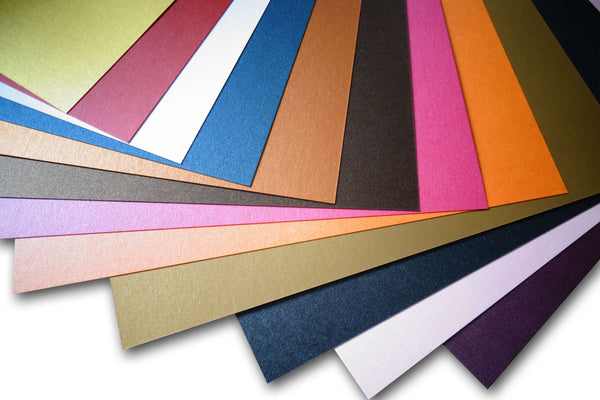
For cardstock, I turned to the beautiful Stardream Metallic Collection from Cut Cardstock. This cardstock has an amazing shimmer similar to beautiful Curious Metallic and perfect for the season. Stardream cardstock is a 105lb cardstock and that is a nice weight. I am thinking it will also look awesome for New Year's and also weddings.
The names of the cardstocks used are: lagoon is a beautiful aqua color, Mars is the red I like- dark red, the green is Fairway and Copper is the brown.


After die cutting the tags I embossed some and textured others. You see a variety of ideas you can replicate if you have the extra time or for future projects.

 On some tags I applied glue with an old brush on the bottom part and sprinkled with diamond dust, on another, I used a strip of double sided tape and covered it with glitter, on others, I rediscovered the handiness of shaped scissors to make borders and so on. Some of the deer were mounted on foam squares.
The final step was adding ribbon or twine to hang if necessary.


A few more pics:

I also made a few tags with paper punches and added commercial embellishments for a really fast way for the really last minute gift.
Hope you are enjoying this short series my teammates and I are sharing with you.
For the Stardream Collection, please, click here.

Have a great day! and, thanks for visiting.

Blogged by flowerdisco 
from 
flowerdiscosscraphut

Cut Cardstock Supplies used in this project:
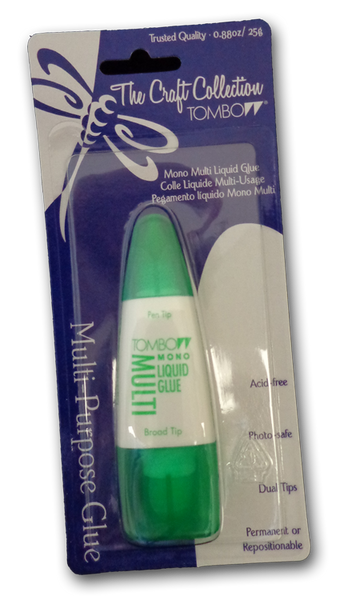
show3-D Foam sticker adhesivesMono Multi-Purpose Liquid Glue

Wednesday, November 30, 2016

TEPEES FOR CHRISTMAS?

I know the tepee cards seem to have been around for a long time and while making some
 -just to practice- because I had never made one before, the idea came to mind.
Tepees for Christmas. Yes! Why not, right? I said to myself.


 I started gathering what I needed: cardstock, embossing folder, ink, scoring board and adhesive.

I grabbed some green, red and white cardstock from the Pop Tones collection and cut 3 square pieces at 4 x 4" that I embossed and inked to achieve a distressed look that coordinates a bit with my distressed Christmas Cards.
After I inked them I needed to score them down the middle as shown above. Try your best to align the points but if you don't and when you fold is not even, you can always make adjustments with your scissors.


After scoring, it was time to adhere the three pieces together. I started with the white piece making sure I positioned the green piece just next to the scored line as shown in the left pic. At this point, I also double check if any adjustments were needed and where I was supposed to apply the score-tape. After that, I added the score-tape to the back of the green cardstock and adhered it to the white cardstock. I did the same process for the red piece that was going to be on the left side. In the pics above you can also see how it needs to look before you close it to make the tepee.
(Note how I adhered the score tape. If you add adhesive to the entire edge, you will have exposed adhesive where you do not want it. Make sure you make a pencil mark where you need to add the adhesive). 


This is how you close it: tape the green over the white or vice-versa. It does not matter unless you would like to match the colors or patterned paper if you decide you want to add the later.


I am showing here the 3 different sides after taped them close with more score tape. you do not need score-tape for any of it, you can use liquid glue too but you have to make sure you have a good bond.

I had mentioned I started with 3 pieces of 4 x 4" cardstock. That is the biggest size I cut and the base of the tepee trees. I also cut 3 pieces at 3 x 3" and 3 pieces at 2 x 2" and followed the same steps.
Now, I had three different sizes I could mount on top of each other and give the trees more dimension. 

To the left, you see how it looks after being stacked from the biggest to the smaller and on the second pic you see the tree sizes (4, 3, and 2) and some snow tops I made from 1 square white cardstock. I thought it would great with some imaginary snow. The third pic shows one of the folds.


At the end, I decided to add some bling and I added some tiny ornaments I made using the gold glitter cardstock and a paper punch.

I apologize for the many pics but I thought they were my best bet to show the process. Remember, this was my first time making these tepee cards and I know there are tons of tutorial videos on the web but if you have any questions, feel free to do so in the comments area.
Hope you enjoyed your visit today.

Thanks so much for stopping by and taking the time to check out my tepees.
As many paper projects, they have infinite uses and sometimes just changing colors will do.

Have a great week!


Cut Cardstock Supplies Used:
Pop-Tone Discount Card StockScor-Tape for paper crafting

Tuesday, December 15, 2015

A CHRISTMAS ACCORDION CARD

hello all, 
agnes here welcoming you to another digi playground post. 

today i am sharing this super cute and easy to make accordion card.
it could be a card or a mantle piece/table decoration for the holidays.

the file is from miss nic squirrell.
Christmas Village Papercut Accordion Card
i have noticed lots of these accordion cards around the blogs and i thought it was fun to show you how i decorated mine. i did a very simple job because to tell you the truth i did not have much time to spend on it. i bet we all are feeling the christmas rush, :(

anyway, i used a kraft cardstock because i liked the subtle faded plaid design. 

i also i used my cricut explore to cut. it did take a bit long but the explore goes kind of slow so that's that :). all very worthy.


on the photos below i am showing the accordion card after cutting it. 
you notice i added some snow strip cuts on the roofs and on some windows. 
these extra snow cuts DO NOT come with the file. 
and a very thin snow bank on the bottom.

the instructions read that it cuts from a single piece of 8.5" x 11". i cut mine on a 12 x 12 and stretched it a bit longer: 11.6" x 3.70" to be exact.


on this photo i started adding some liquid pearls to give the illusion of snow.


i backed it up with kraft color cardstock and colored the open windows with a yellow marker.

the christmas trees were also colored and filled with glossy accents in to resemble ball ornaments. 


this is just another view of the card.

 i cut a few of them to make christmas cards. i will be adding the greetings and sentiment on the back. i will make sure to add they can be used as christmas decor too. i know they will love them.


please, accept my apologies for the bleed on the trees. i just realized it here but it is too late to change. so again, my sincere apologies for that bleed.
i use a macro setting on my camera and it shows the tiniest details but macro sized, :( therefore the bleed looks huge but is not. :).

and this is it for today.

they file has been linked for your convenience and this is the link for the digi playground store if interested. they have other designs in this fun accordion style.

thanks for stopping by and i would like to 

wish you the best christmas celebrations. i hope they are filled with health and happiness.


Thursday, December 3, 2015

SEASON'S GREETINGS

hello all,
today i am sharing a project i made for joy clair design team using the Joyful Wishes
stamp set. this set is packed with many pretty christmas words to combine many sentiments. bonus: it even includes some tiny christmas images like stars and hollies.

SEASON'S GREETINGS
3-1/2" x 5.25"

-love the handwriting font-
sorry about the inking on the edges of the sentiment. it looks very pronounced in the pic but not in real life. i normally use macro when photographing and it maximizes every single micro detail. :(


the poinsettia die cut is from tim holtz.
the center was made with a dry embossing powder. it almost looks like brass. i used the same embossing powder for the sentiment.

i stamped the leaves with another joy clair stamp set from their autumn release: hello autumn. it gives some subtle detail to the plain green cardstock.


this is the joyful wishes i used for today's card and its matching digi dies.
 
they have been linked for your convenience.
i am also linking the hello autumn because it has beautiful fall leaves you might like.
pretty huh?

well,
i have to go now.
rush-rush-rush
:D

thanks for stopping by and 
take care! 

REMEMBER: Joy Clair is having a Design Team Call


Wednesday, November 25, 2015

JOY CLAIR'S BLACK FRIDAY SALE 50%

please, read along with me:

joy clair is having a black friday sale. joy clair is having a black friday sale and...
 i can get lots of stamps  
at 50% off with a FREE usa shipping. 
i will also receive a FREE stamp cleaner with my order. 
this is an awesome sale I really do not want to miss--- 
i deserve the treat, i deserve the treat, lol.

sale ends monday, nov 30th at midnight est.


now, i will entertain with the cutest penguins of them all.

Christmas Penguins
the penguins are the latest release and are included in the black friday sale, of course.


i used a stamp from another set (the snowflakes set) to get the illusion of snowflakes for the background. i inked them with water (hehe) and stamped them on top of the blue background distressed ink.
the pretty tree is from a cricut cart, the stitch border from a thin die and i used alcohol markers for the coloring.


the christmas gifts are from the "cozy snowman set". they were too cute to leave them behind.


i think is a pretty handwriting style font. it is from the joyful wishes set.

this is the penguins stamp set and its matching digi die.
Christmas Penguins Clear Stamps Christmas Penguins Digital Dies
they have been linked for your convenience.

hope you enjoyed my post for today.
a bit of silliness just because why not? right?
 :D

have a great thanksgiving and a safe black friday!

blogged 
by
flowerdisco
from
flowerdiscosscraphut

(copyrighted)

Tuesday, November 24, 2015

SANTA'S MUSTACHES...a must see

absolutely adorable.
this svg file was not for santa's but we can do whatever we want to do, right? lol

Santa's Mustaches
3-1/8" x 4-1/4"tall
if you look in the digi playground store you will find this cutie under carina gardner's files or in the search box as:
"mustache shadow box sliding card".
i really like the shadow box effect.
i used some super thick cardstock i have in my stash covered with red paper.

the mustaches are covered with stickles sprinkled with some fine glitter. i was looking for the glue that looks like snow but couldn't find it. then i thought i could have used some texture gesso or something similar, but oh well.
i think it looks pretty anyway. :)


this is the sliding part of it. it does not move the mustaches tough.
 it just slides on the back of the card, just that you know. :D

here
is a video where miss carina gardner shows another shadow box sliding card.


and, this is how the svg file looks like in the store.
mustache shadow box sliding card
it has been linked for your convenience.
they have many other shadow boxes with different themes and orientation.
check them out. 
they are really cute!

and this is it for today.
hope you enjoyed it.

and once again, thanks for stopping by the hut.

blogged
by
flowerdisco
from
flowerdiscosscraphut

(copyrighted)

Thursday, November 19, 2015

ANOTHER SET OF CHRISTMAS GIFT TAGS

i believe we all can relate to the need of christmas gift tags and gift cards presentations during the holidays.

this set of 4 christmas gift tags was made fast and you can mass produce with ease.
they are from the "christmas gift tags) clear stamps set from Joy Clair.
i think they are so cute too.

(a santa's face...a snowman...some snowflakes and pine tree branches and acorns)
each tag measures approx: 1-1/2" wide by 2-3/4" tall 
the sentiments or sayings on them are:
joy to the world, happy holidays, christmas wishes and the to and from on the santa's tag.

i made a small pouch to put in because i am giving 3 sets of them to one of my neighbors.

the pouch was made using a cricut cart called spring holiday cards and the red and white borders are from holiday cakes.


Joy Clair Christmas Gift Tags Clear Stamp Packaging
this is the stamp set used on today's project for joy clair.
it has been linked for your convenience.

once again,
thanks a bunch for stopping by.

blogged by 
flowerdisco 
from 
flowerdiscosscraphut

(all contents are copyrighted)