Showing posts with label SIZZIX DRY EMBOSSING. Show all posts

Monday, December 4, 2017

IT'S BEEN A WHILE...

Hello all-
As we all know life keeps us busy.
Because all is good we are dealing with other health issues I don't care to discuss right now but is the reason why it took me a while to craft and post.

However, I am sharing with you today my 2017 Christmas Cards.
My inspiration was taken from Pinterest but I couldn't recreate the beauty of the original not that I ever want to. This is my take on it.

Christmas Cards
2017
4" Round Card
I used more than a few die cuts and took me a while to cut and build the prototype.

-Let's start with the Cricut images-
The circle base is from the Cricut cartridge 'Wild Card', Cricut Access #m2fa54.
The circles are from the 'Shapes' feature in Design Space. Cut at 4" and 3-3/4" also to get the ring around.

The candles are from the 'Christmas' cart, Cricut Access #m40ade.
Some of the foliage (green in this card) is from 'Storybook', Cricut Access #m34132 and the banner strips are from 'Bits and Pieces', Cricut Access #mfb1ff.

The font is called 'Wildflower'. I didn't know about it but it showed up in the fonts area and I was able to use it. I am assuming
it is a Free font or was Free at the time I used it.
I liked it very much and it wrote beautifully.

-The rest of the die cuts-
Cottage Cutz: wreath, tiny bow, and the neck applique.
Impression Obsession: the tiny red flowers (reminded me of poinsettias).
Martha Stewart paper punch: the red branch up on top.
Ek Success paper punch: the star on the foliage.

The embossing was done with a Tim Holtz embossing folder called 'Collage and Notebook'.
The sentiment is from Joy Clair stamps and it was embossed using a gold embossing powder, which it went array as I can see in the pics but not in real life, :). Oh well!

For those who are interested...here is the link for my inspiration. It takes you to the post itself.
As I mentioned before, I found it on Pinterest first.
-Absolutely Gorgeous- in my opinion, that is.
Hope you enjoy it and this blogger won't take offense I linked her project.

Before I finish here I am taking the moment to wish you all:
 'Happy Holidays', 'Merry Christmas' and or 'Happy Hannukah'
Better do it now in case life continues to surprise me and I can't come back for a bit.
*-*'

Take care you all!


Wednesday, January 29, 2014

MINI JOURNALING CARDS...using more color hills

hello all,
i am here again with more color hills patterned papers.  i like the colors, the texture, the design...love it all.
with valentine's in mind i made these small pouches where i will write a "love note" along with some sweet chocolate to my loved ones. i thought it would be fun to share with you and give you some kind of a different twist on them.
BY FLOWERDISCO FOR NANIKEOLA USING COLOR HILLS (2)
-i used a die cutter machine (cricut) to make the pouches-

BY FLOWERDISCO FOR NANIKEOLA USING COLOR HILLS (7)
i also did some zig zag stitching using my sewing machine and i also did some stamping (the blotches on the paper) using a halloween dollar stamp i had in my stash.

BY FLOWERDISCO FOR NANIKEOLA USING COLOR HILLS (4)t
the heart is from a metal die cut

BY FLOWERDISCO FOR NANIKEOLA USING COLOR HILLS (5)
mini hearts here done with a hand punch.

BY FLOWERDISCO FOR NANIKEOLA USING COLOR HILLS (3)
not too sure about the blotches done in red but liking the embossed heart behind the negative die cut.

BY FLOWERDISCO FOR NANIKEOLA USING COLOR HILLS (1)
here you can see the set of three heart pouches.
and...
-all the sentiments are already written on the color hills patterned papers making it fun to choose to play. you can also cut them a journaling cards for any of your projects.-

hope you like them as much as i do and i invite you to give this company a try.
all supplies have been linked to the store for your convenience.
thanks so much for stopping by!


Thursday, May 30, 2013

JUST A CUTE CARD...i made for a guest designer spot at


it was so nice to be invited to this blog. i met georgina (the host diva) at whimsical designs. she is one of my teammates there. really nice gal.

anyhow, here is the project i made for their blog.

Any Ocassion Card
4" x 5.5"
pretty-pretty card!

since they are die cuttin' divas i needed to use die cuts in my project, right?...of course!

the pink embossed area was done using the "shall we dance" cricut cartridge and then embossed with a tim holtz sizzix embossing folder using my cuttlebug. i then inked it a bit with some brown and some white ink.
the pretty clouds and the circle are from a paper punch. i added some glossy accents to that center.
the flower was cut using "florals embellished"---another cricut cartridge.

the scallop was done using birthday bash. the border was done with more punches.


the patterned papers are:
chevron: heidi swapp
  travel themed paper: me and my big ideas
and,
the pretty twine is from the may card kit from artful delight.

as i mentioned before this is an any occasion card and i left it blank (no sentiment)  for that very purpose. when the time comes, i just need to add a sentiment for whatever occasion i need it.

i am very happy i was able to produce such a pretty card for the die cuttin divas guest designer spot.

thanks for stopping by!


Tuesday, December 6, 2011

HOLLY JOLLY


FINALLY BACK!

my son's thanksgiving break was awesome. we had a great time and a full house almost everyday. we loved every minute of it.
 we flew him back from Philadelphia to Boston and it took less than an hour for him to be in his dorm---:D
just fab!

anyhow,
 i am super late making my cards this year and this is a super simple project i think i can achieve and get them done and mail out this week, lol.  wish me luck!

Holly Jolly
5.25"  x 4"
the card base is from birthday bash, image #19 on the overlay. the holly is from winter woodland, image #10 and cut at 2.5.

the red cardstock was dry embossed using the cuttlebug and a sizzix plate called dot daisies. it is not a seasonal design but it did reminded me of stars, ornaments and snowflakes. 

the sentiment is from my pink stamper and you can see the whole set here. the dotted patterned paper was a piece of scrap paper. i love when i can incorporate some shaped scraps in my projects, don't you?

well, i hope you guys had a wonderful Thanksgiving and already all trimmed for Christmas :D

see you soon!

note: i am trying to take things as they come and not get anxious if i can't make it over here. we all know how busy we get during the holidays and we should do what we can do, right? i love you all....want you to know that.

Monday, April 25, 2011

LET YOUR LIGHT SHINE

hoping all had a great holiday with your loved ones and had time to meditate and celebrate that we have eternal life because of Jesus.
Amen.

since i do not have my family around, we normally go to the inlaws but we have been staying home the last few easters. i prepare a pretty dinner for us and sometimes neighbors stop by and join us.

Let your Light Shine
5.5" by 4.25"
this card was inspired by another card i saw at a magazine from northridge. i knew i had the exact sentiment from one of robyn's clear stamp sets and that is all it took to start the process. :P
the scallop, the circle and the clouds are from fiskars paper punches. the pretty embossed background is also from one of fiskars texture plates.


here you can see the embossing better.  i also did some paper piercing, bits of diamond stickles and blue liquid pearls i had in my stash. the clouds were also stamped with another set of robyn's clear stamps.


the butterfly is from a ms paper punch. the border from k&co and the stem on the little flower is another stamp from my stash.

enjoy!
 and
  "let your light shine"

love you all!
*-*

Wednesday, March 23, 2011

PUSH THE BUTTONS WITH THE CUTTLEBUG SPOT WEEKLY CHALLENGE

yes, i am super late with my project for TheCuttlebug Spot. so late i told nilda she did not have to add it if she did not want to. 
the weekly challenge is to use buttons on your project.
i made a big tag.

Enjoy
5.5" tall
(i need to trim that upper left corner a bit--it is bugging me).
anyway, this tag started being a card, of course, lol. but by the time i finished it did not look like a card but a tag. so, i cut the other half and made it into what i guess it was supposed to be...a tag.
the base is from "just because cards", image#34 
using shift and adjusting the width with the gypsy to a 3.25.

i cut that shape three different sizes as you can see to add the layers to the tag.. the embossing was done with a sizzix folder called "snowballs" using my cuttlebug. i also used the "divine swirls" cuttlebug folder for the clouds from "paper dolls for everyday", image#15 using the accesories3 creative feature. the butterfly it is from the same cart-- image#3 using shift and accesories3.

here is the so very cute snail and the HUGE BUTTON from my vintage buttons box. the snail is from "creative a critter", image#44 flipped to the right. 
as you can see i finally got me some more hemp. i love using that stuff. now i have to get some ms twine.
i tried using the zip dry glue to adhere the button but it did not work at all so i used my trusty glue gun.

the stamp is from a my pink stampers set called "everyday life" you can see more of the sentiments and of her stamps if you click HERE.

well, i hope you join us at the cuttlebug spot weekly challenge and get those nice buttons out and play along. or just stop to see what my very creative team mates worked their butt-ons up to, hehe.

love you all!

Tuesday, February 15, 2011

GATEFOLD CARD CHALLENGE FOR THE CUTTLEBUG SPOT

hello all
i hope you guys had a great love day yesterday.
it was quite here, but nice.
------------

the cuttlebug spot challenge this week is making a gatefold card and this is my take on it
 --i still have no name for it-- :(
for now i will call it

Any Occasion Gatefold Card
6 x 7-3/4
pretty big in size- :)
i took a piece of 12 x 7-3/4 inch cardstock
--scored it at 3 and 9 inch--
and that was my gatefold card base.
i used dcwv songbird cardstock.


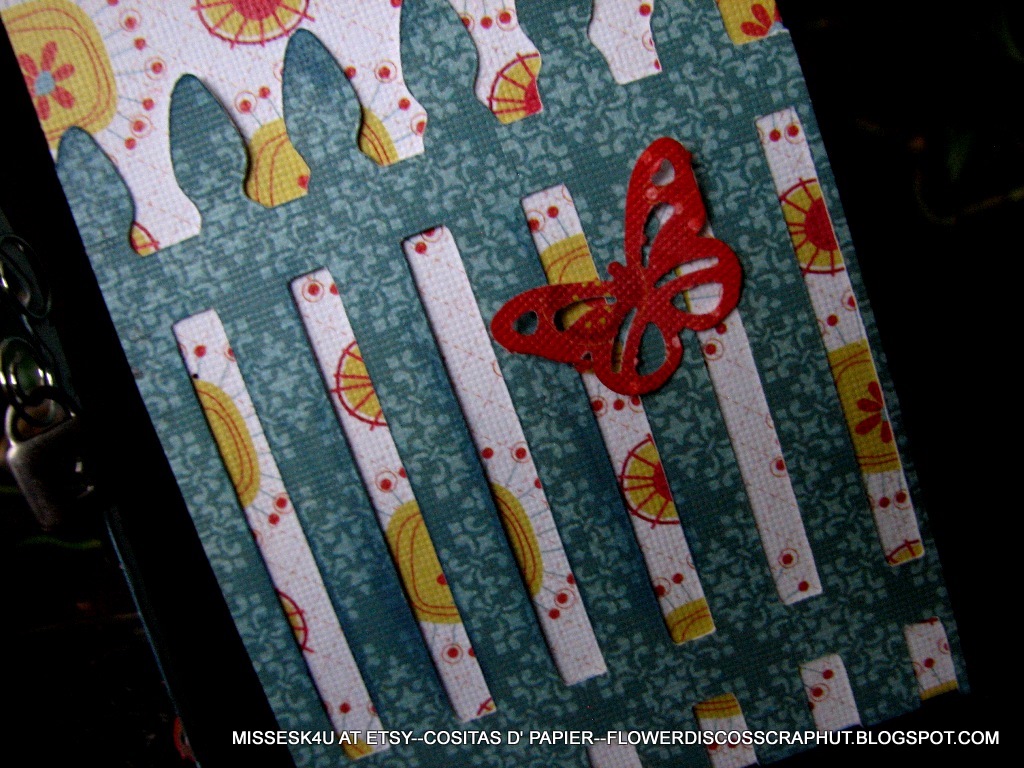
the gate and the lamp post are from the heritage cricut cartridge, the birds are from an ek mini punch and the grass is from create a critter.

the butterflies are from a martha stewart paper punch.


the clouds are also from create a critter.


on the above pic you see better the dry embossing on the clouds and if you click on the pic it will zoom for a better view.
i used my cuttlebug, of course, and a sizzix texture plate this time.

i had no idea what i wanted to make at all, but as always, all came together at the end,
and i think it turned out really pretty.
what do you think?

 come on, play with us and let us see your take on the gatefold card. remember nilda always have something to give away to a lucky participant. click HERE for more info and for more eye candy from the rest of the design team :P

thanks for stopping by!!
-love you all-
*_*

Tuesday, January 18, 2011

BINGO

 i want to take a moment here and thank you all for the prayers and best wishes. it touches my heart and i appreciate you taking the time to say it. i go to the doctors today and see what kind of magic wand she has ;p...i will update as soon as possible, in the meantime i am still dealing with the situation.
-------

we had to get inspired by a children's game this week at
and i remember playing Bingo with my family since i was a very young girl. we also played lots of dominoes. these games bring back lots of nice childhood memories.

and...since you all know i am in love with the inch bag from tags, bags, boxes and more--cricut cartridge--i decided to use it again. 
this be inch bag is a very versatile cut and you can weld to it or re-size it any way you want.
below is my project for the challenge.
Bingo
5 inch bag
(this was the second one i made since i wasn't pleased with the other one--;p)
the "adore" bingo cards are from jenni bowlin--i had one of these for a while-while now, and since i wanted to use more than one for this project, i scanned it and printed a bunch of them :P--the markers are the little hearts, cute huh?--you also can see the dry embossing. i used a sizzix folder which i always put through my cuttlebug with no problems.
i have used two different kind of twine and a crinkle ribbon from kristen and a bit of ink here and there. 

added a heart charm, some bling and done...simple right? well not that simple since i am so very picky, lol.

this is it for today.

hope you like it and i will be back as soon as possible.

love you all--!!
and welcome to my new followers, yay--!! 
a big hug to all of you--!!

Tuesday, December 7, 2010

A HOLIDAY CARD

  WOOHOOOOOOOOO!

Nilda from The Cuttlebug Spot asked us to stay 3 more months designing for her blog. We all said yes, of course! It has been so much fun working with this design team. All are so friendly and loving.

This time we were asked to make a:
Christmas card using your favorite embossing technique such as sanding, inking, etc.
 Just right down my alley, hohoho

A Holiday Card
4 by 5.5"
(remember to click on the image for a bigger view)
The base of the card is American Crafts textured cardstock: distressed and inked.

The green cardstock is from Core-dinations and it has been embossed with a Sizzix embossing folder, distressed and also inked to the max, hohoho! ;)
The reindeer is a chipboard accent from K&CO.

The lace ribbon it is a remnant of what I used last year to make this Holiday Wreath.

A view from the side.

and this is the inside....a bit distressed.

Don't forget to stop at THE CUTTLEBUG SPOT and enter you project for a chance 
to win 
CANDY-CANDY-CANDY.
Custom Crops are sponsoring the challenge.

Thanks for stopping by and for the love left for me
Ho-Ho-Ho
wink-wink