the inspiration for today's project comes from my own backyard.
i have been planting perennials for 3-4 years now with birds and butterflies in mind
i have been planting perennials for 3-4 years now with birds and butterflies in mind
and, i have plenty of birds. no problem with that. just yesterday i saw one i hadn't seen around. a kind of woodpecker called northern flicker. what a beautiful bird!
but, i am failing attracting butterflies. this year we got a few more common butterflies showing up. i think that is a good thing, :) maybe i am not failing after all.
anyway,
but, i am failing attracting butterflies. this year we got a few more common butterflies showing up. i think that is a good thing, :) maybe i am not failing after all.
anyway,
the butterflies are what inspired my project and
for today i am working with a new arrival to the store:
in this post i am also explaining how i download and save my digi playground files or any other files/images i want to save in my computer.
(a bit of pic heavy post) :D
hope it helps.
hope it helps.
first,
My Butterfly on Canvas Project

the file is for a 5 x 5 card but needless to say, i cut/sliced off the other side of the card and i kept just the butterfly part.
i used white textured cardstock for the butterfly outlines and 5 different color cardstocks for the inside: aqua, green, orange, pink and yellow.
i then used the negatives of the color cardstocks to paper piece? my butterfly.

i used the clear wink of stella to add the shimmery effect you see on the above pic.
(the background clouds paper is an oldie from dcwv)

-when done i adhered it to a mini canvas with my tape runner-
(5 x 5)
filed the edges and voila....
"a butterfly on canvas".
hope you like it as much as i do.
it was a darling to make.

-this is nic's butterfly svg-
check it out, the pic is linked to the store.
and as always,
thanks for stopping by!
-----------------------------
now onto the tut of how i save my digital files.
remember you can click on any pics for a zoom in.
(know i have a pc not a mac, it might be/look different if you have a mac)
1- after purchasing or acquiring your file(s) you will be prompted to download:

normally, when you download images or copy and save images from the internet, it automatically defaults to a download folder in your computer. i recommend you find your default download folder prior to download just that you know where it is located (in case you do not know, that is). i also recommend adding a folder to your default download for your digital files and add a sub folder for each file you save. it makes your searches easier.
2- clicking on that red download button will take you to the page where your purchased image is:
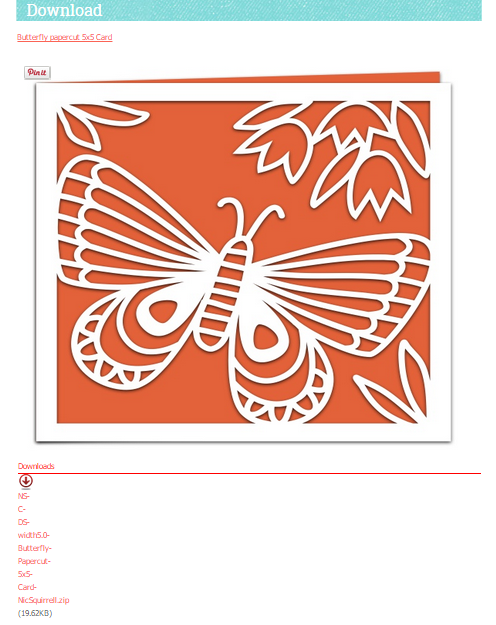
you will see another red download button: click on it and it should automatically take you to your default download folder. (you should have added that other folder for your digis and maybe a sub folder if you wanted to---makes it all better).
3- if your download folder is not highlighted, you can click on it for your file to go in there and then click save. --your computer screen should look similar to the pic below.

see that "extract files"?
click on it and that will open your files, ready to be used: (please, ignore my library, that is where i keep mine).
the file(s) are now open (unzipped) and ready to upload to your electronic cutting program/software.
i use cricut so i upload mine to cricut design space.

the one for cricut design space is the second one: see the DS for design space? (NS-C-DS). (i believe the first one is for any other software other than design space). some files have digital stamps, or pdf's you can print out and cut by hand. you can separate them in individual folders if you want to or just keep them all together in the same file folder. and that is that for the downloading and saving.
if i didn't explain it clearly, please, do not hesitate to contact me if you are using a pc (not mac) and i will be glad to help you step by step.
:D
----------------------
blogged by flowerdisco
from


.JPG)


.JPG)
.JPG)
.JPG)

.JPG)
.JPG)

