Showing posts with label C- PRETTY PENNANTS. Show all posts

Saturday, October 28, 2017

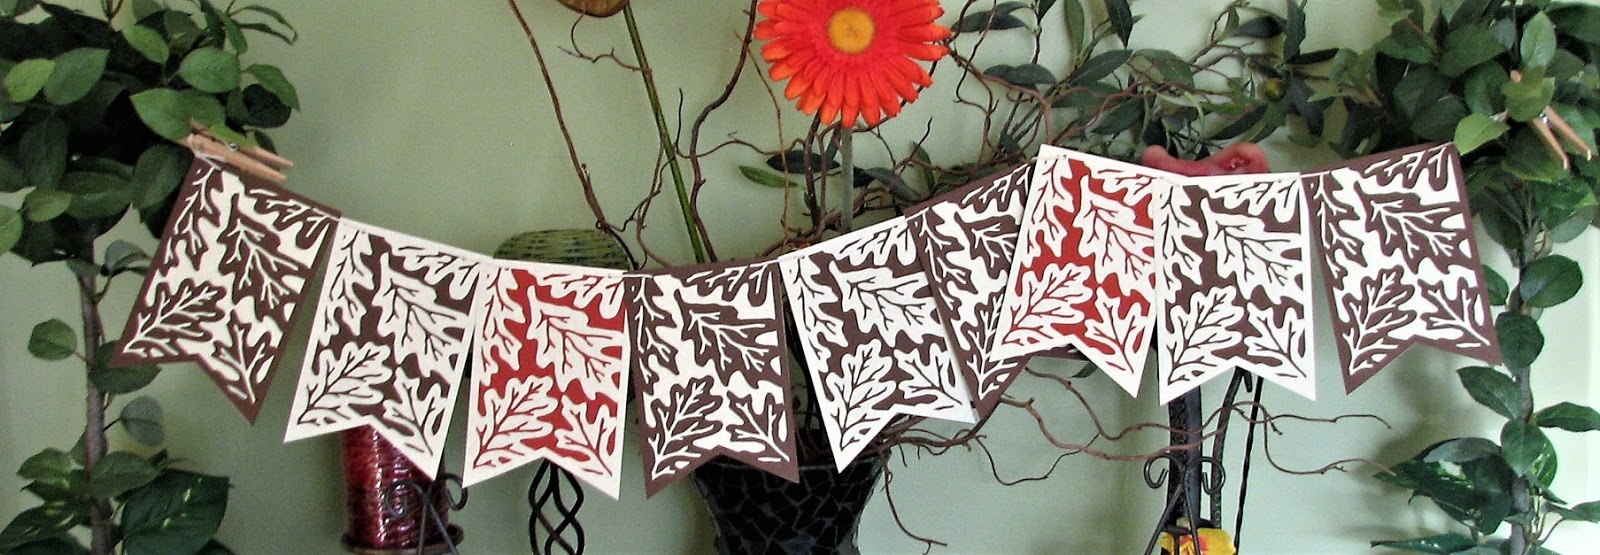
AN OAK LEAVES BANNER!!

Hello all,


Simplicity at its best!! 

What do you think?
 I have listed this banner as a RAK on my Etsy shop and thought to share it with you here in case you want to make your own.

I used the Cricut cartridge Pretty Pennants and each section was cut at 4" x 6"tall.

Have a great weekend!!


(all contents copyrighted)


Wednesday, December 16, 2015

LAISSEZ LES BONS TEMPS ROULER!

hello all, 
welcome to my last project for joy clair
today i am showcasing the mardi gras stamp set.
ironically the sentiment i chose for my card is: 
let the good times roll. 
i haven't have a good time for a while now and for the same reasons i won't be able to stay.
  it is so funny that unconsciously i chose this phrase. i sure will have to 
"laissez les bons temps rouler" 
for real. 
lol.

these masks are so pretty. i used its digi dies to cut the masks. i then used an embossing pad to add gold embossing powder and glitter.

i used a pearlized cardstock for the card layers. the golden splashes were done with a gold acrylic paint and a cheap watercolor brush.
the black ink i used smeared a bit on the slick surface and it took a while to dry. 
the tiny fleur de lis are also from the same stamp set. the stitched border was done with a fiskars paper punch.


i cut these pennants from a cricut cart and the tiny fleur de lis here are from a g-studio paper punch. i covered them with stickles.
the gold tone cs is from dcwv. 
the other masks were not glued to the pennants and that is why the middle mask is crooked. 
normally, i can't photograph purple well for whatever reason but today i did. lol. i couldn't chance to wait for another day. hehe.

the stamp set is so pretty. 
Joy Clair Mardi Gras Clear Stamp Packaging  Mardi Gras Digital Die

here is some history info on mardi gras in case you are as curious as i am. i wish one day i could visit new orleans too, i have some friends who visit it often and they love it.

well, and this is it for today.

you guys take care and,

thanks for stopping by!


Wednesday, October 21, 2015

INTRODUCTION TO JOY CLAIR CLEAR STAMPS

 i am delighted and honored to have been chosen to join their design team and to work with their beautiful stamps.
their stamps are made here in the usa (georgia).
they are made of a high quality photopolymer, nice and thick, non yellowing, strong deep edges, they adhere so nice to the clear blocks and they take ink very well. 
their designs are unique and so very pretty and the fonts and sentiments are gorgeous.

joy clair has many plans for all of you to enjoy: challenges, videos, discounts and more. sign up to their newsletter and you won't miss any of it.

below is my first project to show off some of their great designs.
hope you enjoy it!

-A Halloween Frame-
by flowerdisco
hehe, let's start with a nice sneak peek.

i used my die cutter machine for the card base, layers and banner and worked
with 3 different stamp sets on this project:


i started stamping each "halloween" letter on a 1" piece of punched paper using different colors of pigment inks and then outlined each letter with a black permanent ink fine tip marker.

as you can see i distressed most of my cardstock too and later on you will see i "dry embossed" the black base.

as i mentioned before the polka dots banner was cut using my die cutter.
 i wrapped a fuzzy and thin green jute around it for an added detail.

the pumpkin and the boo word were stamped with a dye ink. i stamped the pumpkin first, did some fussy cutting around it and then stamped the boo word. i adhered it to the banner with some foam tape for dimension.

the skulls border to the right was stamped before i adhered the halloween letters keeping in mind their placement.


 the border has 4 joined skulls but i just had room for three of them.

 see the dry embossing on the black layer? it is a chevron shape but hard to see, sorry. i used a core-dination cardstock and after sanding it a nice orange color came through.

here is the finished halloween frame.
(i used a steel die to make a chipboard easel for the back to prop it up).

so what do you think of the stamps? really nice, huh?

you can click on the joy clair logo and it will take you the store where you can take a look at the rest of them.

and remember that only good vibes are welcome, the rest are deleted, lol.

see you next time and as always
-thanks for taking the time to visit-


blogged by
flowerdisco
from flowerdiscosscraphut

(all content and worked has been copyrighted)

Monday, October 21, 2013

AUTUMN DAYS...mini trifold book

hello all, happy fall again

the cooler days went away for now and the days have been so nice.
no need to move out of state just yet, lol.

here i have a project i made for the artful delight blog. our term is almost over, one more week (next week) and i am feeling sad, :(
this has been one of the greatest teams i have ever been in and you all know i had a few disappointments lately, hehe.  
i will miss this group very much so.

but anyway, 
here is the mini trifold book where you can add some journaling or pictures or both and carry it with you or have it displayed at home.

Autumn Days
-mini trifold book-
 this is the first peek at it, hehe

 i used my cricut gypsy for the welding of some up-side down pennants to make the base of the trifold. i then used one of the bazzill cardstock to cut it out.

-all the supplies used in the making of this project are from the october card kit below with exception of the wooden polaroid frame (from the sept. kit) and the hearts (from a punch i own). of course the sewing was done with my sewing machine and the thread is from my stash, lol.


 i cut the individual patterned papers a bit smaller than the base after adding an outline which i turned backwards to show the other side of the paper. 


 the "arrow" shaped paper clip holds all the sections together.


here is another view of the trifold.

hope you enjoy it and give you some ideas. 
any questions, please just ask away, :)

also, if you have time to join our monthly challenge do so now because time is running out. you all know if you win, you will receive a kit of your choice: scrapbooking or card...hoping you join us.

and....
thanks for stopping by and i hope you have a great week too!

-here is the card kit pic and within the link to the challenge-
nice, huh? 
:D

Wednesday, June 26, 2013

A MINI BANNER...school days

hello all and welcome to the my blog!

it is my turn to remind you of all the good sales we have at the pumpkin spice shop and 

  i am sharing with you a mini banner i made using some designer paper by my mind's eye which i made using my cricut expression.

i know school is out but that does not mean teachers stop being teachers and some are taking some of their time off to think of ideas on how to revamp their classrooms and...
 this is where my banner will go and hang pretty.

School Days
12 sections banner
you can find all the supplies here or at least something similar.
---the font is from all mixed up and the smiley cards, both are cricut cartridges---

the green is more like a lime green, it looks totally different in these pics :(

i cut each section approx. 4 inches tall and i used the pretty pennant cricut cartridge for the triangles.

i think it turned out so cute. 
i made this banner as a token of gratitude for someone i appreciate. i hope she'll like it.
 i will also upload it to my etsy shop and if you see it among my listings, you know is a duplicate, not this one...this is a gift.  :P

i am going to make it short for you today since i know you are all enjoying the weather...
i see you next time.

take care and again, thanks for stopping by!

 i still on my mission of "clicking and sharing" but i am getting lazier, hehe.


Saturday, February 2, 2013

A PUMPKIN SPICE BLOG CHALLENGE: a valentine's day banner

FOR THE WHIMSICAL DESIGNS HOP, PLEASE-PLEASE: CLICK HERE

-----

hello hoppers
welcome to our february pumpkin spice blog hop
this hop will coincide with the february challenge too and the theme is hearts.
we are so happy you came to join us.

this is my project for today and i also will be entering it for the challenge.

A Valentine Banner
)clicking on the pics will give you a bigger image)
i used my cricut expression for most of the images.
each pennant base measures approx. 7in. high. and a quarter of an inch less on each layer.

the cupid was cut using a sizzix die.


Supplies Used:
cricut cartridges: ashley's alphabet, b is for boys, cake basics, pretty pennants, sweethearts 
kraft cardstock: bazzill
white paper: carta bella
pink striped patterned paper: mme
all other papers: authentique "lovely" (exceptions below)
translucent vellum: paperbilities
solid red cardstock: the paper cut
lace: craft store
adhesive and foam dots: american crafts

this banner is a darling!
a lot of work but well worthy. 
any questions/help, please contact me! 
right now you are at 
and you will be at our dear and so talented teammate Court.  

thanks for joining us and do not forget to
Have fun!

-----

for the beginning of the hop and to get any info please go back to  the

--------------------

Okay ladies! :) Time for our second hop :) LOVE hoppin' with you!

Challenge: Hearts!