Showing posts with label COLORING. Show all posts

Thursday, February 25, 2016

CUTE BUGS DIGI STAMPS CHALLENGE

adriana from 
 invited me to be a guest designer for a friend of hers who is designing some digital stamps for her etsy store and on her blog 
Michelle, the owner, is starting challenges with digi stamps.
since i am all pro small business, i said yes, of course.

here is my take on her first challenge

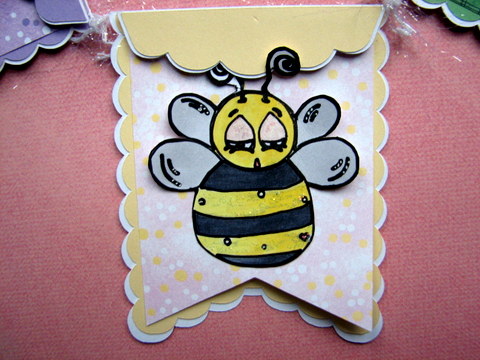
Cute Bugs
-mini banner
these pretty papers are from sizzix, from looong time ago. hehe 
you know i do not use many pastel colors but these i love.

 -the size of each pennant is around 2-3/4 wide x 3-1/2" tall.-


 -here you can see some of the dimension on the top part-


on this one i tried to pop the bee's belly a bit for a more round look, like she just ate some yummy pollen, lol.


and this one is simply beautiful. hard to see but there is a bit of stickles too.

these are such cute images, perfect for a little girl bedroom or nursery.


the banner die cuts are from cricut pretty pennants cartridge. 
the top part of the banner was adhered using foam tape and all the wings have been bent for more dimension. a bit of stickles for bling, of course.
the coloring was done with alcohol markers and images were cut by hand BUT drawn by the cricut explore.

if you have any questions, please, email me. i will do my best to get back to you in a timely manner.

remember, 
do not miss this fun challenge and the chance to support small business too.
these challenges run for two weeks and this one ends on march 10.
the theme is "anything goes" and you do not have to use a cre8tive hands digi stamp to participate.
a random prize winner will receive one bundle of choice from michelle's etsy store.

as always,
thanks so much for stopping by!
blogged 
by 
flowerdisco
(copyrighted)

Sunday, December 20, 2015

MADE WITH COTTAGE CUTZ DIES

just a quickie here to share a santa and a penguin i pieced together using this cottage cutz dies. i bought these dies and a few others when joann had them at 50% off. i thought it was a great deal.


the santa took took a bit of time to put together. 
lulu was really needy that day. i was trying to rush and forgot to add the tree that comes with this die, grr! lol.

the penguin was done fast.
i used white cardstock and used alcohol markers to colored them in.

i made one red and one blue.
i wanted to make the santa for most of my xmas cards but i was short on time. that was when the snowman showed up, lol.
i used one of joy clair stamps for the sentiment "good cheer".

these dies are so much fun. they reminded me when i first started crafting with sizzix dies, way before moving to cricut.

well, and this is it.

thanks so much for stopping by!


Sunday, December 13, 2015

A PAISLEY BOUQUET in HD

hehe, 
that goes for hi definition since i used that clear liquid embossing on the image.

the card didn't come out the way i wanted it too but i still wanted to show you the stamp i used and the coloring. no blending because that is not my forte just yet, lol.

the dry embossing folder matches the name of the stamp:
paisley bouquet.

here you can see all the hd done with the liquid embossing.

and this is it for today, i just wanted to share how pretty this stamp is. i bet you can do a much better job.


Paisley Bouquet Border Clear Stamps

thanks for taking a peek!

Tuesday, December 1, 2015

HOME FOR CHRISTMAS...through a window

hello all,

as i said in one of my latest posts, we can all relate to the need of gift tags and or gift cards presentations.

i have been admiring the window scenes projects for a while now and finally i made my own.
this one window is a gift card holder and i hope you like it as much as i do.

i used the glad tidings stamp set from joy clair for the 
home for christmas on the window box. 
the font is super pretty.
the window has been backed with a piece of acetate sheet.

the string of lights i love is from the same glad tidings stamp set and i filled them in with some sepia color liquid embossing.

the gifts are from "cozy snowmen wishes".
i fussy cut those along with the lights string and i do not know why  because
we know that joy clair has its own matching digi dies for all their stamps. :D
...i also colored the gifts with alcohol markers.

in case you are wondering about the window shape... it is from creative cards, a cricut cartridge. the flowers and leaves are from some wafer thin dies i own.

Joy Clair Glad Tidings Holiday Clear Stamps Glad Tidings Holiday Digital Dies
this is the glad tidings stamp set i used on today's project. 

Cozy snowman clear stamps for Christmas Holidays Cozy Snowman Wishes  Digital Dies
and this is the cozy snowmen where i found the gifts.

hope you enjoyed the gift card holder and the stamps i used.
they all have been linked for your convenience.

once again, many thanks for stopping by the hut.

REMEMBER: Joy Clair is having a Design Team Call


(all contents have been copyrighted)

Thursday, November 19, 2015

ANOTHER SET OF CHRISTMAS GIFT TAGS

i believe we all can relate to the need of christmas gift tags and gift cards presentations during the holidays.

this set of 4 christmas gift tags was made fast and you can mass produce with ease.
they are from the "christmas gift tags) clear stamps set from Joy Clair.
i think they are so cute too.

(a santa's face...a snowman...some snowflakes and pine tree branches and acorns)
each tag measures approx: 1-1/2" wide by 2-3/4" tall 
the sentiments or sayings on them are:
joy to the world, happy holidays, christmas wishes and the to and from on the santa's tag.

i made a small pouch to put in because i am giving 3 sets of them to one of my neighbors.

the pouch was made using a cricut cart called spring holiday cards and the red and white borders are from holiday cakes.


Joy Clair Christmas Gift Tags Clear Stamp Packaging
this is the stamp set used on today's project for joy clair.
it has been linked for your convenience.

once again,
thanks a bunch for stopping by.

blogged by 
flowerdisco 
from 
flowerdiscosscraphut

(all contents are copyrighted)

Friday, November 6, 2015

COZY SNOWMEN GIFT TAGS

a little treat of christmas/winter inspiration.

-set of three snowman gift tags-

each tag measures around
2-5/8 x 3-1/4" tall

COZY SNOWMEN
i am not a great colorer and do not have expensive supplies for that hobby but i get in between the cracks when i have too, lol, or feel like it.
the snowmen in this stamp set were screaming for color so i gave in.

they will be great embellishments to help me with my christmas gifts wrapping. 


Just for You
added some glossy accents to the buttons, heart, scarf red pom poms.


Winter Wonderland
on this one i just stamped the head and scarf and left the body out. 
i clear embossed the snowflakes and glossy accent the berry. 
the banner was cut with a thin steel die.


Cozy Wishes
on this one i also did the buttons, scarf pompoms, and berry with the glossy accent and added some wink of stella to some areas.

TIP: if your alcohol markers are dried up, add a few drops of alcohol inside the barrel. make sure you can take the nib(s) off first. try at your own risk. i won't be held responsible for any damage you cause. i did and it worked but can promise yours will. and if you choose to try it, remember to cover work surfaces too, just in case.


i used this stamp set
 from joy clair

the different shaped layers and red base were cut using the cricut explore.

i think despite i don't color much, they came out adorable.

joy clair is coming out with some svg's dies you can use instead steel/wafer thin dies. they will match their existing stamp sets inventory.
you do not want to miss them because you will adore them and your wallet be delighted.
wink-wink.

well, this is it for today
 hope you liked the snowmen tags.
they are super cute!

thanks a bunch for taking the time to stop by

blooged 
by 
flowerdisco

(all content has been copyrighted)


Tuesday, November 3, 2015

HEAVEN AND NATURE SING...a christmas card

welcome to another post for my new design team

today i am using some of their newest christmas stamps on my card.

i am calling it
because of the sentiment i used on the front.
(3-1/4 x 4-1/4")
the greenery is from their rustic christmas sentiments stamp set and matches the sentiment so well.
after stamping it with green pigment ink i used some color markers to highlights some of the beautiful details.
 i also brushed some fine glitter over the stamped image.
it looks heavenly!
(the pun?... i just had too, lol)


 i colored the berries red using another color marker, added a thin fuzzy twine around the first two layers and finished it with a red rhinestone on the center of the bow.


here is the sentiment i used to name my card, love it!
-Heaven and Nature Sing-
from their 

-another view-

-the inside-
the falala is from the same "merry christmas sentiments" used for the outside sentiment and the music notes border is from their "music maker" stamps set.
as you can see they also go together so well.

-the greenery stamp would look awesome on gift tags too-

Rustic Christmas Card Clear Stamps

(all stamps used have been linked to the shop for your convenience)

you have a great weekend and i surely hope you enjoyed today's project!
and as always,
thank you so much for stopping by the hut.
i surely appreciate your visit.


for
-Craft Joy into Someone's Life-

(copyrighted)


Monday, July 8, 2013

YOU INSPIRED ME card...using my july card kit

did you have time to watch the video i made?
the purpose of it was to show you a better view of its contents. it is packed with all kind of yummy goodies.
you can click here if to watch...it is just a 5 minutes video.

anyhow, we are in july now and we have a new sketch to follow for our challenge at the artful delight blog. the prize for the lucky winner is a kit of your choice:
a scrapboking or a card kit

here is the cute card i made. 

You Inspired Me
4.25 x 5.5"
this is a fun shaped i designed using my gypsy. it reminds me of a gate opening towards a garden of beautiful flowers. 
the garden that one day i hope to have if some animals do not keep eating my flowers, lol.

i used the echo park "floral patch" patterned paper fro the background. this paper is from the echo park collection called "here and now".
the pink base is from bazzill and is called: candy hearts.
as you can see i distressed the edges of the patterned papers.

for the tag i used the marshmallow bazzil cardstock and a tim holtz  die (from my supplies) for the shape.
i also used the same marshmallow cardstock to stamp the flower and leaves from the lawn fawn stamp set (flutter by) and i colored them with my markers, cut them out and pop them up with some foam tape. but before i did that i cut a small piece of the mesh ( to make it look like a fence) and glued it before adding the stamped flower. i then added the pretty sequins after i layered them. i also stamped the "you" from the "you inspire me" sentiment from the stamp set (lawn fawn).

the paper i used for the "gate" part of my card is from the my mind's eye collection "find your wings and fly" called sky's the limit. it looks like different pieces of patterned paper but in reality is just on piece. awesome look! i also finished stamping the sentiment.

and here is the completed project for you today. i followed the sketch pretty much and i think is lovely.
 i am thinking i can use this card as a mini album if i add some more patterned papers inside maybe stitched together in the center. it already has the twine as a closure. if given as a gift, you can express this idea to the recipient.

below is the card sketch and another a pic of the card kit. all is linked to the artful delight blog where you can also link your project if you would like to participate in this challenge.

(there is a scrapbooking sketch there if you prefer)

and..this is it for now but before i leave i 
thank you so much for stopping by my blog.

-have a great week-

Wednesday, June 19, 2013

LAND OF THE FREE...using a digital stamp

welcome to another challenge.
i am so super late with this project i did not even send it yet.

time has been flying around like a "bee here and bee there" and i have been lacking craft time but however i was able to produce another sign. i love signs and this one i will be using in conjunction with other 4th of july decorations for our get together. i was planning to make a banner but a sign will do for now. i will make the banner later.

our sponsor this week is
eureka stamps.
they will be giving 5 free digi stamps of your choice to the winner. 
thanks so much eureka stamps. they were also very nice to provide the dt with another free digi stamp of our choice. i chose the below background stamp and i love it.

now, onto my sign...this will become the center of my banner. it is a big sign/pennant section measuring 8 inches tall because i want to show it off.

Land of the Free
look how gorgeous!
i love that blue color. i used my spectrum noirs markers to color in this huge image.
i went and sat on the deck, with lulu by my side and spend a bit amount of time coloring and relaxing. i think i use the entire ink in the marker, hehe.

did you noticed the design on the letters?
i did that with a hole puncher, the one you have to use a hammer to punch, lmbo....i think it was the first hole puncher i bought before the crop a dile and i still use it a lot. it is a very handy tool indeed. i think it was the perfect touch. i backed the sign with the same yellow paper i made the stars to give the illusion of lights behind...like one of those hollywood like signs you see.

the Land of the Free phrase comes from the cricut cartridge called "stand and salute". i used the craft room because my gypsy was giving me some problems and i have to say i really liked it. i am still in doubts about syncing my gypsy to the craft room...i need some advice on it.

i also punched some stars out and staggered them around the background.

i went outside in the morning and took the picture using the natural light of a beautiful morning.

and this is it for now, :P

thanks so much for stopping by!

---i appreciate your company---
*-*

Monday, May 27, 2013

CELEBRATE!

hello all,
welcome to the flowerdisco's scrap hut!

today is my turn to share what i made for artful delight using their fabulous may card kit. i think i already told you i am in love with the color combo in this kit and with all the goodies that come within. in this card i used the rub-on's as my main element and i also used one of the most beautiful buttons i have ever seen...i know it is bit exaggerated but the button and the colors are really-really pretty :)

Celebrate
3.5" x 5"
see how pretty this button is?
as you can see i also used the tiny alpha's to spell my sentiment.

and look at the pretty cityscape, clouds and sun...they are all rub on's that i colored in with my markers.
due to the rub-on nature they turned a bit blotchy but i still loved the look and decided to left it as is
a bit of stickles for the radiant sun...i believe they are celebrating Memorial Day despite the non-traditional colors...see the firework?

Happy Memorial Day!
 to all of you and to the ones who gave their lives for ours.
---a minute of silence for them all---
this is how i do it for some holidays...i give them a minute of silence in where i give them all my heart and thoughts in appreciation.

and this is my sweet card for the artful delight design team and the end of my first month with them.
soon, we will be showcasing the june kit so keep your eyes open. :P

remember, artful delight has their challenges in which you can win a kit of choice.
this is the link to the blog where you can follow up with this challenge.

thank you so much for stopping by and i will see you later this week.

hope you CELEBRATE your holiday weekend!


Sunday, May 5, 2013

WELCOME TO MY FIRST POST FOR THE CUTTING CAFE

hello all,
so happy to show you the rest of my sneak peek of my first project for my new team.
i am sure you know regina easter. she was the owner of the original bitten by the bug blog where she had another fabulous team creating projects using the cricut. when she closed it down she started working with her own digital images and opened 
i was on the bitten by the bug2 team with heather, who came after the first was closed down. i had so much fun there too but i was dealing with lots of life stuff at the time and couldn't stayed for long.
anyway, that is a little of a background for you to know why i am so happy i am working with regina's files.
i always admired her work and i am so happy and proud to finally made it to her team. a bit apprehensive but i think is normal. you will be too if you see what these talented ladies in her team are all about.

i chose an oldie file for my project.
there are so many i would have loved to work with but i had to choose one and i chose the
 summer fun
my card is a round card
enough of the sneak peek, right? hehe
--i stamped the background waves with a so old wooden stamp from plaid i believe i could call it vintage right now--


the umbrella, the sandals, the beach bum sign and the starfish are included in the bundle. these are not the only images in this set, there are many more. actually, they are 33 images in this printable stamp set.
here is the link to the summer set and i warn you,
you will be amazed at all the gorgeous files regina has in her shop. and you will drool when you see all the inspiration offered. oh my, i can't hardly contain my excitement.

now, a bit about my card
the base for my card was done with the cricut cart called life's a party. i punched the two holes on the left with the cropadile to insert the pretty ribbon i found in my stash.  i made that cute bow with the help of a fork. i colored my images with the spectrum noirs alcohol markers. i am still avoiding the shading, lol.

NOTE: for some of you who are not familiar with regina's blog, anyone who comments is automatically enter to win some digital stamps from her shop. yeap, that is right, you heard well...a chance to win some free digis if you comment on her blog. you can also subscribe to her newsletter so you do not miss any news.


and this is it for now.

thanks you so very much for stopping by.
xoxo