Showing posts with label C- SENTIMENTALS. Show all posts

Wednesday, March 25, 2015

CENTER STEP CARD

i haven't make a center step card in a while but then i saw one on pinterest that caught my eye. well, i saw many i liked but chose this one.

FLOWER POT 
 most patterned papers are from crate paper
and die cuts were designed with the cricut design space software and cut with the cricut explore latest die cutting machine.


 the pot id#M3F416 and is from the april showers seasonal cartridge and happy birthday id# M4CF49 is from creative everyday cards also a cricut cartridge.

see how tiny the letters are?
amazing!
that is cricut explore for you.
oh, and i cut the "happy" a bit larger than the "birthday".
-the kraft color banner is handmade and handstamped-


 the extra 2 flowers id# M3F1B8 (orange and yellow) are from bloom.


 -side view-
you can google a template for this center card. there are many available and free of charge.


phrase is from sentimentals id# M2FB52 and i adhered it on the back of the card where we signed and wrote our own sentiments.
the card was made for my mil's birthday.

TIP: all cuts were cut three times and adhered together for thickness and dimension. no need to panic or run to the store if you do not have foam tape on hand. :)

and here you have it crafters....a fun to make card.

if you have any questions, please do not hesitate to contact me.

in the meantime, have a great week
and, as always...
thanks for stopping by


Sunday, March 20, 2011

WAY COOL


 i made this cute card for a little girl...her name is juliana.

Way Cool
standard A2 size 
(4.25x5.5")
the base card is from sentimentals. i did not know this cartridge had a file folder shaped card in it. cool! it is image #49 and all i did was use the hide contour in my gypsy and hid some marks.

i also used paper dolls for everyday for the girl. her hair is image#8 using the "headwear" creative feature. her outfit is image#45 using shift and accesories1. the sandals are image#20.

the chipboard heart is from k&co, nail polish are stickles :P. the face is from peachy keen stamps.

 juliana are alpha rub-ons i had in my stash

 the sentiment above is from my pink stamper clear stamps, the "spanish sayings" collection.

i have hardly used the paper dolls carts and you can find so many images there it makes you feel you do not need any other cart...hehe!!!! yeah right? we are addicted to them...i know i am. i am in a budget right now and my wish list is getting longer and longer. i will need to make a loan to get caught up, lol.

this is it for now...and please, do not get disappointed in me. the finished album is coming this week. i know you understand but i still feel bad. i haven't forgotten...just want you to know that.

love you all!

oh...we had a great time at mom's b-day party. we really took her by surprise and she got all emotional. she loved my cards...they all did, but hmmm! they are my fans..hehe.

enjoy the weather!

Friday, December 17, 2010

THE LIME LIGHT BLOG HOP STARTS TONIGHT AT 8PM CST---HAVE FUN!

ETA: 
(edited to add)

BLOG HOP HAS BEEN EXTENDED UNTIL SUNDAY 12PM EST.

THANKS FOR ALL T YOUR SUPPORT---SPREAD THE VOICE---
THE MORE PEOPLE WHO KNOWS ABOUT THIS CHARITABLE BLOG, THE MORE PEOPLE MIGHT GET INVOLVED TO HELP AS NEEDED---
THANKS, THANKS, THANKS.


Hello my dear friends

Finally the day has come where we newbies get to participate too in our first
blog hop
(so very happy here)

ALL OF YOU
Welcome to my hut, and please feel free to browse it.
My name is Agnes for those of you who are new visiting and I love to making cards and home decor projects. I do to scrapbook but not as much as I make cards. I am married and we have a --soon to be-- 18 years old young man, who we are very proud of. We also have Lulu, our pug fur baby girl. 
I am so very delighted to be here and be able to use a hobby to help others in whatever I can. 

This Cricut cartridge is my donation for the hop.

----------

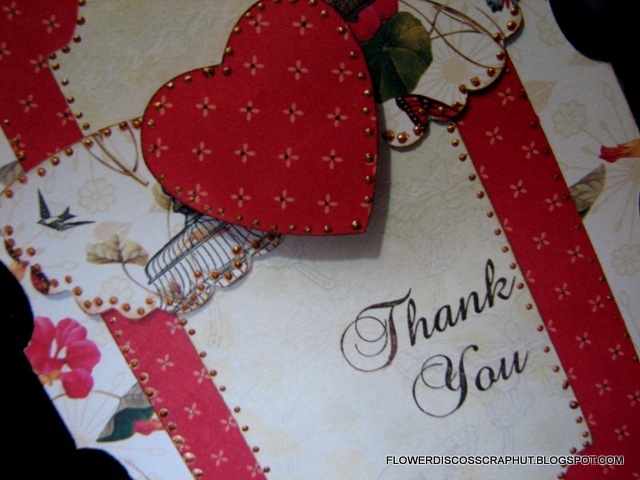
This is the card I  made for tonight's hop. I want to say Thank You to all of you who come and support me and to the new bloggers/crafters who will be stopping by tonight.

Thank You card
 4 x 7 inch
 The base was made with Birthday Bash and adjusted on the Gypsy to make it a 4 x 7".


 The top heart was popped up. The mini dots are done with fabric paint.


 The Thank You sentiment is from My Pink Stamper clear stamps sets.


 I think the sentiment font matches my card beautifully.


 The cardstock is from DCWV.

Hope you see what you like and maybe decide to become a follower.

OK...now, back to the hop

-----

below are the participants blogs in case you missed somebody, and
---You will find more info about this hop HERE---

 Lime Light Charitable Design Team --8:00 PM --Our little home on the net   
  1. Gracie ---Imagine That  
  2. Sue ---Sue's Cricut & Crafts  
  3. Joanne ---TropicLuv
  4. Joy --- Everyday Cricut -- she's one of our honored guests on this hop, giving you tons of ideas for your Cricut creative mind.
  5. Terry ---Hello From Oregon  
  6. Peg --- Peg's Crafting Corner 
  7. Kim ---the object of art is to give life a shape
  8. Kathy ---The Beautiful Life
  9. Agnes ---FLOWERDISCO'S SCRAPHUT -me-
  10. Sarah ---Pink Cricut --- she's our other honored guest on this hop, full of inspiration and generously sharing her Cricut talents.  
  11. Sandra ---Sandra Wilson Designs
  12. Samantha ---Samantha J Designs
  13. Sonya ---Appel Quilling Garden  
  14. Lime Light Charitable Design Team --- Home sweet home...again!


----------
Have fun hopping and good luck!

Thank You So Very Much
for hopping along with us today, and for taking the time to stop by!

Saturday, July 10, 2010

SNAIL MAIL CARD

It's me again!
I wanted to share this card I made for an online friend.
I made this card using the Sentimental Cricut cartridge and one of the Joy's Life Lots of Pun stamp set. When I couldn't be her designer she still sent me a set of her new stamps and just now I got to use them.  I wanted to share the card I made and the stamp I used from her set. It was very thoughtful of her and I appreciate her kindness.

Snail Mail
5 inches
You can find the card base/shape on page #35 on the card feature. 
The polka dot paper was cut at 4-1/2 inches using the same card feature.

The snail was cut at 2 inches and its shadow came out to be at 2.06 inches.
You can find the snail on page #47. I used foam adhesive to pop up the snail layer.
.
The umbrella is from Everyday Paper Dolls and you can find it on page #41 (accesories2). As you can see I dry embossed the umbrella using the Cuttlebug and a Cuttlebug folder called Swiss Dots. I also added some doodling.

The clouds are also from Everyday Paper Dolls from page #42 and I cut them at 1.79 and 1.99 inches. I stickled them with the Frosted Lace Stickles I received from Helen.

The butterfly is also from the Sentimentals cart and you find it on page 46. I used the shadow image and I made the small circles with my Crop-a-Dile. I also doodled on it this time with white ink.

I added some rub-on flowers to the grass I punched out with a Martha Stewart paper punch. Before I adhered the grass to the card I used the sentiment
Snail Mail
from Joy's

A beautiful card for a beautiful friend,

Thank You Joy!

Friday, July 9, 2010

HONEY

Hello my Blogger Friends.
My name is Agnes aka flowerdisco. I am one of the Gyptians and finally my turn has arrived to share with you my project. I mostly do cards but when I do layouts most of the time are smaller than 12 x 12.
I chose an 8 x 8 layout for today and I am using the COM which is Sentimentals. I won this marvelous cart on a blog candy and as many other cartridges we own it hasn't been used to it's full potential. I am glad this is the cart of the month.

My cardstocks are from American Crafts and Die Cuts with a View.
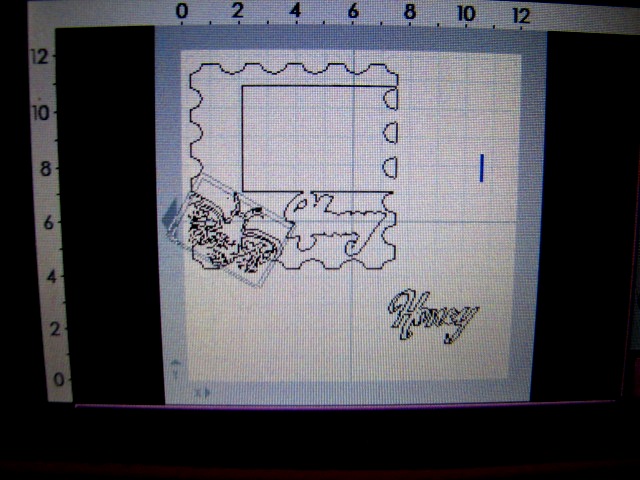
 The Crown Stamp image is from page #50 and the Honey word from the phrase feature on page #44. I cut the stamp at 7.25 inches high and the Honey word at 2.15 inches.
 The frame you see above the word is just a guide for the placement of my 4x6 photo.

On the photo above I am showing how well the word fits in it's shadow.
I also cut the Bee and it's shadow from page #22 at 2.50 inches.

The rest was just putting it together.
 Super Simple and Super Easy!
The photo is of my and my dear husband taken at the end of the school year for my 
son's High Honor Society Induction. 
Enjoy!

Tuesday, April 20, 2010

MY PINK STAMPER PROJECT

and...
This is my contribution for this month of April to the 
My Pink Stamper Designers 
project
Spring Treats.
My partner Jo has her sweet project up too.  
You are going to drool when you see hers, lol.
We are teamed and our week is the 
third week of April, May and June.


BACK TO BASICS
(is a small kraft bag you can use for any purpose. 
I am using it here to share some of my flower seeds with my neighbor).

Back to Basics 
is an One Inch Bag from the TBBM cricut cartridge. You can find this bag on page #128 of the cartridge handbook.

---cut at w11 x h5.75 inches using a Martha Stewart cardstock in kraft color.

---the two shapes (called card 1) are from the sentimental cricut cartridge on page #65.
One is cut at w4.25 x h3.4 and the other one is cut at w4.5 x h3.5 inches. the brown shadow shape cardstock is from DCWV Green stack and the green color shape is from the paper studio/pink armadillo small stack.


---the back to basics phrase is also from the sentimental cricut cartridge on page #40 and cut at w2.5 x h3.5 inches. the shadow cardstock is an MS kraft cs again and the blue patterned paper is from colorbok/friendly forest. i used my white gelly roll pen from sakura to add some dot doodles to the letters.

---the red flower is from the stamping solutions cricut cartridge, #20 on the overlay pad and cut at 1 inch.

---the green gem is from my stash, lol and the red dotted ribbon from american crafts. the whole project was inked and the flower was popped with foam adhesive.

---the small tags are from TBBM cut at 1.75-1.50 inches high and the sentiment and mini flower on them are from my pink stamper clear rubber stamps, simply sweet occasions set.

***my idea on this back to basics bag is to put some packets of my gardening/flower/herbs seeds in it and give it as a Spring Treat Gift. the seed packets shown on the photo are from a template you can find on the web (gardenandcraftsdotcom). You can modif
y this bag and embellish it for any other season/holiday as needed.


-----------------


 SHOPPING BAG/CHIRP
This other small bag was made with birds in mind. 
(I love my wild birds and I feed them all year long).
You can use it for any other purpose too and both can be change to suit your needs.
I hope you enjoy it and if you have any questions about my projects please do not hesitate to use the 


Thanks so much for stopping by and for all the support you give me.

XOXO