Showing posts with label DT- DIGI PLAYGROUND. Show all posts

Saturday, March 12, 2016

PLAYING ALONG WITH CHALLENGES...

hello all,

this is just a quick post to share my entry for joy clair's monthly challenge.
i am the randomly chosen winner of last month's challenge and today using the stamp set i chose: happy easter!
it has such cute images.
I want to thank joy clair for their generosity.

An Easter Trio
so cute.

i made these three sacks with a digi playground svg, used my cricut explore for all the cutting including the digital dies from the stamp set.
coloring was done with some alcohol markers i purchased at acm. i believe they are from their nicole brand premiere. i actually like them very much. they seem to have their own unique blending properties. you can see it on the yellow chick. the colors used there were turmeric and pumpkin and i actually like how they blended. what do you think? they are very juicy too.

back to joy clair's challenge entry.
i partially colored this rabbit pink and the other rabbit partially green.
i wanted to make the chick my main one.
the gray areas were colored w the spectrum noirs.

the paper used is from a heidi swapp's collection: the sugar chic.

below you see the stamp set used and also the digi playground svg.
they both have been linked if interested.

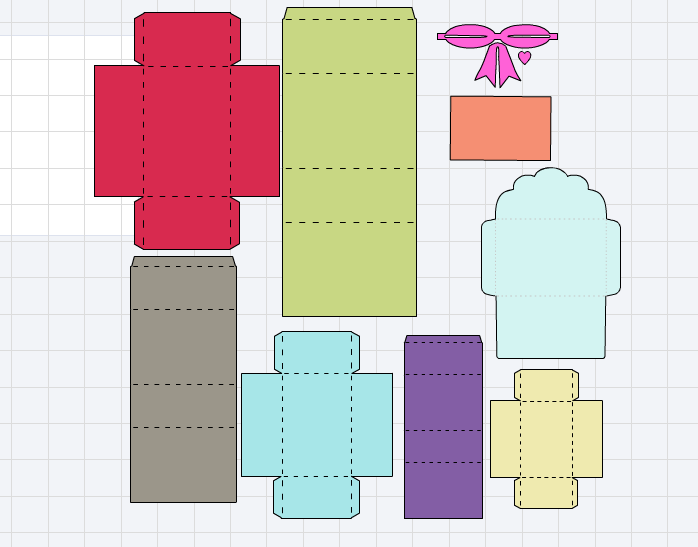
Happy Easter Clear Stamps - Joy Clair - 1     valentine envelope bag


you should check this month's challenge. they randomly select an entry to win a 
$25 gift certificate to their store.
sweet, huh? that is how i won, :)

thank you very much for stopping by.
hope you have a great day!

Thursday, March 3, 2016

DIMENSIONAL PAPER CRAFTING...mouse cart svg

hello all,

i want to share with you a 3d project i made with a samantha walker digital file and it turned out super adorable and i know you are going to love it.

3D
please know this is a photo heavy post. 
i wanted to capture all sides and details.
int this pic you see where i will display my mouse cart. it will stay here for a while. it looks really nice and the colors match with the background, :D


i used my cricut explore and its software to open and cut the file.
the mat i used is a 12x12 but the software will say you need a 12x24 but do not pay attention. it cuts just fine on the 12x12.
NOTE one of the canopy sections is not attached just yet but the entire cart base is. you will attach that layer later on. it makes it easier not being attached at this point.
(sorry about this pic, it was a bit cloudy when taken)


here i am showing the left side and right side of its face.
adorable, isn't it?
the patterned papers i used are from mme: away we go collection (6x6)

 these pics are showing left and right sides again.
see those diminutive parts of the bike. well, they cut perfect. 
check the size of the pedal, it is actually two to pieces, lol. 

  you won't be able to attach both parts completely but do not worry because that is how it was designed. 

i recommend a good strong adhesive and for the base a nice thick cardstock.
i added some extra details:  stamped a subtle pattern on shirt, edge of papers were inked for more definition, some wet embossing on the ice cream and on the tiny round parts on the wheels. 

like it, huh? i think they can be great for a birthday party decoration, as favors filled with candy, as a gift box and who knows what else you can think of i am not.
3D mouse-cart Box
the mouse cart has been linked to their store, if interested.

let us know if you make one, and show us too, please. we would love to see your take on it.

thanks for stopping by!


Tuesday, January 26, 2016

MY VALENTINE'S FAVOR BAGS

hello all,
welcome once more to the digi playground blog.
this is agnes sharing a bit of inspiration and idea for your valentine's celebrations.


MY VALENTINE
i made a few of these to treat my sweet neighbors.


this is a jamie cripps file
valentine envelope bag
and it looks like this before you make it your own.
but you know you do not have to and just make it like it looks here because it is adorable no matter what.
we can think neighbor's treats (like i did) or classroom, office, friends and lovie dovies.

i love this tag. 
the heart was embossed with a clear liquid embossing for a glossy accent.
i also added some sequins and the rustic twine.

i also stamped the kraft cardstock i used with some background script wooden stamp. any other design will be just fine too.

the corrugated red cardstock was torn by hand and added as the base for the pretty tag.

i inked all edges for a distressed look.

 
notice here the pretty finishes: the scalloped one is the top side and the zig zag one at the bottom. nice details.

and ladies and gents...this is all for now.
remember the digi playground is having a dt call you do not want to miss.
i certainly can't say enough good things about my term with them.

thanks for taking the time to visit.

have a great love day!


Saturday, January 16, 2016

STACKING BOXES- LOVE MINI CARDS KIT SET

hello crafters,
 a mini tutorial for a mini card kit set.
many variations can be used: candy, jewelry, love notes, love coupons...)
using
 these stacking boxes from carina gardner, 
stacking sliding boxes

this puckered bow from jamie cripps,
Set of 4 Puckered Bows

and,
the envelope from the penny slider card from samantha walker.
A2 Penny Slider Bike Card

i re-sized all elements except the stacking boxes.

i used the cricut explore and its design space software for this project.
 these svg's come in different formats for different machines and some you can even cut by hand and or print and cut.

Note: the score lines on them need to be attached. to do this, simply select the item in question, right click and click on attach. if all the images are grouped, un-group them first by right clicking and clicking un-group, then right click again and click on attach.

how i did it:

#1- all elements were cut and scored
#2- box assembly
#3- box cover/bow assembly (i used mini glue dots for the bow assembly)
#4- mini cards assembly (cards were cut at 4"wide x 3"tall and scored at 2")
#5- mini cards and mini envelope (envelopes were cut at 3.9"wide x 5.25"high and scored where applicable)
#6- cards presentation
(note: the small hearts are from a martha stewart paper punch)

#7- inside stacking boxes (hearts, twine and mini cards)
#8- finished project
#9- another view
#10- another view
Note: the mini cards front were covered with patterned paper.

and this is it:

-awesome assemble for valentine's day or an everyday thinking of you set-

any questions???
please, leave them in the comments section and one of us will get back to you asap.

thanks again for stopping by and i hope you have a great day!


Saturday, January 9, 2016

A KOKESHI DOLL

KOKESHI
what is a kokeshi doll you might be asking yourself.
well, a kokeshi doll is a japanese doll.

here is the wiki definition:   Kokeshi (こけし kokeshi ?), are Japanese dolls, originally from northern Japan. They are handmade from wood, have a simple trunk and an enlarged head with a few thin, painted lines to define the face. The body has a floral design painted in red, black, and sometimes yellow, and covered with a layer of wax.

---

let's name her
Kazumi is holding a lute.


anyway, i was figuring out how to print them at home because i wanted to show you do not need an electronic cutting machine to use/play with these dolls. if you do have one, you can certainly use it. the svg comes in different formats for different machines.

since i was just doing a "trial" i did not want to use my more expensive cardstock until i saw how well i could print them at home. but, oh boy, they are awesome. they came out so pretty.
this doll was printed using plain copy paper and the coloring with some color pencils:
crayola and joann's brand. 
hehe
know i am not an expert in coloring: i am just a rookie taking baby steps.
you all know that but i thought to remind you, :D

Kokeshi Mega Set
i think they are adorable!


as always, thanks for stopping by the hut!


NOTE:  i am just a crafter trying different techniques to share with other crafters. i hope i do not offend anyone with my coloring of these dolls. if i do, please, accept my most humble apologies. 


Wednesday, January 6, 2016

WATERCOLORED VALENTINE'S DAY BUBBLES LOVE CARD

hi,
oops! eta: welcome to the hut!
welcome to the digi playground blog.

this is agnes and i
hope you had fun celebrating the new year.we  stayed home, watched netflix until midnight and then went to bed. 
 hubby was sick. it seems he gets sick every christmas. i think it is a bad habit he acquired a while back, hehe.
nonetheless, we did welcome the new year with joy and gratefulness.
:D

now onto my project for the digi playground:
a love card---a bubble love card that is.
-all bubble-licious-
it is a samantha walker svg and i have had it for a while just waiting to be remembered, lol.
it is an easy card to mass produce especially if i/you decide to make a few for v-day.
my first try was using distress ink on the bubbles but i didn't like how it turned out so i moved to plan b and used my watercolors for the background.

Love Card
4-1/4 x 5-1/2"
-a sneak peek-

i used a few drops of red, pink, blue and black onto the wet watercolor paper and to speed up the process, i used my heat tool to dry it and then i sprinkled a few drops of water and some gold paint onto the surface and dried again.


then i brushed the entire surface with a matte finish medium and immediately after i sprinkled some super fine gold glitter onto it. i did that to secure the glitter onto my textured watercolor paper.
so pretty!


the smaller hearts were made using a paper punch. the bigger heart comes with the svg file.
it seems there are lots of steps but they are easy ones and you will have lots of fun playing with your watercolors too. and by all means you do not have to do them all. the card is beautiful just as it comes. i just wanted to play a bit with it.

another idea that came to mind was making it into a shaker.

anyhow, this is the svg i used in its raw version, :D
and it has been linked for your convenience.
A2 Card Bubble Love
i am also linking to all the valentine's day cuties they have in the store. they are too cute not too share.
if interested, this is the link:
http://digiplayground.com/Valentine-s-Day-card-SVG-files/

and now i thank you for taking the time to stop by.

thanks a bunch and have a great day!

blogged by flowerdisco from flowerdiscosscraphut
(copyrighted)

Tuesday, December 29, 2015

HAPPY NEW YEAR IN PINK

hello all, 
i hope you all had a great christmas!
mine was relaxed with happiness all around us.
dear son was able to spend 10 days with us and we had many get together's with family and friends.
not every year is this busy, :)

anyway, here i am sharing another handmade card using an svg from the digi playground.


HAPPY NEW YEAR
5.25" x 4" card
super cute!
my inspiration for the color pink on this card was from the pantone 2016 color of the year: rose quartz.


this is the svg i used for my card:
2016 Folded Card
it was designed by miss carina gardner.


 i wanted to add a few more elements to it: 
banner, branches, circle, stars and happy new year are die cuts NOT included in the file.


i also added some glitter with stickles for some new year's bling.
:D

and with this i am wishing you a great 2016 year.
may god bless you all!


Tuesday, December 15, 2015

A CHRISTMAS ACCORDION CARD

hello all, 
agnes here welcoming you to another digi playground post. 

today i am sharing this super cute and easy to make accordion card.
it could be a card or a mantle piece/table decoration for the holidays.

the file is from miss nic squirrell.
Christmas Village Papercut Accordion Card
i have noticed lots of these accordion cards around the blogs and i thought it was fun to show you how i decorated mine. i did a very simple job because to tell you the truth i did not have much time to spend on it. i bet we all are feeling the christmas rush, :(

anyway, i used a kraft cardstock because i liked the subtle faded plaid design. 

i also i used my cricut explore to cut. it did take a bit long but the explore goes kind of slow so that's that :). all very worthy.


on the photos below i am showing the accordion card after cutting it. 
you notice i added some snow strip cuts on the roofs and on some windows. 
these extra snow cuts DO NOT come with the file. 
and a very thin snow bank on the bottom.

the instructions read that it cuts from a single piece of 8.5" x 11". i cut mine on a 12 x 12 and stretched it a bit longer: 11.6" x 3.70" to be exact.


on this photo i started adding some liquid pearls to give the illusion of snow.


i backed it up with kraft color cardstock and colored the open windows with a yellow marker.

the christmas trees were also colored and filled with glossy accents in to resemble ball ornaments. 


this is just another view of the card.

 i cut a few of them to make christmas cards. i will be adding the greetings and sentiment on the back. i will make sure to add they can be used as christmas decor too. i know they will love them.


please, accept my apologies for the bleed on the trees. i just realized it here but it is too late to change. so again, my sincere apologies for that bleed.
i use a macro setting on my camera and it shows the tiniest details but macro sized, :( therefore the bleed looks huge but is not. :).

and this is it for today.

they file has been linked for your convenience and this is the link for the digi playground store if interested. they have other designs in this fun accordion style.

thanks for stopping by and i would like to 

wish you the best christmas celebrations. i hope they are filled with health and happiness.


Tuesday, November 24, 2015

SANTA'S MUSTACHES...a must see

absolutely adorable.
this svg file was not for santa's but we can do whatever we want to do, right? lol

Santa's Mustaches
3-1/8" x 4-1/4"tall
if you look in the digi playground store you will find this cutie under carina gardner's files or in the search box as:
"mustache shadow box sliding card".
i really like the shadow box effect.
i used some super thick cardstock i have in my stash covered with red paper.

the mustaches are covered with stickles sprinkled with some fine glitter. i was looking for the glue that looks like snow but couldn't find it. then i thought i could have used some texture gesso or something similar, but oh well.
i think it looks pretty anyway. :)


this is the sliding part of it. it does not move the mustaches tough.
 it just slides on the back of the card, just that you know. :D

here
is a video where miss carina gardner shows another shadow box sliding card.


and, this is how the svg file looks like in the store.
mustache shadow box sliding card
it has been linked for your convenience.
they have many other shadow boxes with different themes and orientation.
check them out. 
they are really cute!

and this is it for today.
hope you enjoyed it.

and once again, thanks for stopping by the hut.

blogged
by
flowerdisco
from
flowerdiscosscraphut

(copyrighted)

Saturday, November 14, 2015

AUTUMN SUBWAY ART

hello all
and 
WELCOME
to another 
digi playground
tutorial.
this is agnes and today i have a home decor project perfect for thanksgiving and done in 
1, 2, 3.

the digi file i chose for today's project is from designer 
-jennifer wambach-

SHORT TUTORIAL STEPS
after i purchased my digital file or svg, i downloaded to my computer, extracted all items and uploaded the file with ds on the title to my cricut design space software to be cut.
---note my die cutter machine is a cricut explore and other machines required different steps. please consult your manual---
(any questions about how to do the above, please check here)

#1
 this is how it will look after you uploaded it to cricut design space.
(sorry about the bad pic, it was taken at night time)

#2
i cut it in white cardstock but for the sake of the tutorial i also cut on kraft for the pics. 
the actual project was done with white cardstock.

#3
after i finished cutting i used some alcohol markers to color the words in.

#4
carefully i lifted the cardstock leaving the words on my (dirty, lol) cutting mat.

#5
this is the negative OR what you will be trashing after lifting from mat.

#6
 and this is the final project.

#7
BEAUTIFUL


#8

pretty, huh?
i am planning to show it off when visit comes on thanksgiving.

#9
Autumn Subway Art
AUTUMN SUBWAY ART

any questions?
you are more than welcome to send an email or ask in the comments section and one of us will reply.

and this is my short and fast project tut for today.

hope you enjoyed it!

blogged 
by
flowerdisco
for
digi playground


(all contents have been copyrighted)